2.8.3
Sinus lift
Sinus lift Sinus lift Sinus lift Sinus lift Sinus lift Sinus lift Sinus lift
The distal section of a toothless upper jaw (maxillar edentation) presents greater difficulties for dental implantation, compared to other areas of the jaws. Considerable data confirms that edentia develops 3-5 times more often in the upper jaw than in the lower one. After extraction of teeth in the subantral region, due to various causes, not only does bone volume decrease, but also its density, which together with the general resorption direction toward the palate, rendering restoration difficult. Besides, significant pneumatisation of the maxillary sinus only exacerbates the problem. That is why creating conditions for successful implantation in this area is a very serious task.
There are several methods of restoring the required bone volume for subsequent installation of implants in the subantral region. The most common is sinus lifting.
Autogenous, homogeneous, heterogeneous, or alloplastic transplants are placed in the maxillary sinus after invagination of the anterolateral sinus wall (sinus lift). When we use this technique, the mucosa of the sinus floor does not get injured, and the intraoral configuration of the alveolar ridge remains unchanged.
In the 1970s, Tatum proposed U-shaped osteotomy of the maxillary sinus lateral bone wall, followed by cranial transfer of the released bone segment into the maxillary sinus, which effectively maintains the integrity of the aligned mucous membrane of the sinus and allows filling the formed space with auto bone. He described an updated method of sinus lifting in 1986, consists in a Caldwee-Luc modification of the procedure (opening of the maxillary sinus through the cuspal socket).
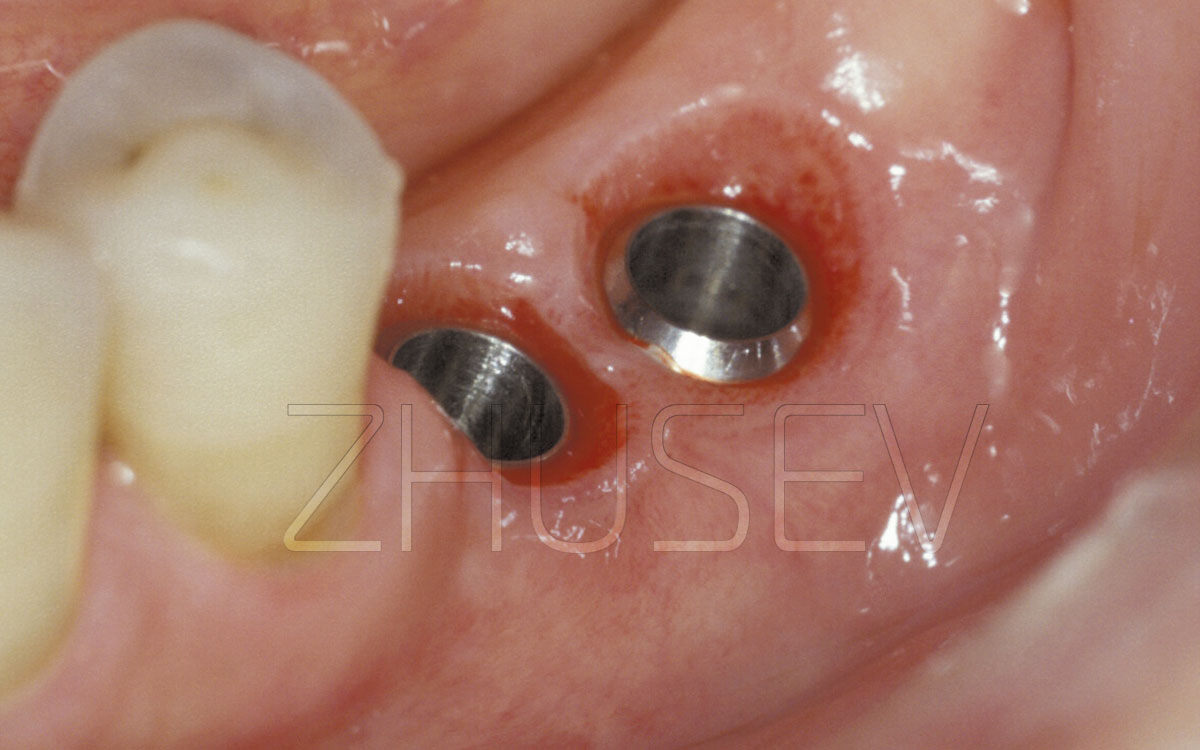
Normally, the healing period is at least 4-6 months, following which you can install dental implants (two-stage method).
If the bone height between the alveolar ridge and the sinus bottom is at least 5 mm, which is sufficient for achieving primary stability of the implant, then implants can be installed directly during the surgical operation of sinus lift (one-step method). If the height of the bone is less than 4 mm, you should not choose one-stage implantation.
Even if you have managed to separate the sinus membrane to a significant depth, you should not install implants that are longer than 12 mm. It is better to compensate for the length of the implant by increasing its diameter. Cone-shaped implants have great advantages over cylindrical ones.
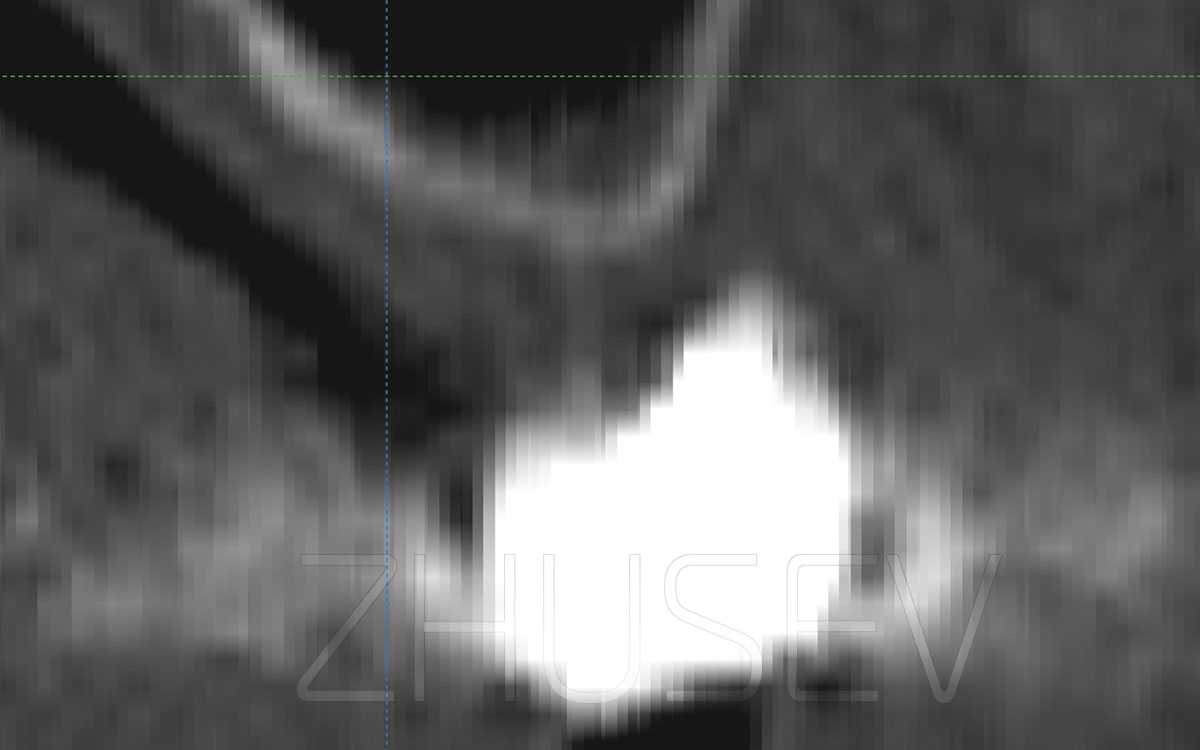
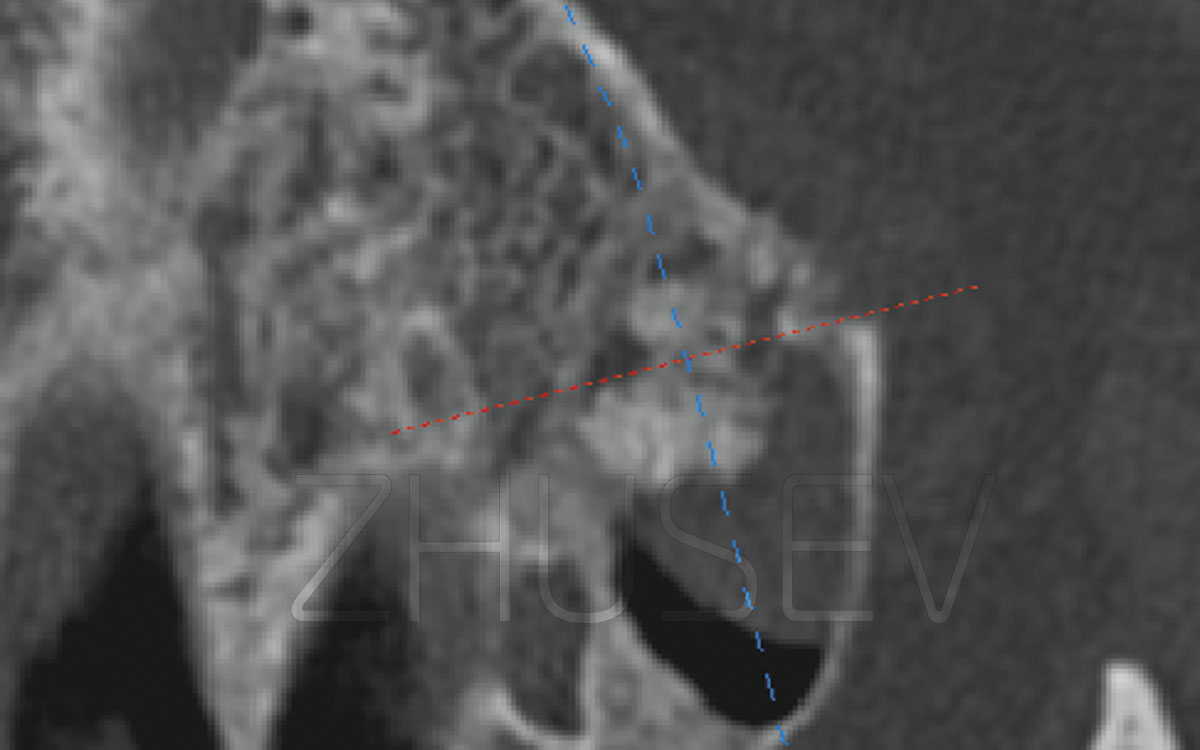
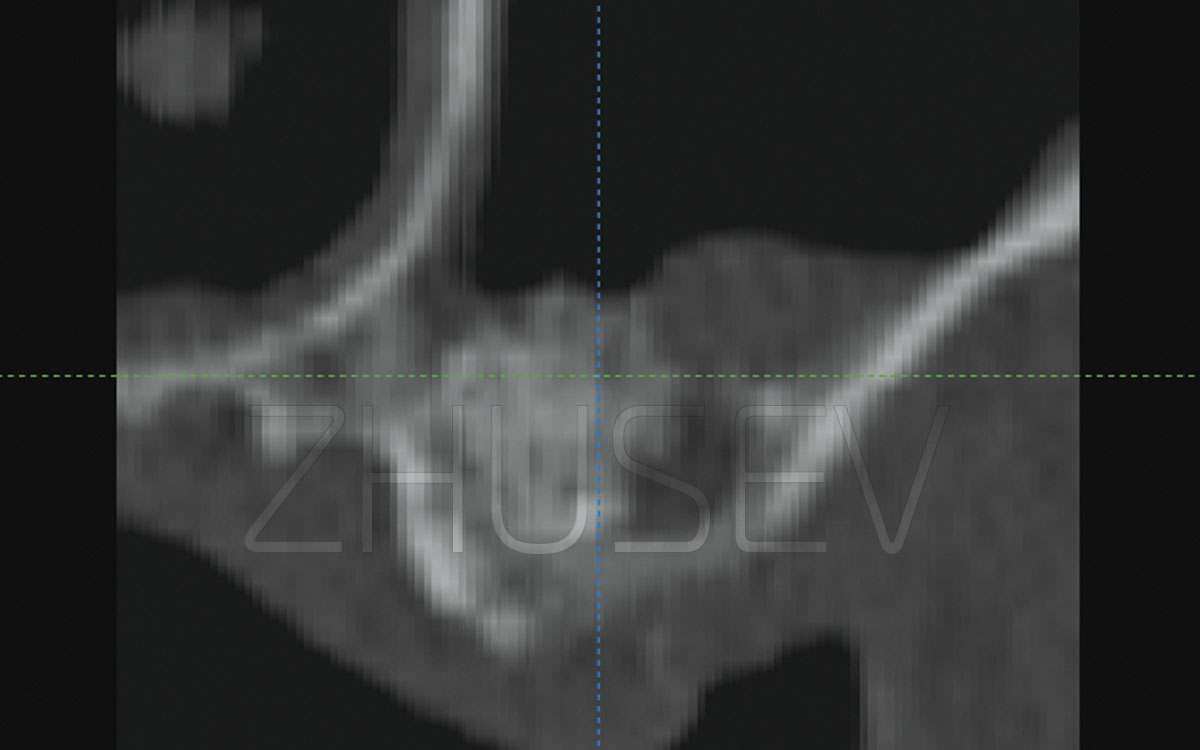
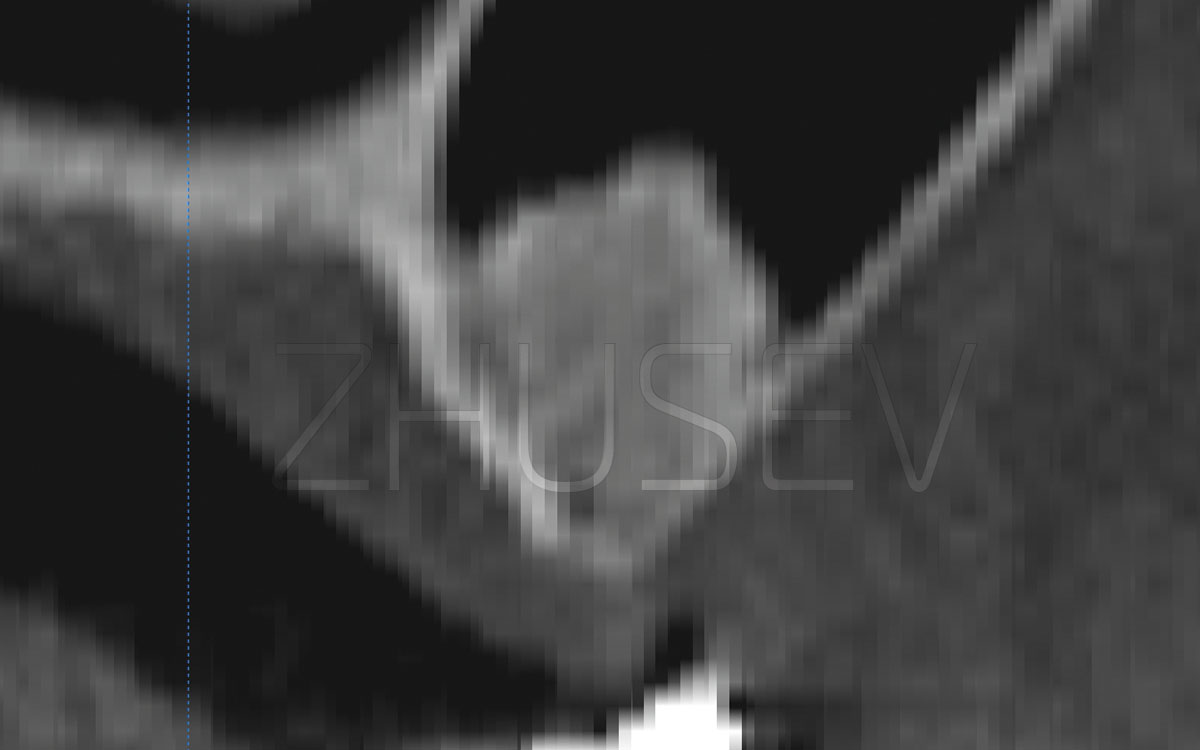
2.8.3-1I strongly recommend taking a CT scan before sinus lifting. In the left-hand image, the sinus membrane is not visible (or missing). This can cause a significant surgical complication. In the right-hand image, we can observe marked hypertrophy of the membrane, and its separation will not cause any problems.
2.8.3-2
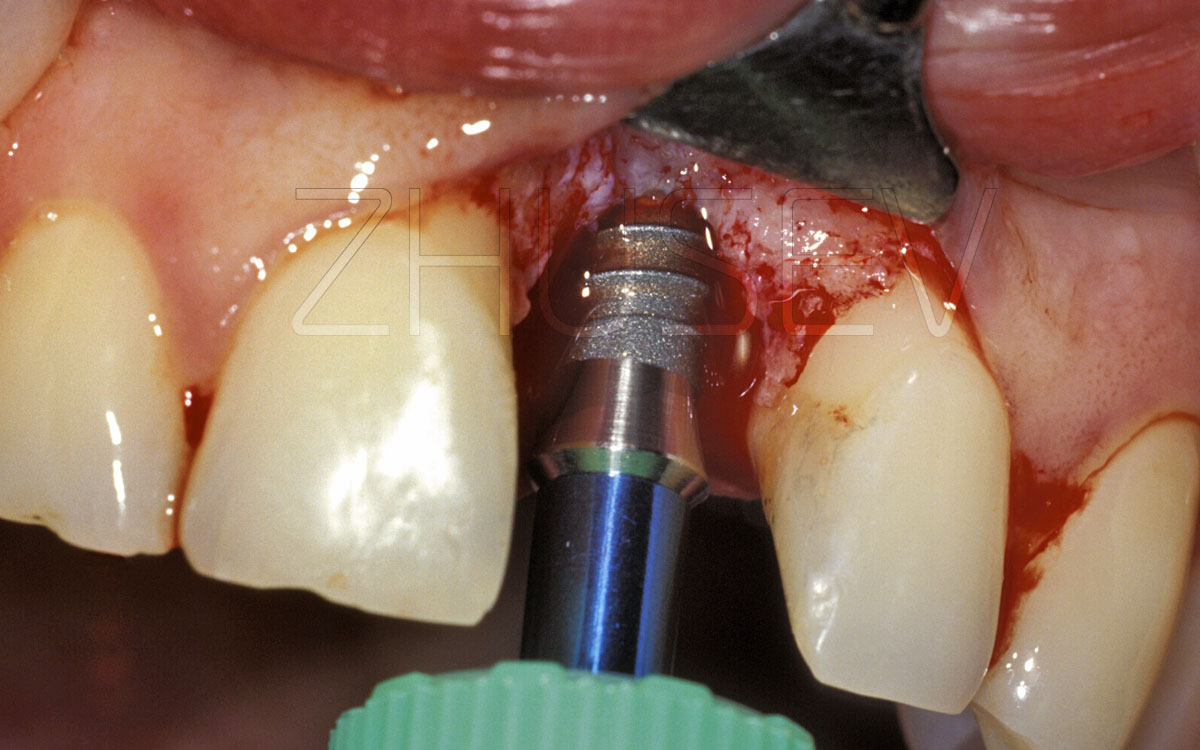
2.8.3-3Preliminary computer tomography will allow you to plan the operation correctly and to avoid unnecessary problems. This picture clearly shows the multi-chamber structure of the maxillary sinuses.
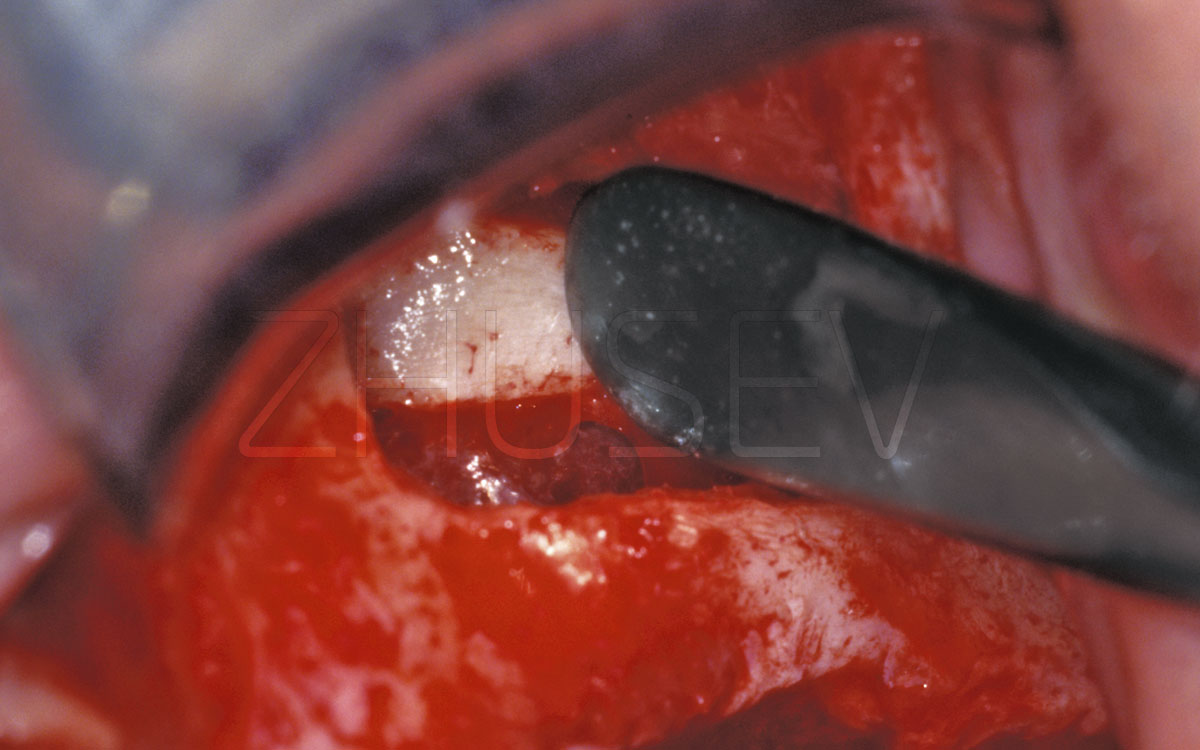
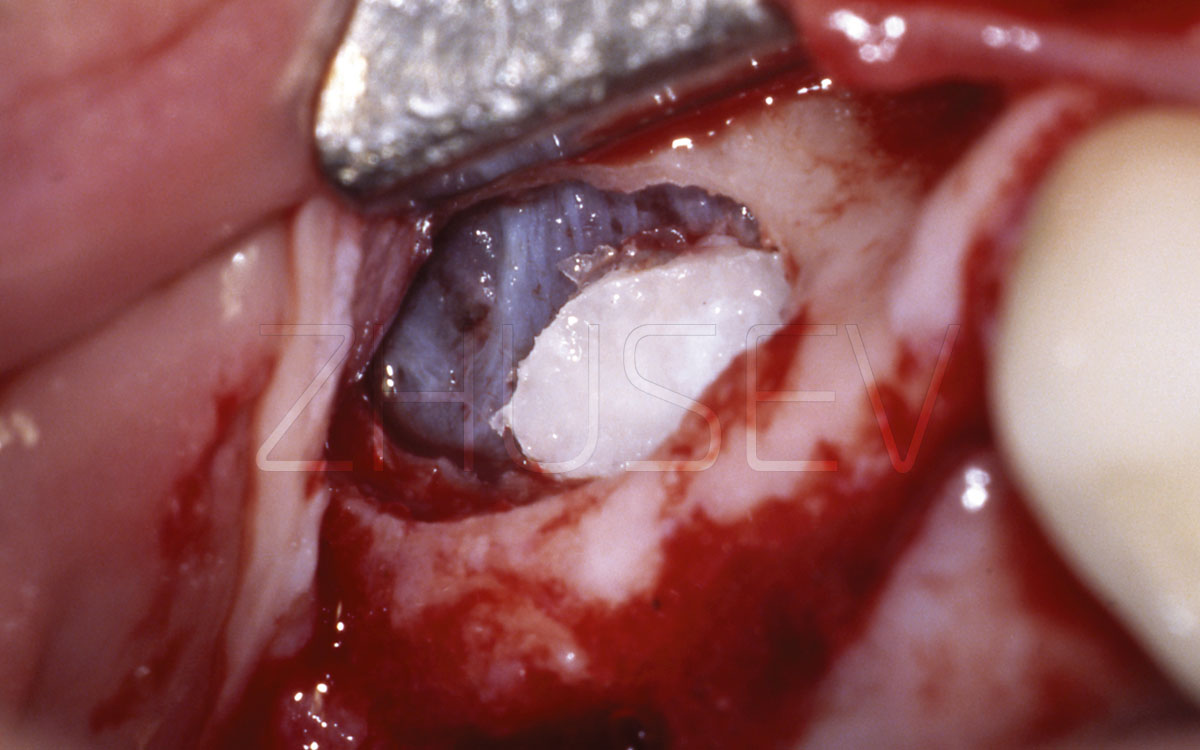
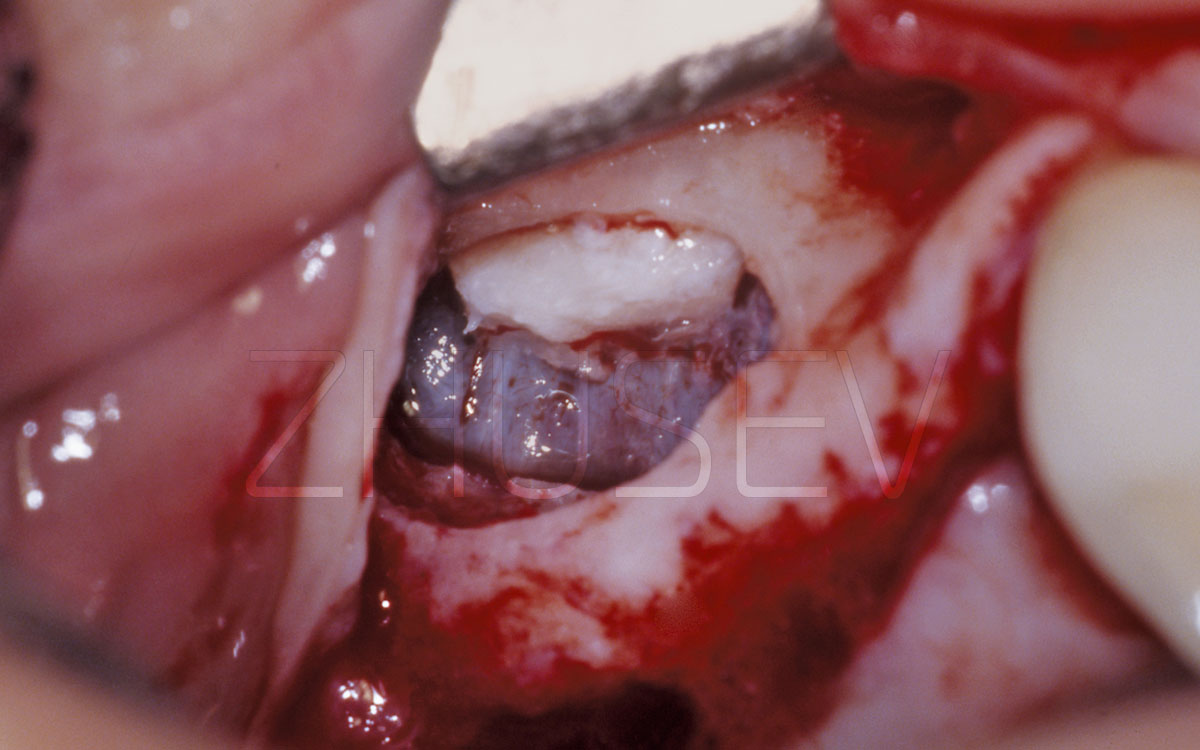
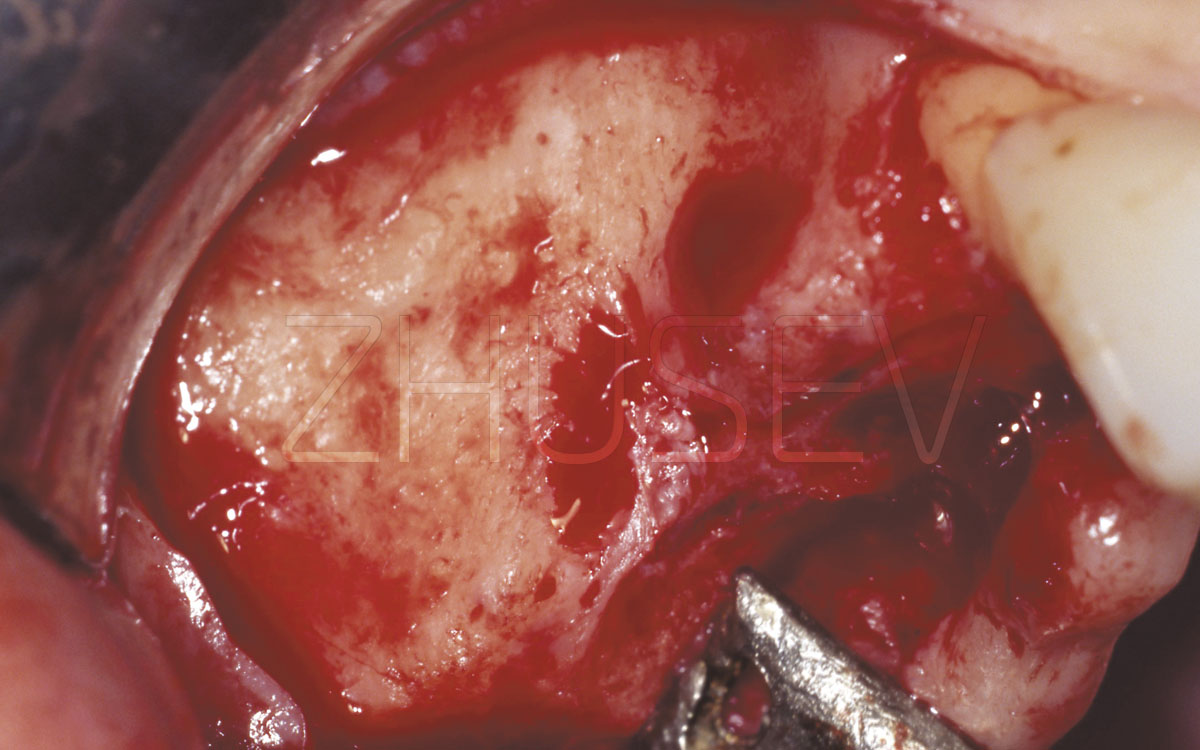
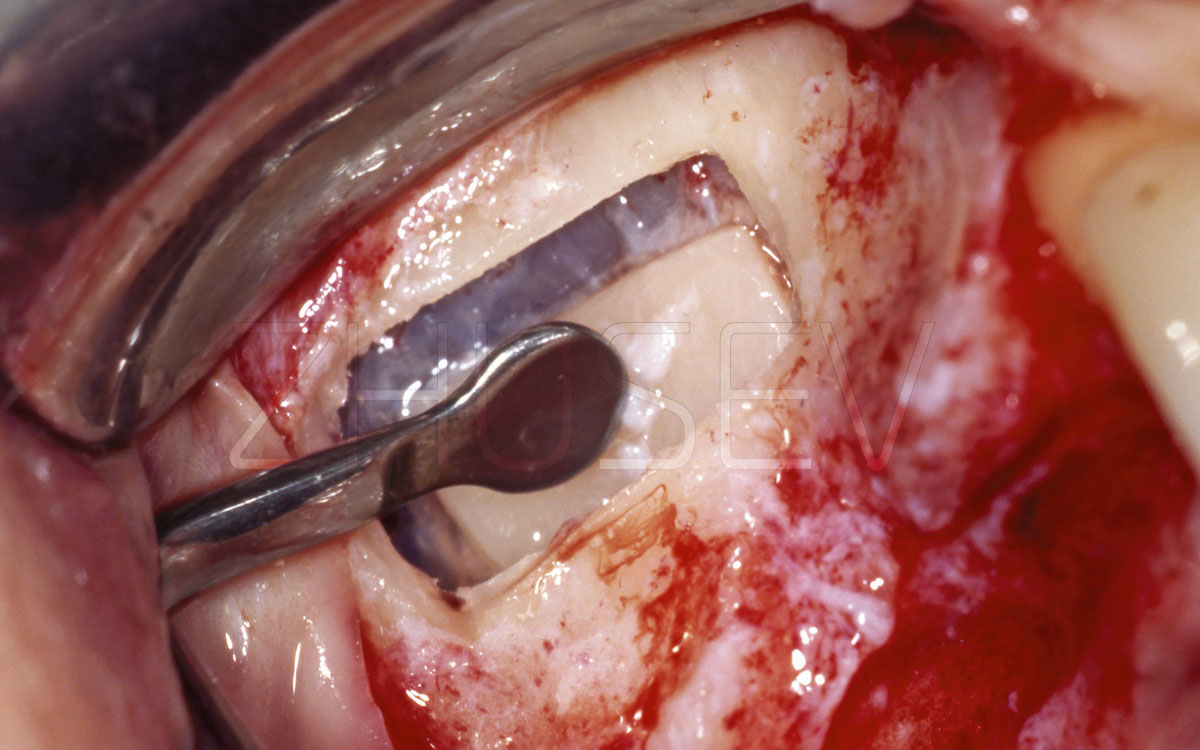
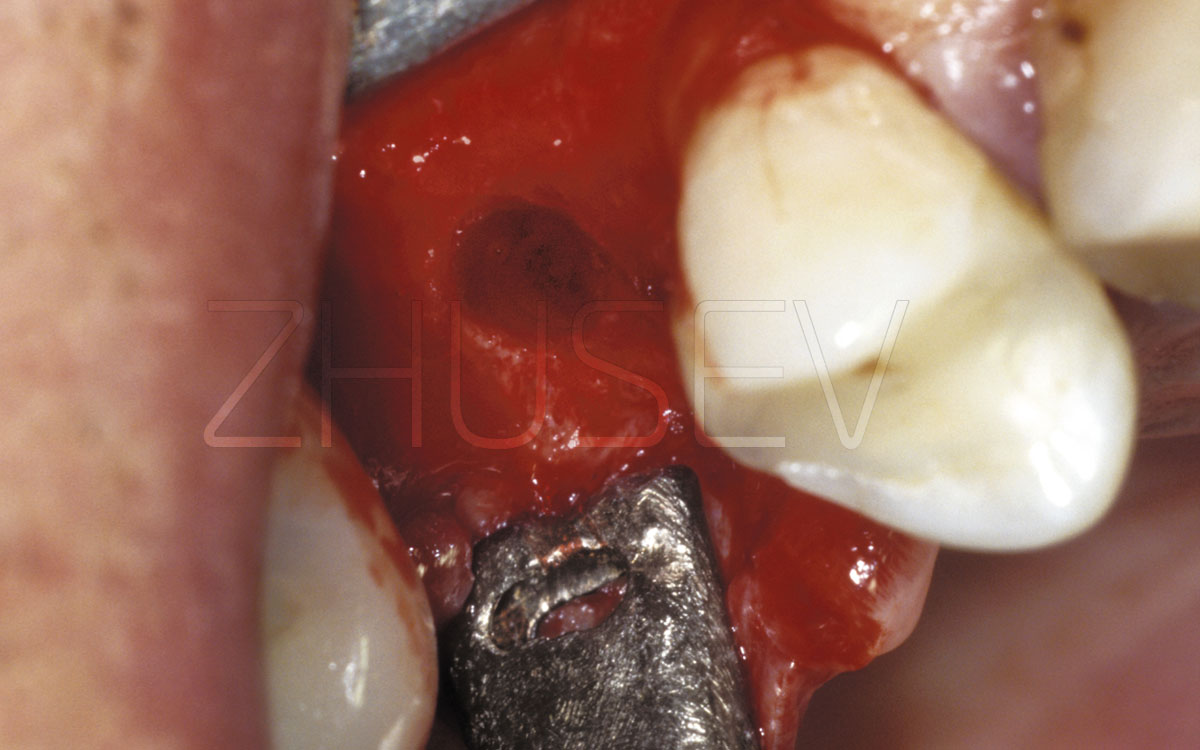
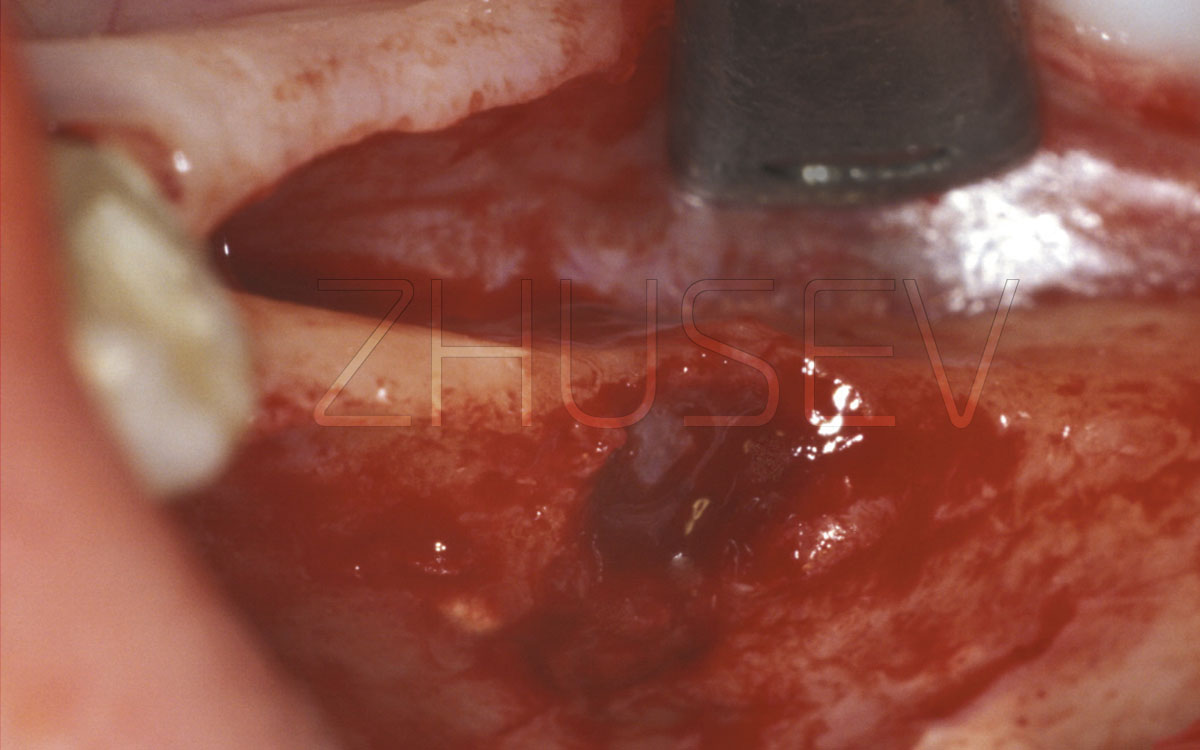
2.8.3-4AA bone window is formed with a spherical drill (not to damage the Schneider membrane). Slightly pressing the instrument (in this case, the crochet-saliva ejector), we check the compressibility of the bone fragment. If it does not yield to compress, do not apply force, but gently trim the remaining thin bone bridges with a spherical drill, only lightly touching them.
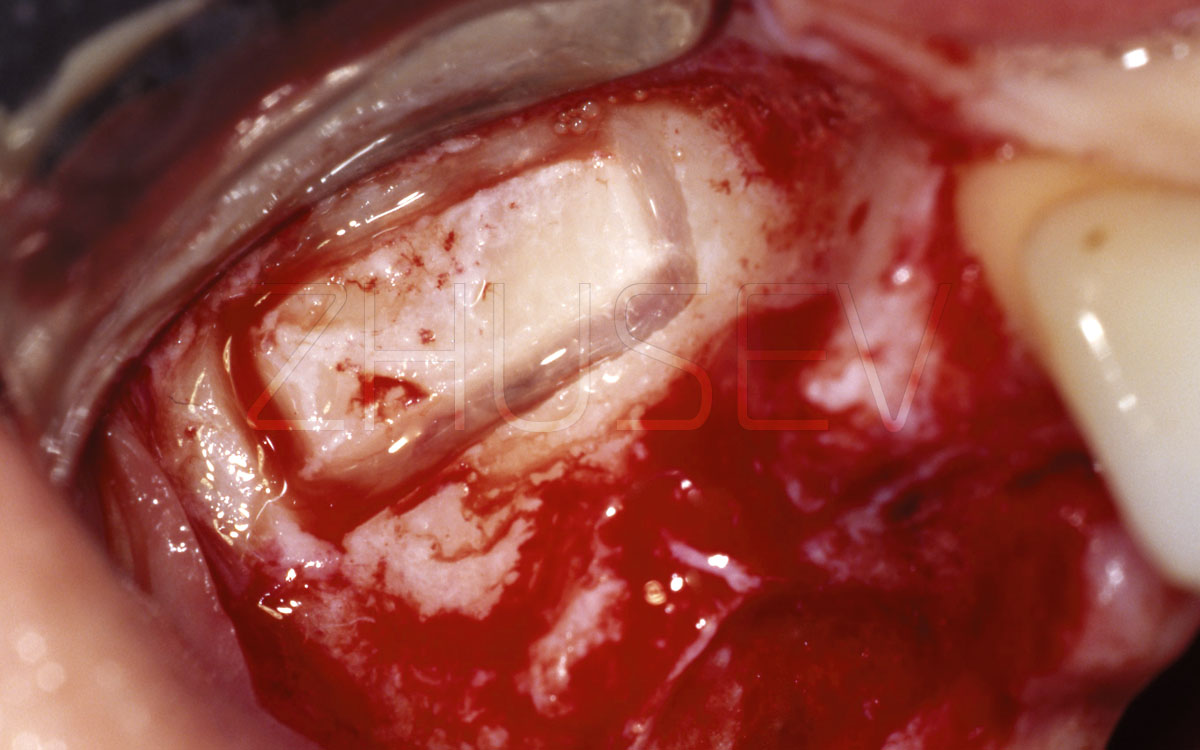
2.8.3-4BOnce you have ascertained that the bone fragment is moving freely toward the sinus, gently push it by the required volume. Separating this bone fragment from the Schneider membrane is impractical, and in some cases (with lack of experience) simply dangerous! Thus, the former lateral wall of the sinus becomes the new sinus floor.
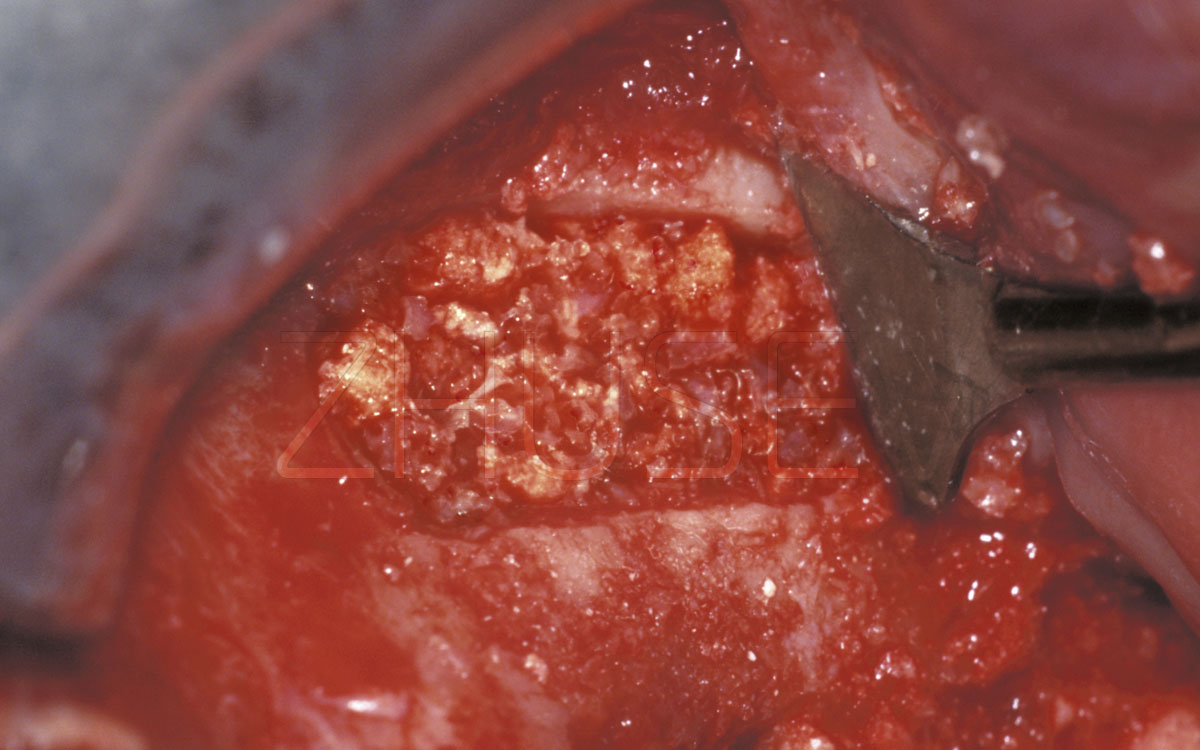
2.8.3-4CWe prepare the auto-bone or osteoplastic
material for introduction into the formed cavity.
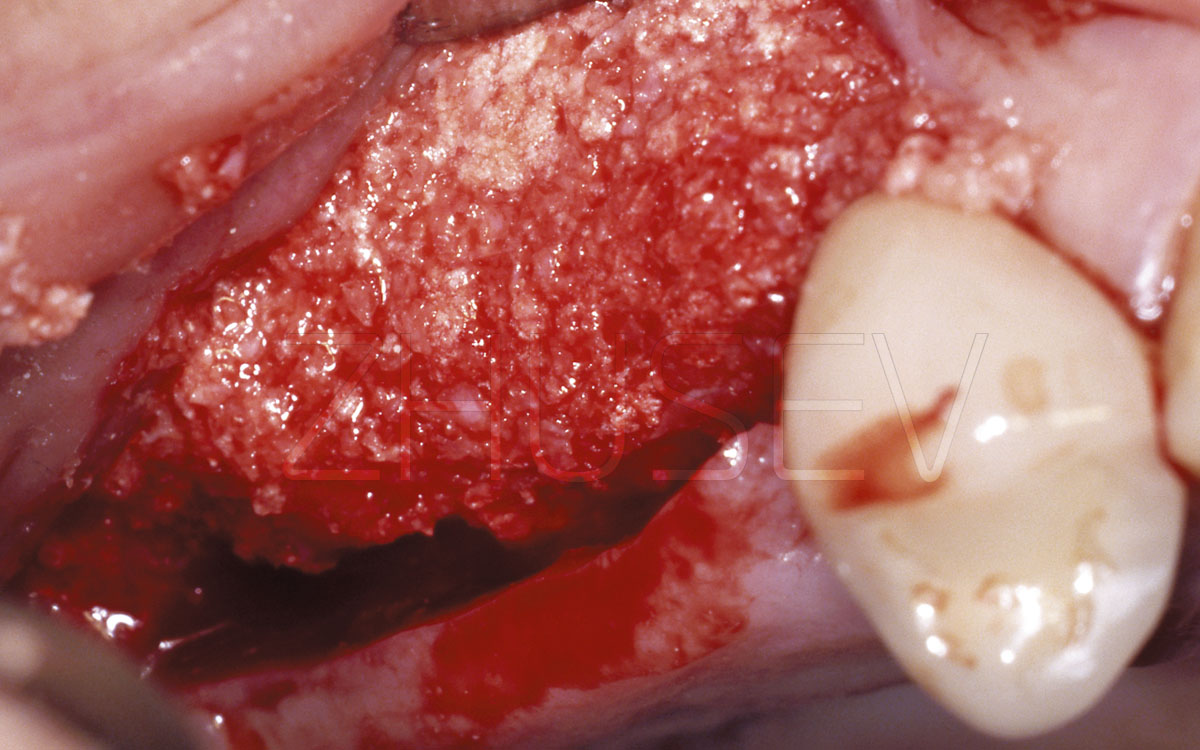
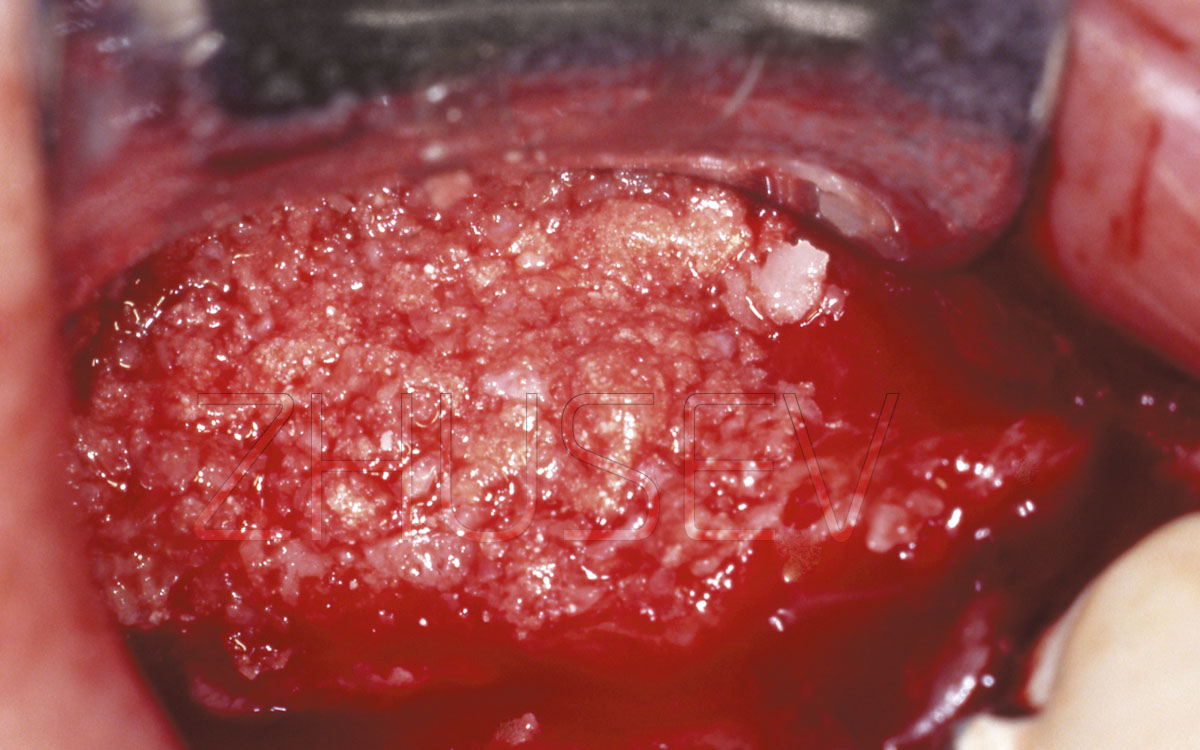
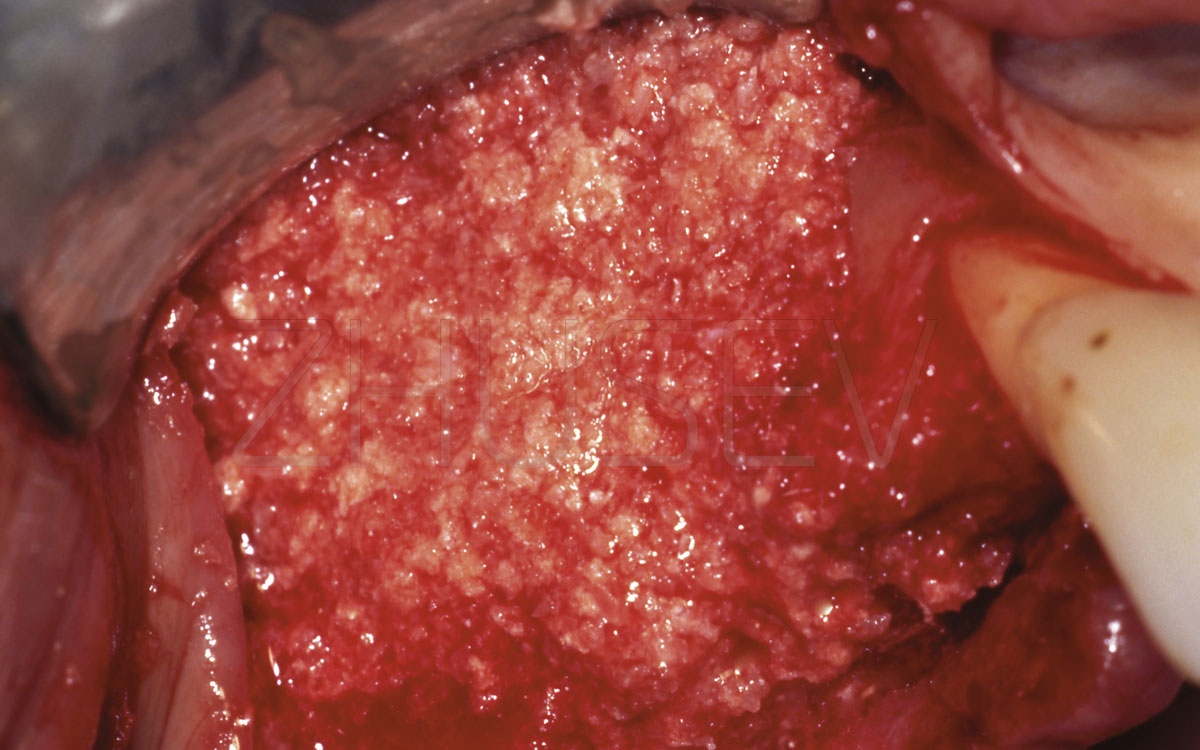
2.8.3-4DThe cavity is filled with osteoplastic material gradually, starting from the bottom. Condensate the material gently, until a feeling of slight resistance and a slight extrusion of the material outwards. We return the mucoperiosteal flaps to the original place and carefully sutured.
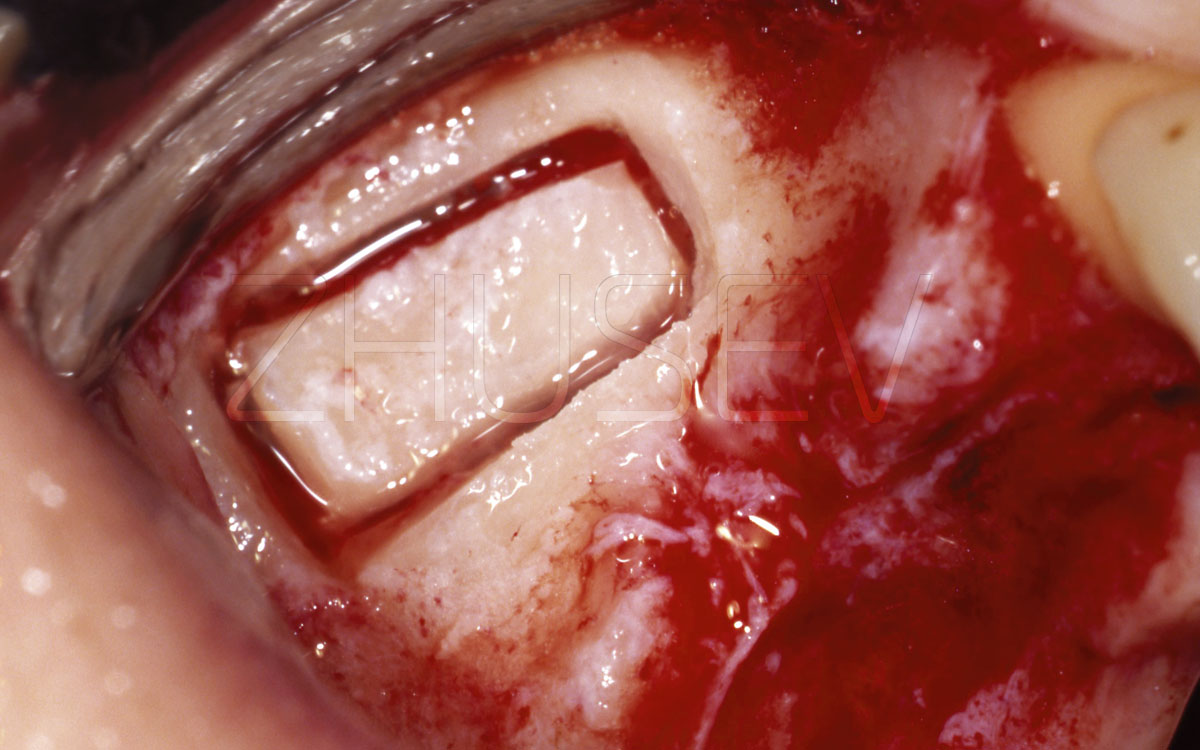
2.8.3-5AThe formation of the bone window is actually completed. Be very careful while moving inside the sinus!
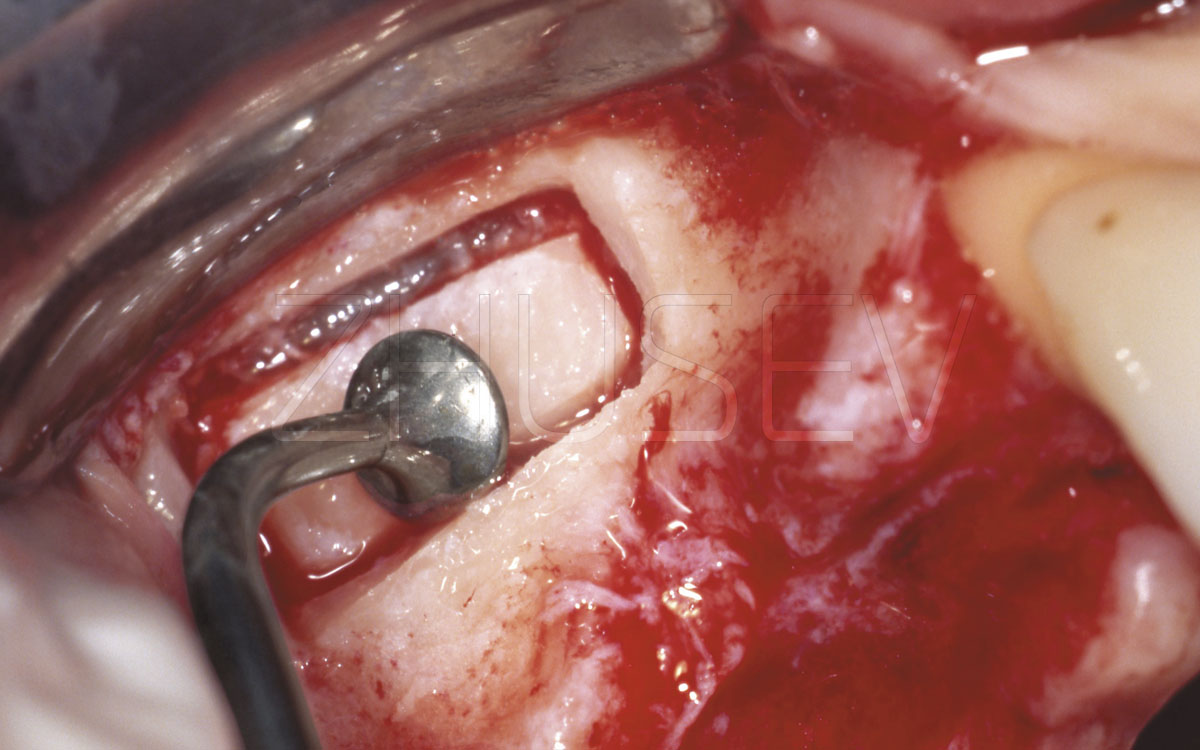
2.8.3-5BAfter the invagination, the bone window dropped downwards under its own weight. This indicates good elasticity of the sinus membrane.
2.8.3-5CMove this window upwards! Later, this pronounced cortical layer will be a good reference for you when preparing for installation of other implants.
2.8.3-5DAlways fill more replenishing material than necessary! In the process of restructuring and consolidation, it always loses volume!
Always keep a small sterile container in the operating set, into which you can pour physiological solution and place osteoplastic material there, a membrane, or auto-bone blocks. While in the solution, these materials are hydrogenated, gaining in elasticity, and besides, the probability of infection decreases, as long as you prepare the operation area for their application.
In some cases, the thickness of the plate you open (in the region of the window that you create) is far from uniform: its thickness in the distal segment is 1 -2 mm, but in the medial segment it can reach 6-8 mm.
In such cases, the formation of the window presents great difficulties, when you work deep inside the bone, and the threat of rupture of the sinus membrane when invaginating the bone window. Then, instead of moving the bone window inwards, it's best to try to carefully separate this fragment and, after grinding it, use the material in addition to the replenishment material.
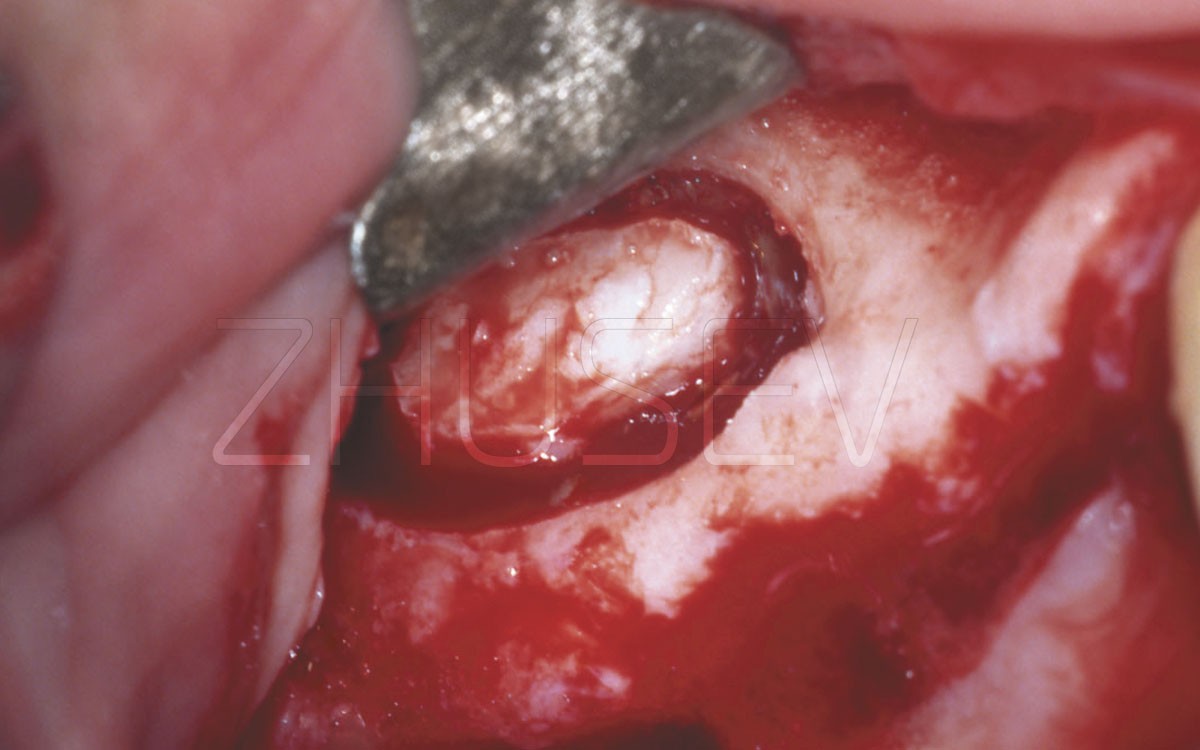
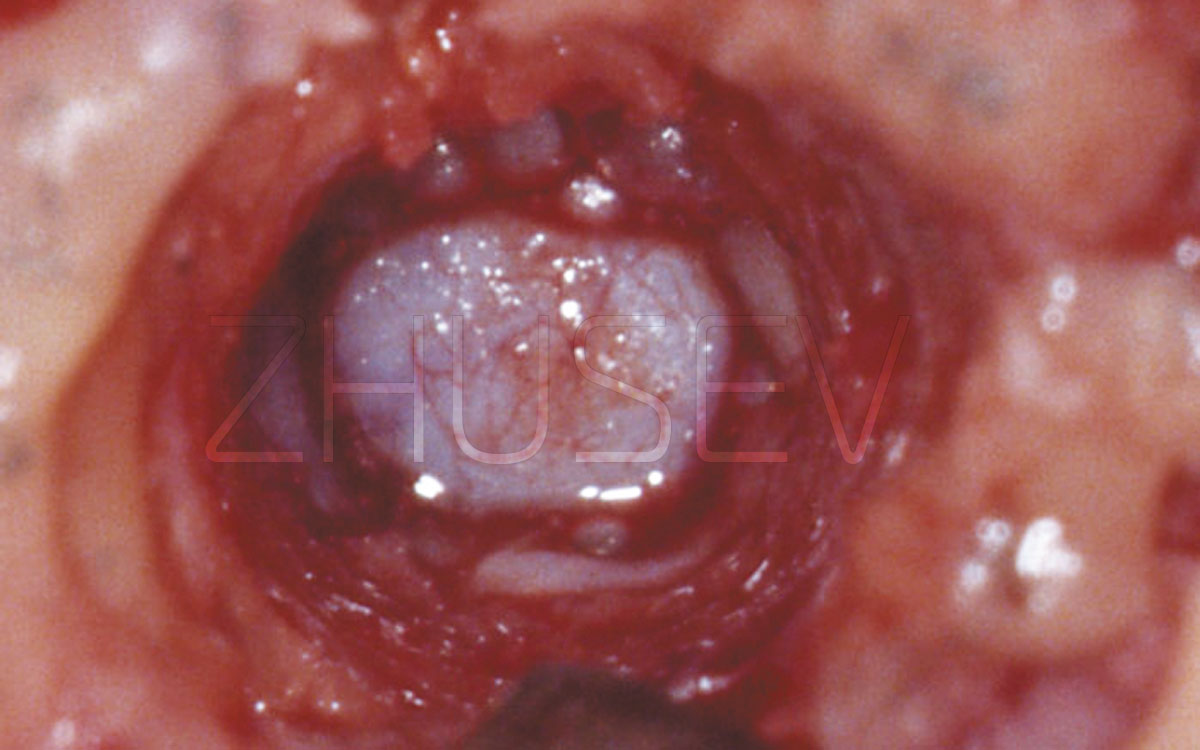
2.8.3-6AThe bone fragment is completely removed, no damage to the sinus membrane.
2.8.3-6BThe shredded bone window was used together with osteoplastic material CollapAn.
2.8.3-6CIf the formed window area is large and the volume of the filling material is considerable, it is necessary to cover all the material with a membrane.
2.8.3-7ADuring sinus lifting, is carried out, you had better make a wide separation of the mucoperiosteal flap.
2.8.3-7BUsing piezoelectric surgery for sinus lifting minimizes the risk of perforation of the Schneider membrane, and allows making finer sawcuts in the bone.
2.8.3-7CAs soon as you see that the sinus starts to appear through the thin bone plate, along the entire periphery of the window formed, stop the preparation work and gently press the bone fragment.
2.8.3-7D Separation of the Schneider membrane around the bone window is best done with a special tip tool.
2.8.3-7E If immobilization of the bone fragment indepth goes with noticeable tension, it is necessary to perform finer separation of the mucosa inside the sinus itself.
2.8.3-7F We fill all the space formed inside the maxillary sinus with CollapAn. Do not forget to apply superfluous material.
2.8.3-7G On the top, all the material is covered with resorbable membrane (it is necessary to exceed the window dimensions by 3-5 mm along the entire perimeter).
2.8.3-7H The wound is sutured hermetically. In the insert, we see an enlarged fragment of the control CT 4 months after the operation.
To form the bone window, take the largest spherical drill available. It must be a drill of diamond or other special surgical material. During preparation work, do not force the drill against the bone, and try not to make stops, so as to avoid perforation. When you see that the sinus (as dark strip) becomes visible through the bone, apply even more accurate and softer movements.
In recent years, various modifications of the surgical procedure of sinus lifting have been proposed.
One of the methods widely used is the "soft" sinus lifting, when the Schneider membrane is lifted with the help of osteotomes (2.8.3-10) (in case of insertion of blade implants, the function of osteotomes is performed by the implant’s analogue), without extensive opening of the lateral wall of the maxillary sinus.
This technique is low traumatic and does not require high surgical qualifications; it is also more predictable and can be recommended for wide clinical use, unlike Tatum’s classical technique. The only contraindication is presence alveolar bone of 5-6 mm in height (i.e. the thickness of the bottom of the maxillary sinus).
Hold the osteotome in your left hand, and the hammer, in the right. Apply the hammer blows gently, use only the force of your hand muscles. Pay attention to the sound or blows. When you tap the hammer, and the sound gets higher, this means that you are very close to the bottom of the sinus, and the tapping should be lighter, so proceed with caution!
Among the most effective synthetic materials used in such operations, we have to name the Russian product CollapAn, representing a homogeneous composition of pure hydroxyapatite [HAP] and specially prepared collagen, delivering an antibiotic (Gentamycin sulphate, Lincomycin hydrochloride, Metronidazole, Dioxidin, Claforan, or Rifampicin).
2.8.3-8 It is difficult to determine the precise position and volume of the material. Try to stack it always more, but carefully monitor the compliance of the sinus membrane in order to avoid its overextension and rupture.
2.8.3-9
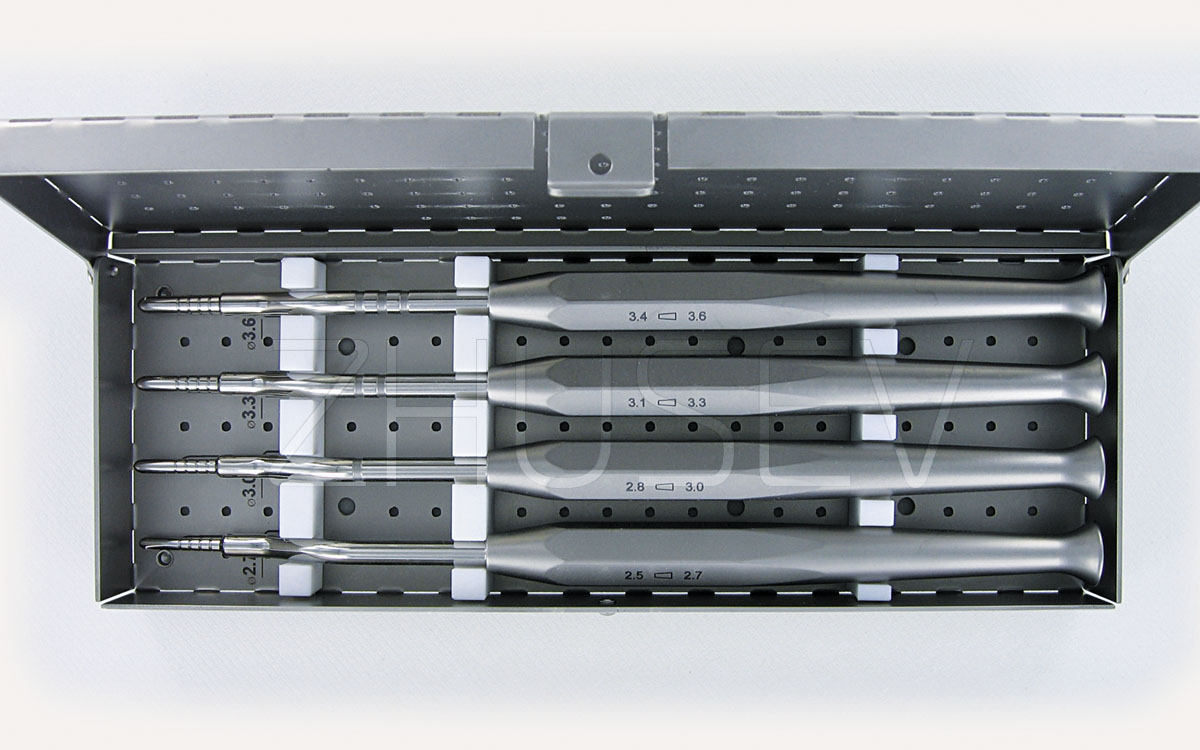
2.8.3-10 A set of CONMET titanium osteotomes for "soft" (closed) sinus lifting. The same tools can also be used to prepare a bed for an implant.
2.8.3-11A In ‘soft’ sinus lifting, the bone is perforated to the depth of only 3-4 mm, but to the required diameter.
2.8.3-11B Then, with light blows (‘taps’) of the hammer, we slowly drive the thinnest osteotome into the bone in the direction of the maxillary sinus to the depth necessary for the implant. In order to remove the osteotome, do not pull it out, but carefully unscrew it!
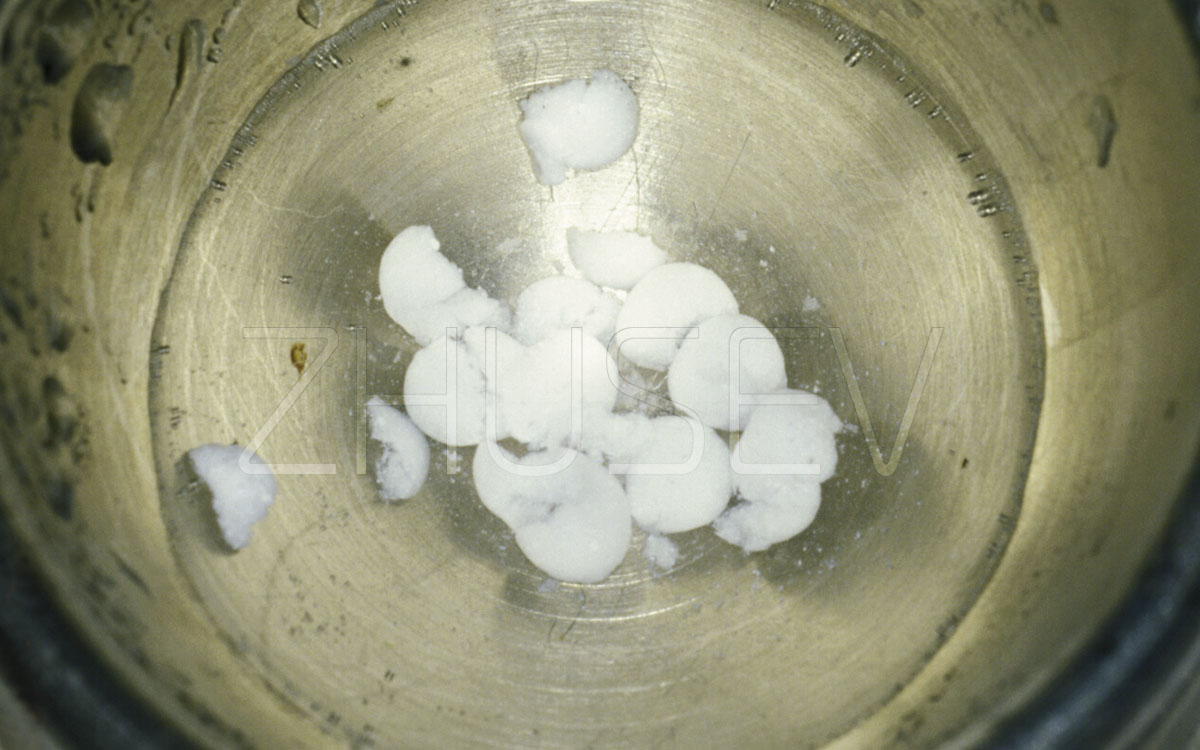
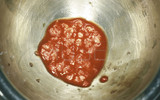
2.8.3-11C The required amount of CollapAn should be poured into a sterile container and topped with sterile physiological solution at lukewarm temperature for 3-5 minutes.
2.8.3-11D CollapAn, impregnated with physiological solution, settles down to the bottom (to improve this process, the granules are ground to homogeneity). Superfluous solution is wiped away with sterile gauze napkins.
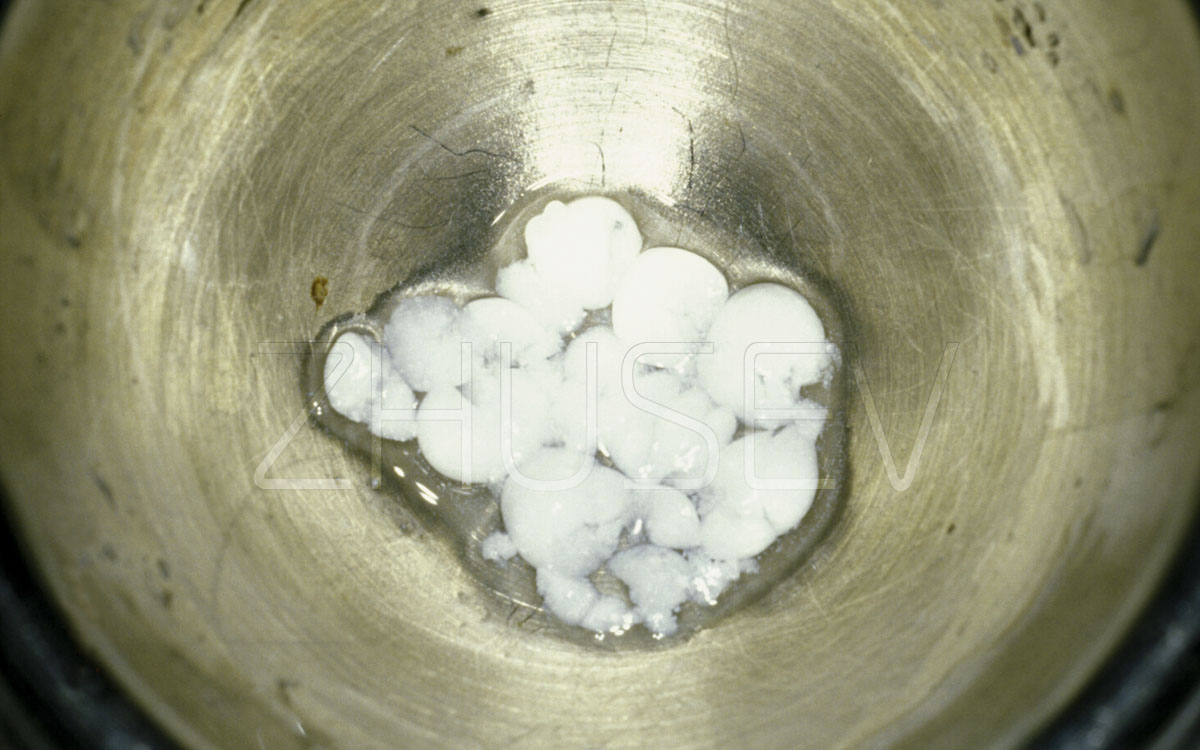
2.8.3-11E After removal of excess saline, add a small amount of blood collected from the surgery wound and mix it with CollapAn. The prepared material is delivered to the site.
An important condition for normal rearrangement and substitution of any osteoplastic material auto bone is stabilization of the blood clot on its surface. But during surgery, the normal blood clotting rate increases. As a result, blood does not penetrate deep into the granules of the material, clotting on its surface and forming a blocking strip, and the volume of internal granules of the material may not undergo this restructuring and yield the expected result, therefore some preparation of the CollapAn material is required before its introduction into the bone cavity 2.8.3-11C…11E. After the sinus lifting surgery, advise the patient to refrain from visiting baths, saunas or swimming-pools for 10-14 days, and to sleep on the opposite side for 2-3 nights, so that the operated sinus is located on top and well drained. Proceeding from the above, performing single-stage sinus lifting on both sides is not recommended.
To enhance anti-edematous and anti-inflammatory effects, I recommend prescribing Euphorbium compositum S aerosol 3-5 times a day, for one week.
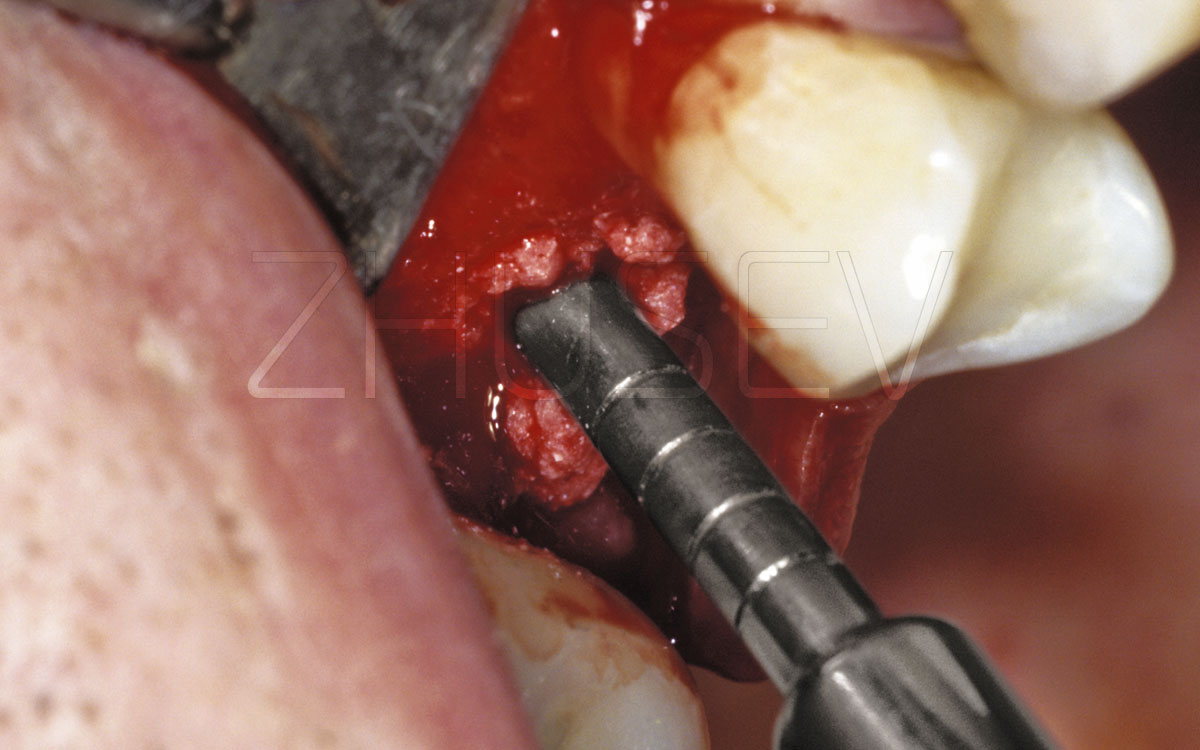
2.8.3-11F Apply prepared CollapAn osteoplastic material to the bone. The aspirator (saliva ejector) should be switched off!
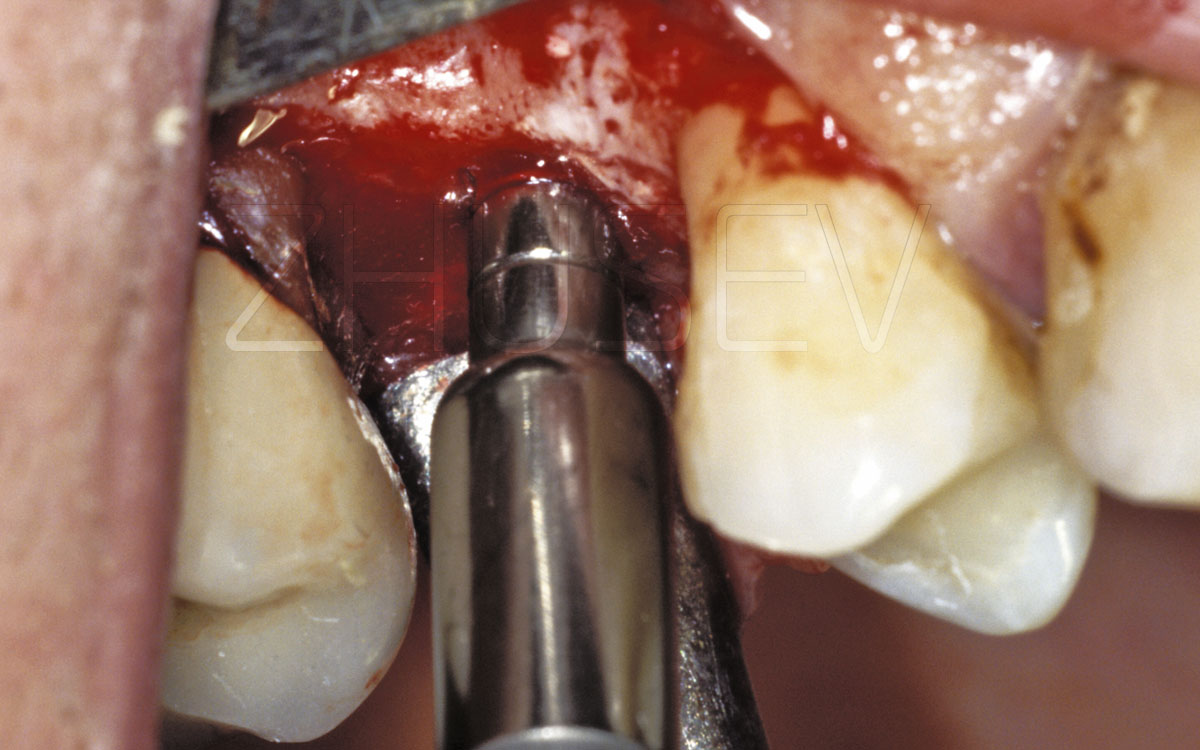
2.8.3-11G Use the same osteotome to gently push the material deeper into the sinus. Do not try to enter a large amount of material at once. Do it gradually, in small portions of 0.1-0.2 cc.
2.8.3-11H When you insert approximately 0.5 cc of material in the sinus, apply the osteotome of the next larger size and again gradually move it to the required depth. Then, insert about 0.5 cc of osteoplastic material into the sinus. Continue until the hole is ready in both depth and diameter.
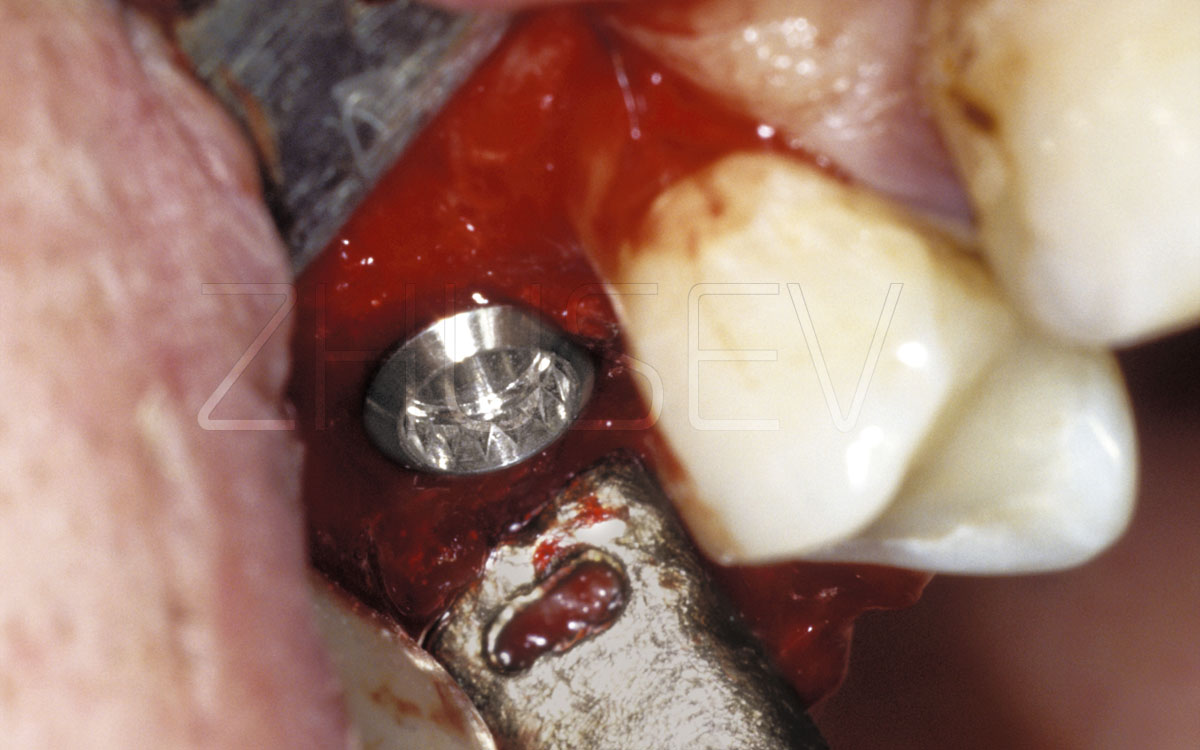
2.8.3-11I When all material is introduced, we install the implant.
2.8.3-11J The implant is fully installed in the bone and the maxillary sinus, through the orifice punched with the osteotome.
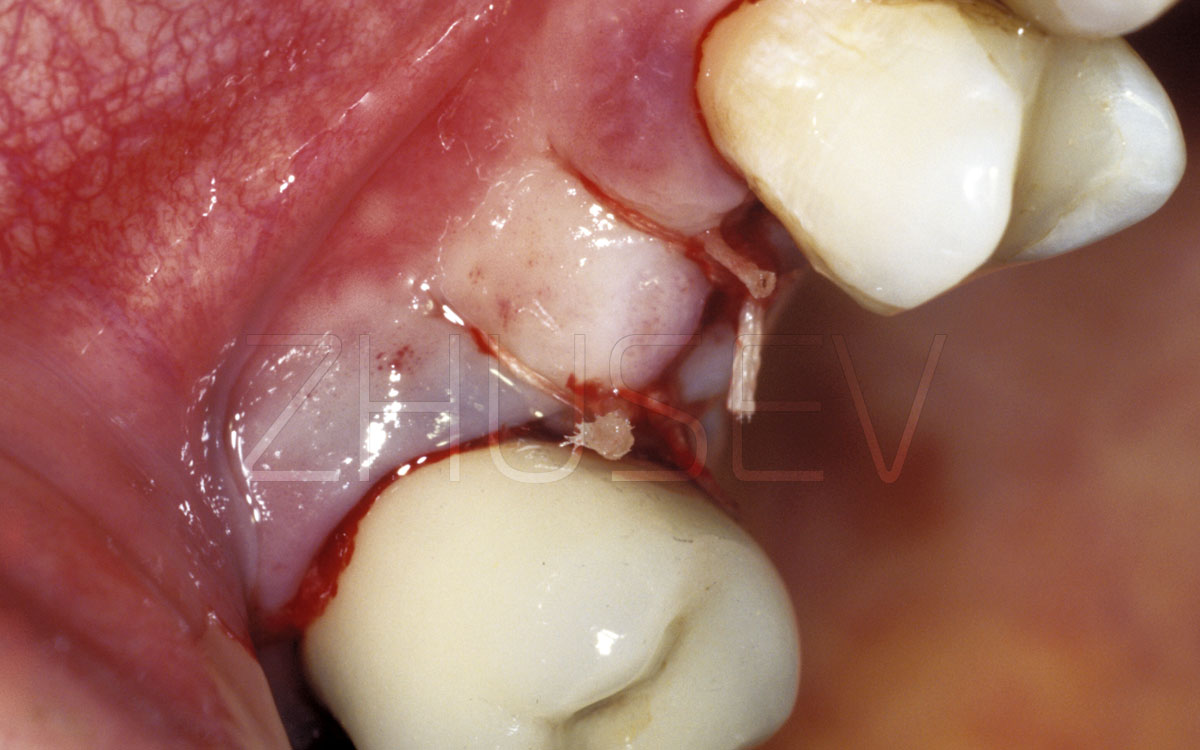
2.8.3-11K We return mucosal-laminate flaps to the original place and carefully suture them down. If the flaps over the implant require stretching for bringing together, be sure to apply Solcoseryl for 7-10 days.
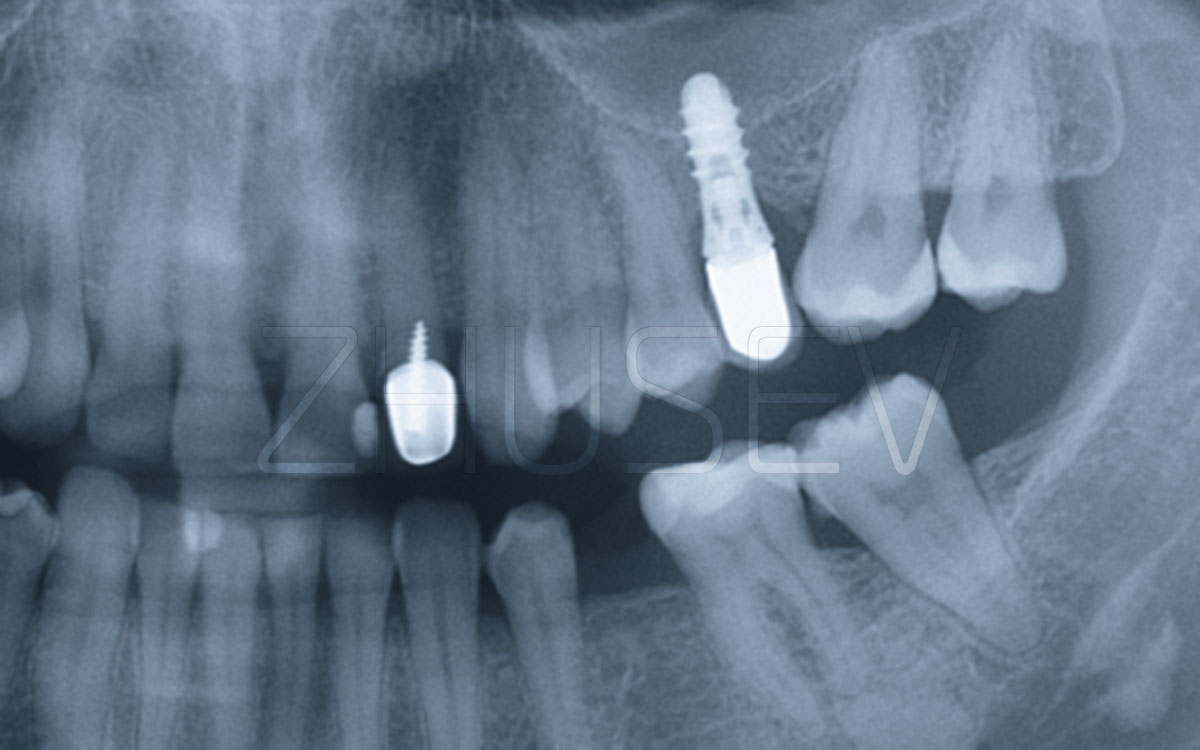
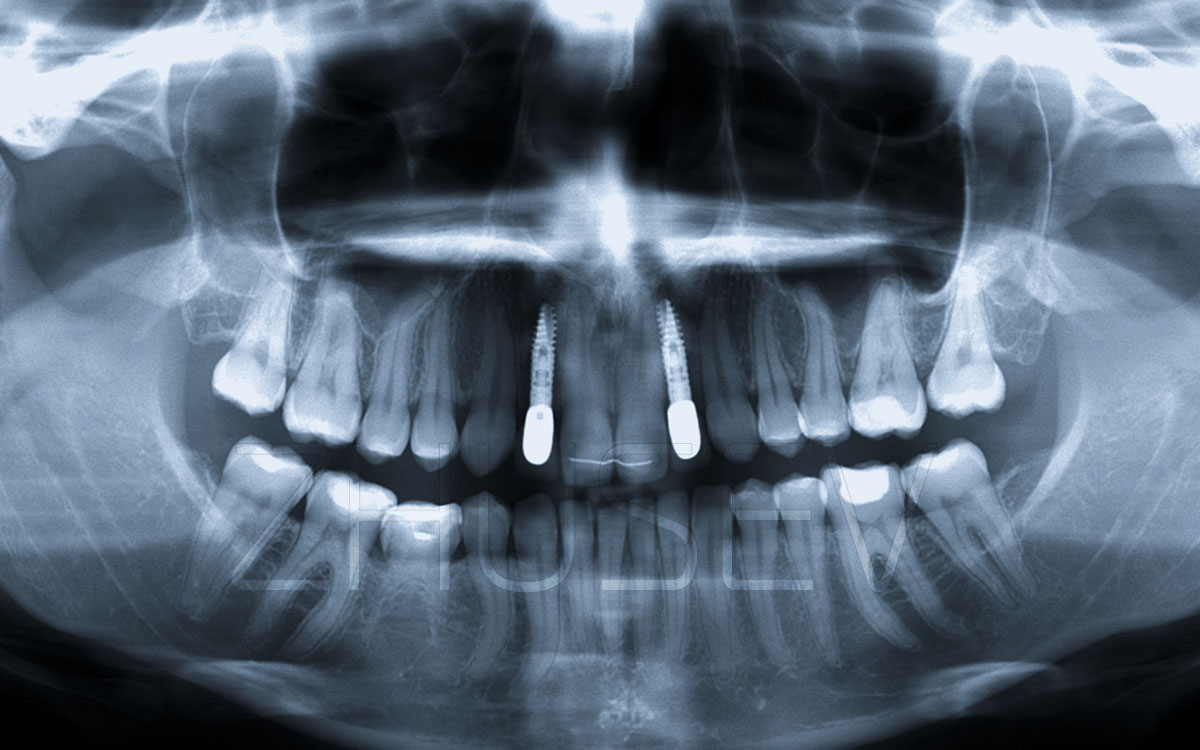
2.8.3-11L Reference X-ray taken 5 years after surgery.