2.8.2
Immediate implantation
Immediate implantation Immediate implantation Immediate implantation Immediate implantation Immediate implantation Immediate implantation Immediate implantation
Very often, you can install an implant right after extracting a tooth, i.e. there are conditions for immediate implantation.
Immediate implantation can be performed in areas of single-root teeth and two-rooted teeth where the roots are intergrown. The ideal variant is when around the root there are no signs of inflammation, and the bone volume allows you to install an implant, exceeding the size of the extracted tooth, i.e. the alveolus itself can be drilled entirely for the bed under the implant. The same applies to small granulomas on the root: If they are smaller than the diameter of the forming dills, they will be removed during drilling.
A very important aspect of immediate implantation is the surgical technique of extracting the root itself. In no case can you use forceps for this purpose! Extraction should be performed with thin straight elevators, excavators and sharp curettes carefully inserted between the root of the tooth and the wall of the bone alveolus, and the luxation can be applied only from the medial, oral and distal walls of the alveoli. You should by no means insert the instrument from the side of the vestibular wall, to avoid damage or breakage. Turning the tool to a small angle one way and the other, we slowly push it inward, swinging the root to carefully extract it.
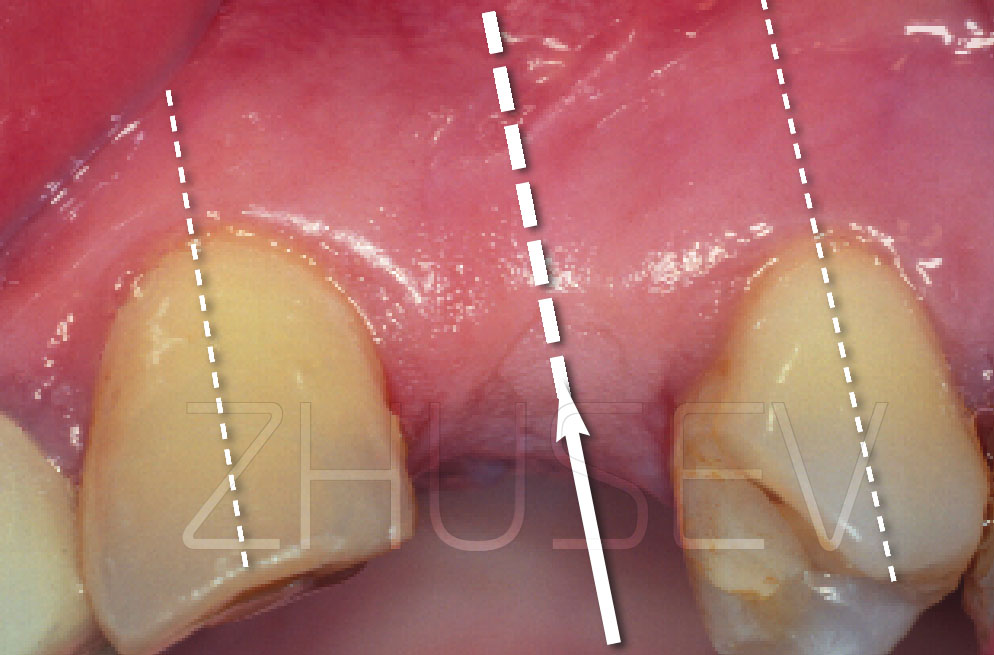
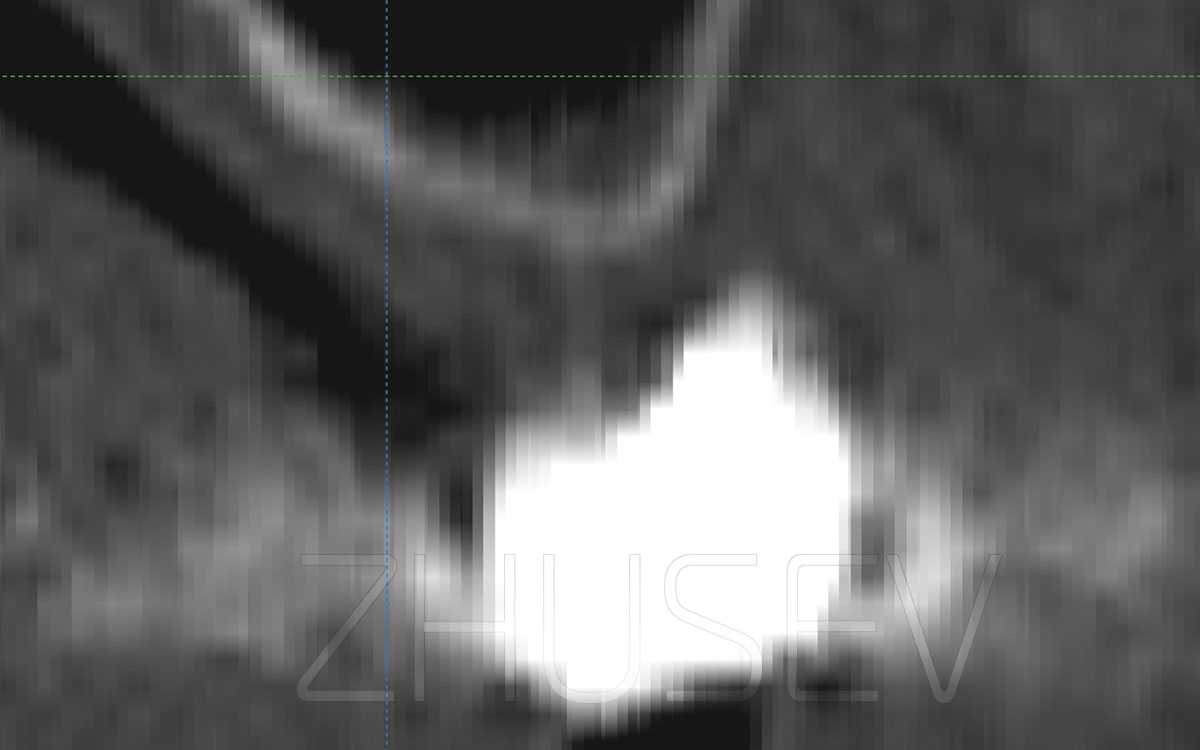
There are some specifics to performing immediate implantation in the anterior section of the upper jaw. Look at the computer tomographic sections of several teeth in picture 2.8.2-1. It becomes clear that if at the time of preparation of the bed under the implant we maintain the axis of the previously extracted tooth, then the vestibular wall will remain too thin, and its perforation will be possible even with the apical part of the implant. Therefore, after removing the tooth, we carefully examine the hole and determine the direction of drilling. Visually divide the entire length of the palatal wall into 3 fragments and form a central point on the border of the upper third of it. Drilling a bone at a sharp angle is always difficult. The drill point starts to roll over the bone, causing the yaw effect, and drilling into exactly the point that you have outlined becomes problematic. For this purpose, take a small diameter Lindemann drill and first make a small groove, keeping the cutter perpendicular to the bone; and only then change the direction. In this case, the axis of the milling cutter should be parallel to the vestibular wall.
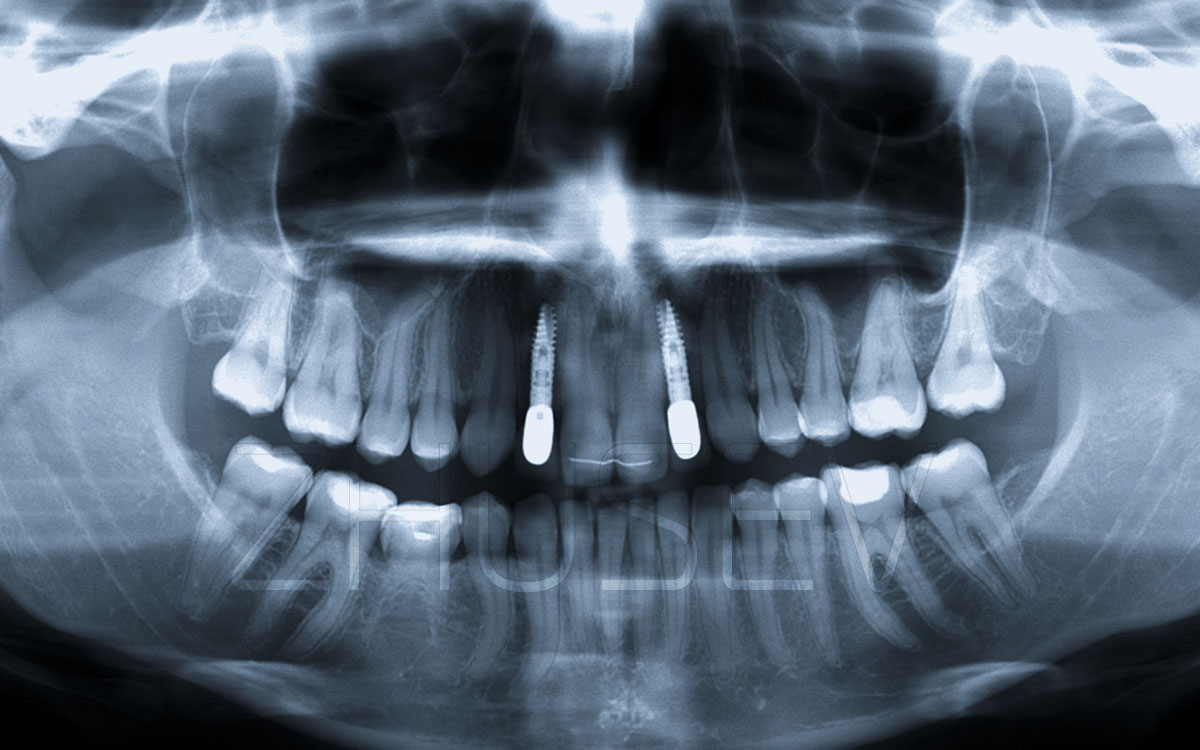
2.8.2-1 Cross-sections of topographies of tooth 11 in different patients. The main axis of the tooth is nearly always closer to the vestibular wall. So, when preparing it, if you keep the same direction, you will not avoid critical thinning of the wall, or even perforation!
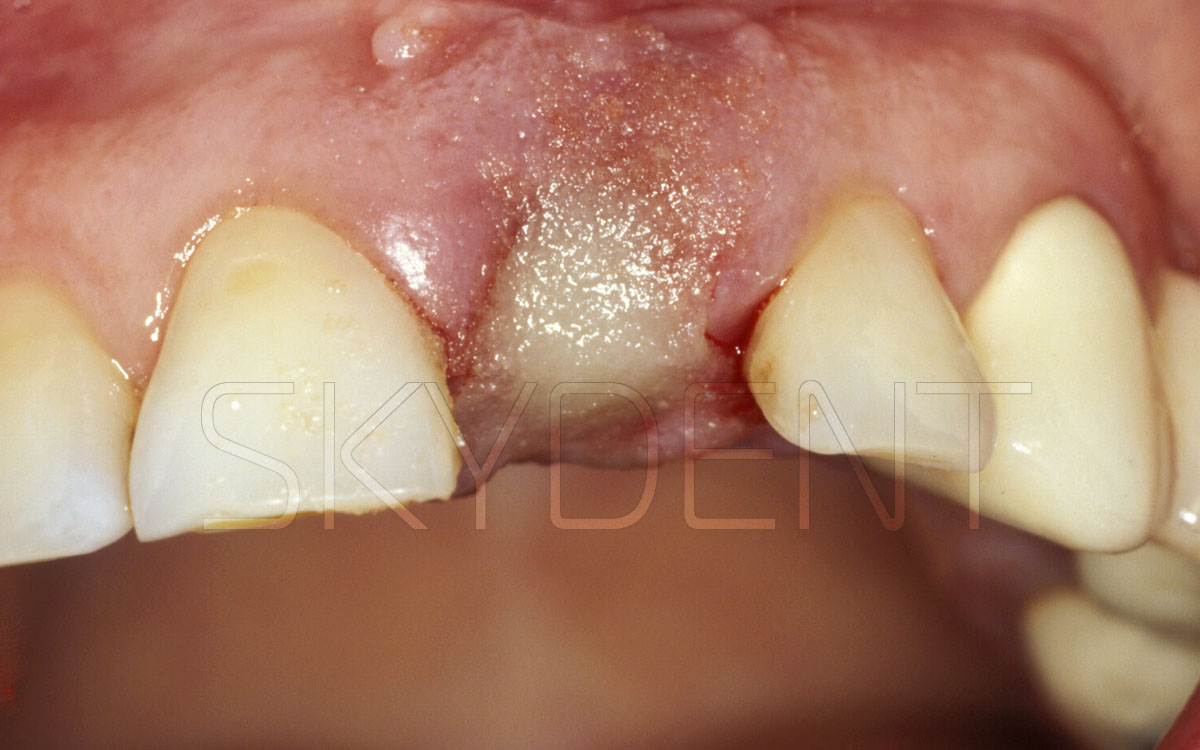
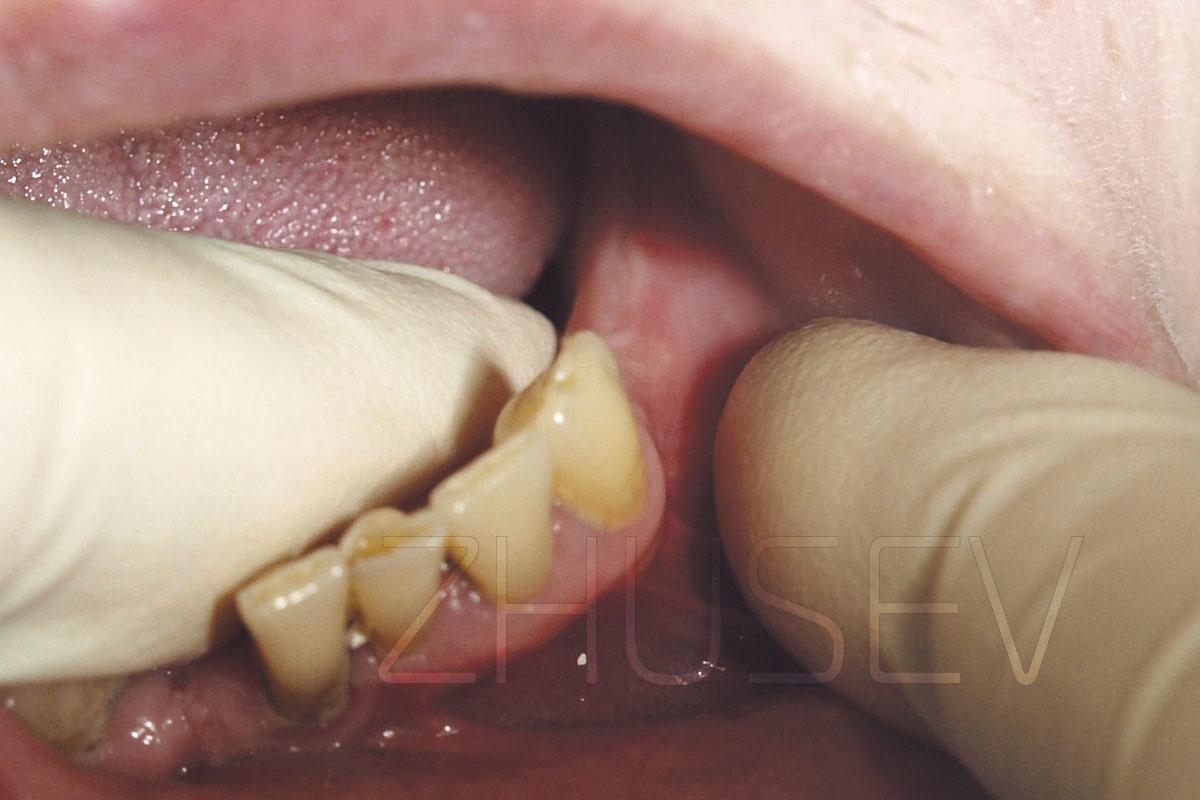
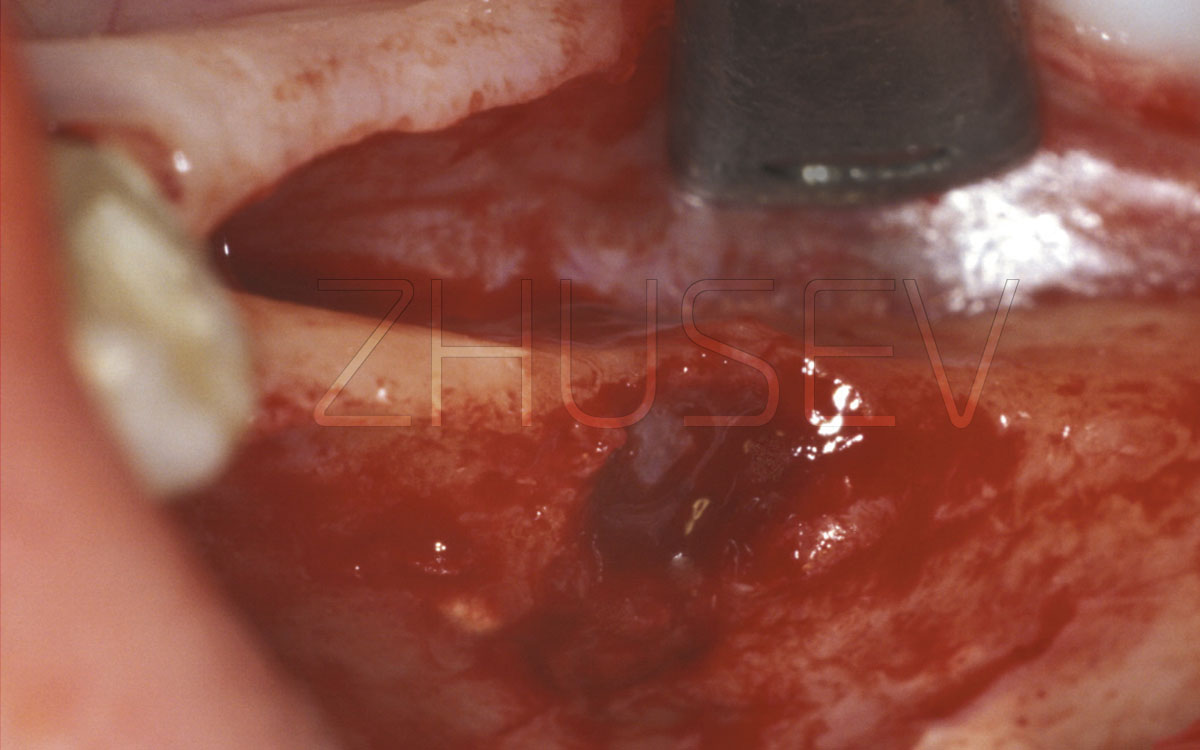
2.8.2-2A The root should be removed with extreme caution: do not use forceps, use thin straight elevators.
View of the remaining root of the tooth after the fracture of the crown part.
2.8.2-2B After finishing the formation of the bone bed with a tap (depending on the implantation system chosen), bone thread is made.
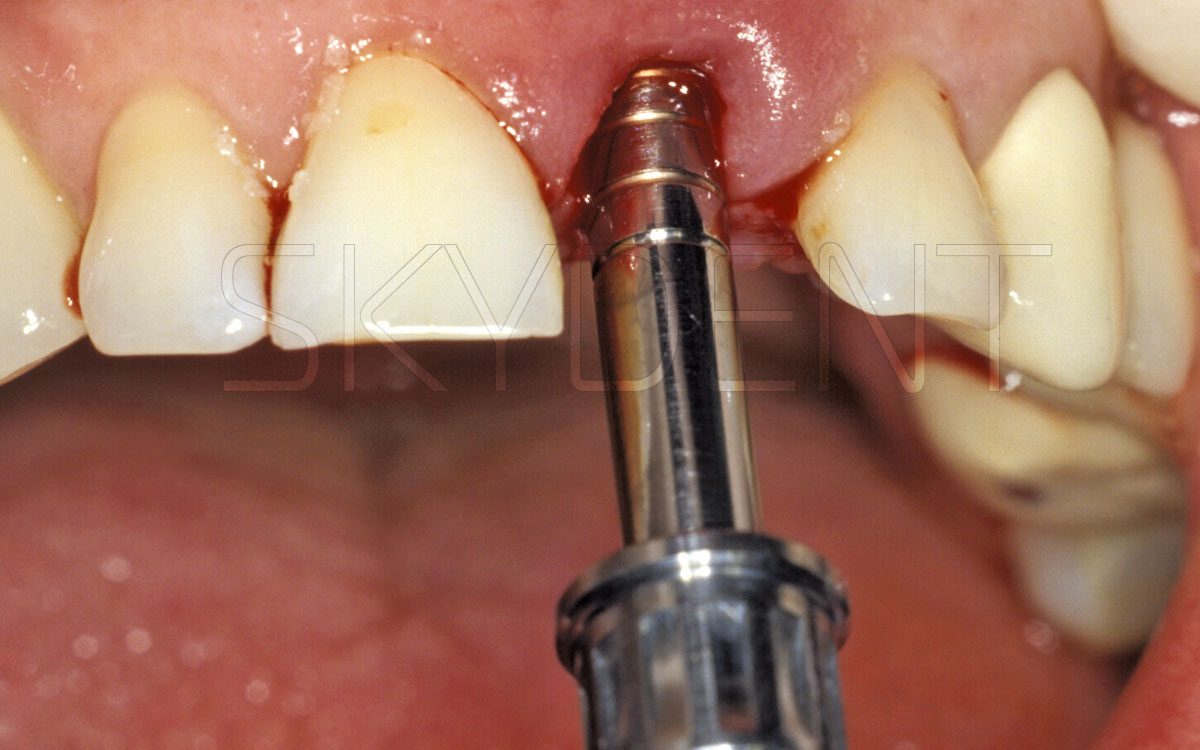
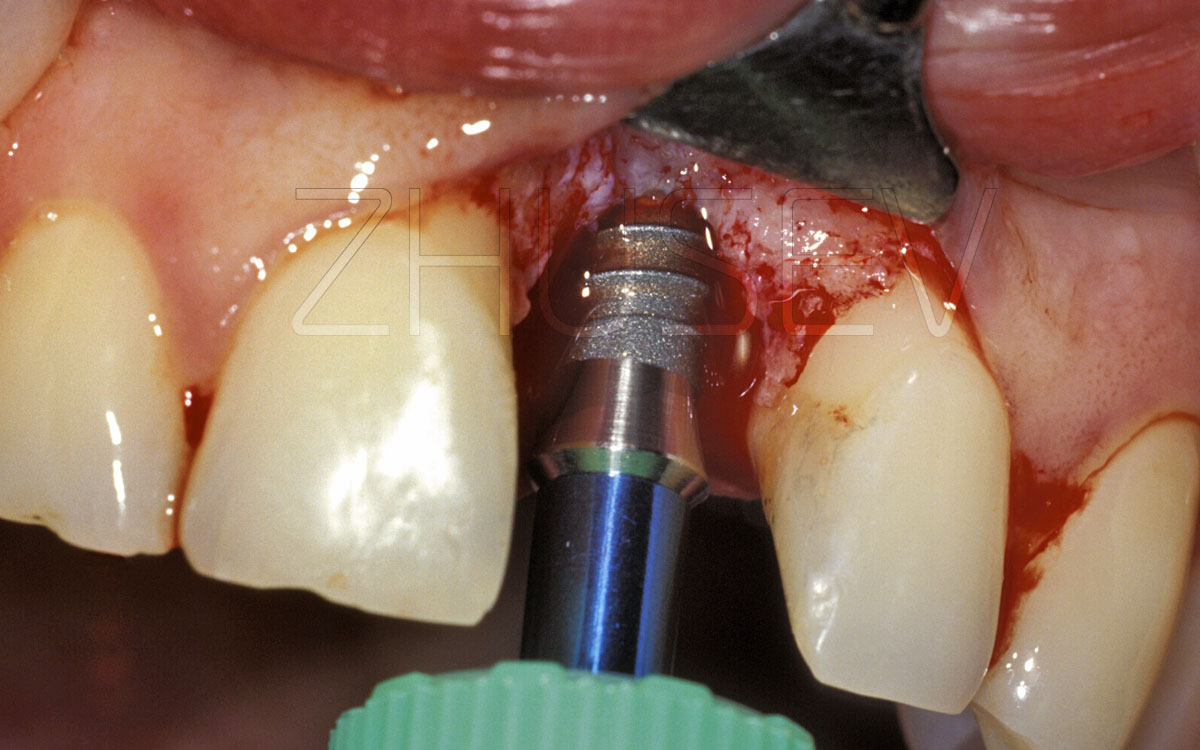
2.8.2-2C Implant is neatly turned into the bone tissue. If you feel significant resistance, reduce the driving speed and periodically (after 1-2 full rotations) irrigate the surface of the implant with physiological solution.
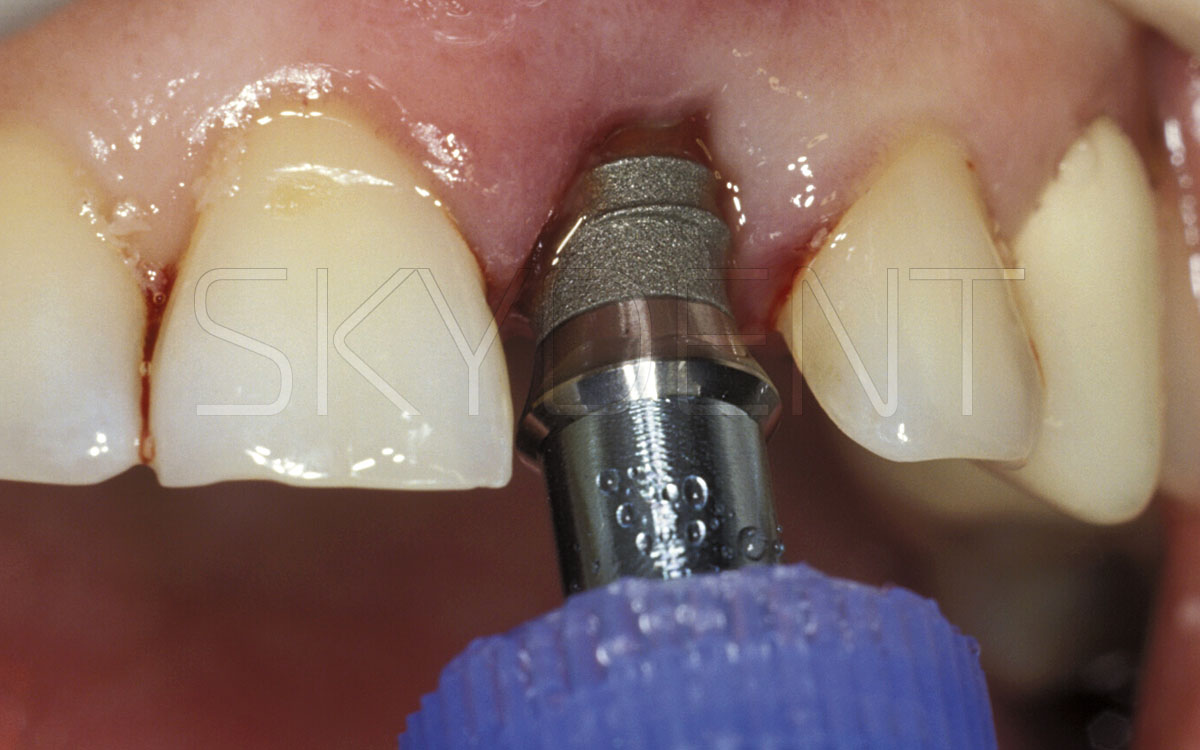
2.8.2-2D To install the implant at the required depth, use a reversible torque.
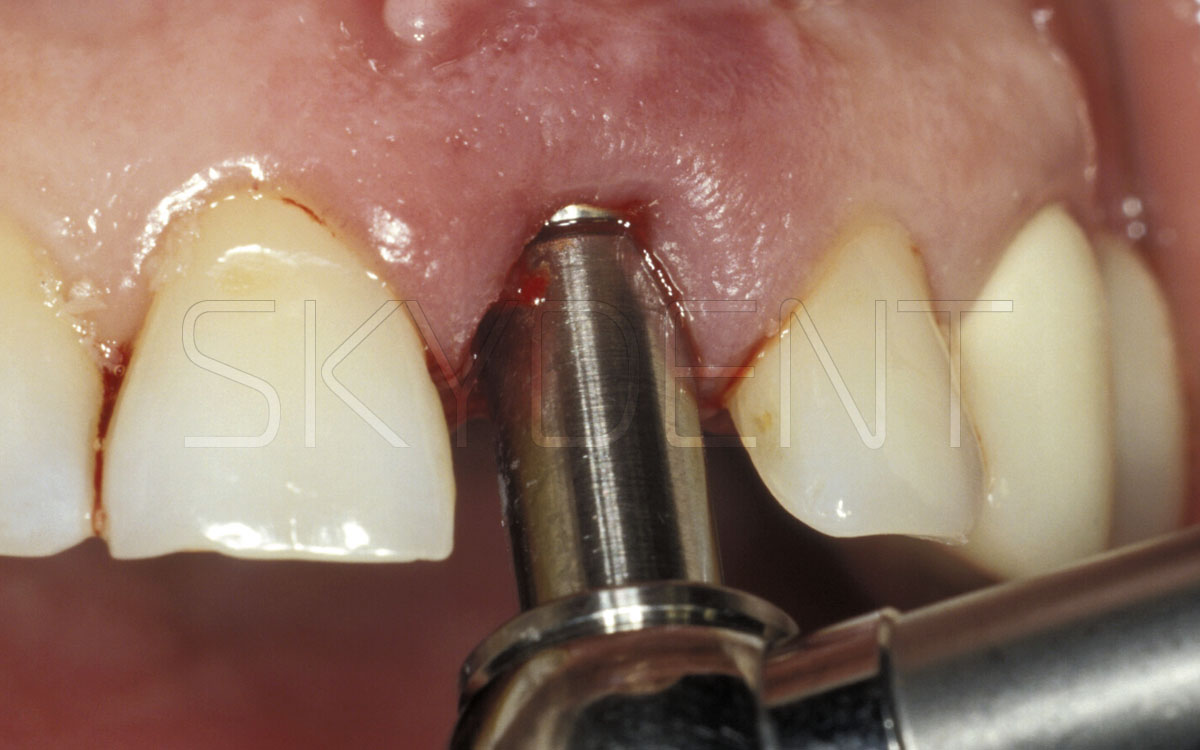
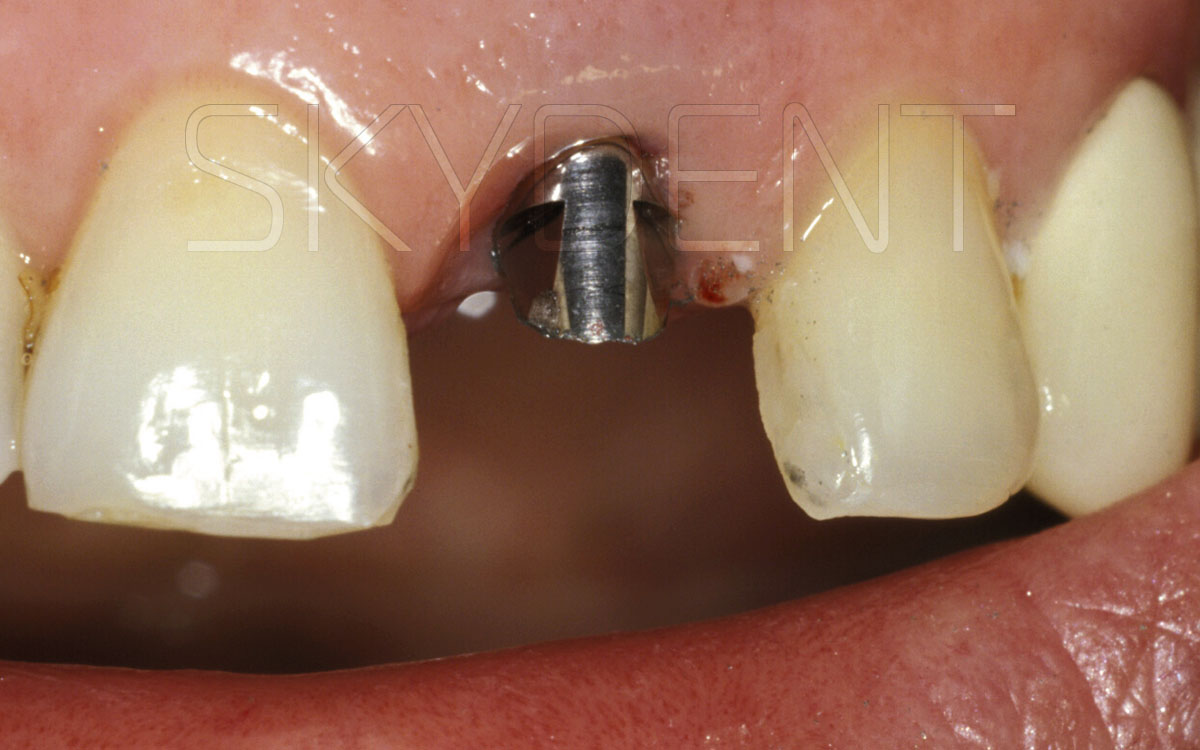
2.8.2-2E The implant is fully installed in the bone. It should be at least 1-2 mm below the level of the mucosa.
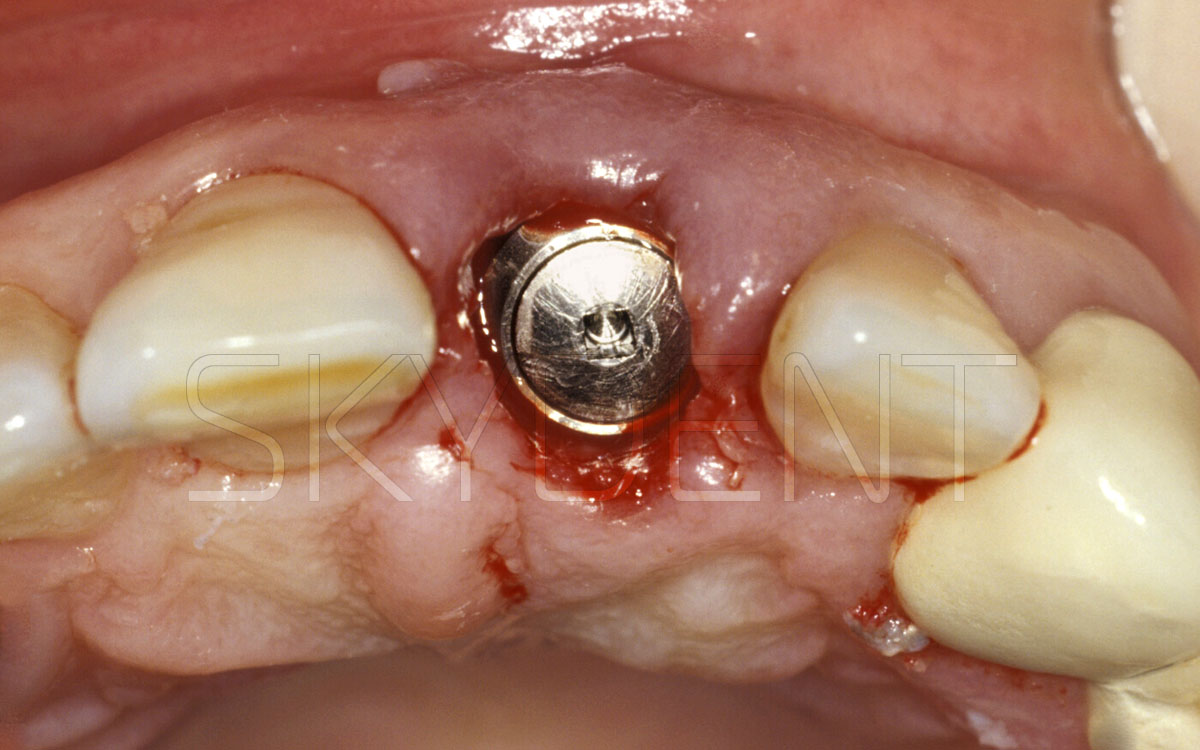
2.8.2-2F An internal plug is fixed. Note that there is a small gap between the implant's equator and the bone alveolus.
2.8.2-2G In this case, do not use suturing, only a bandage with dental Solcoseryl.
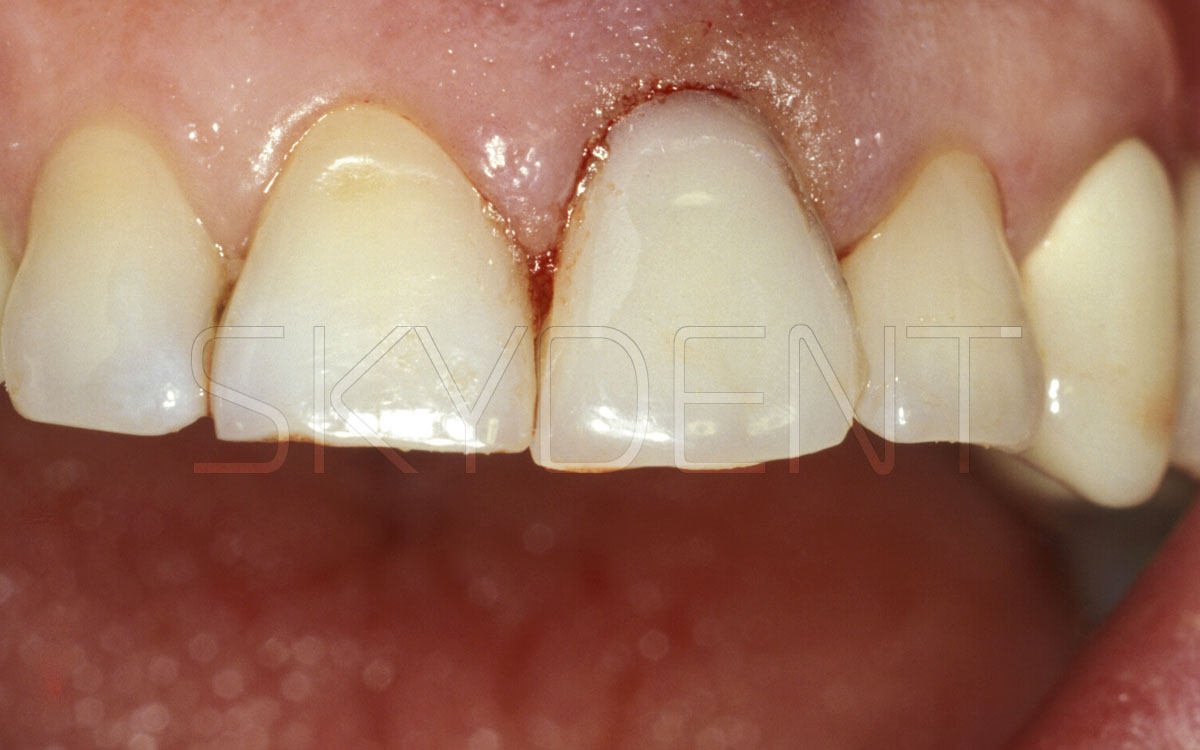
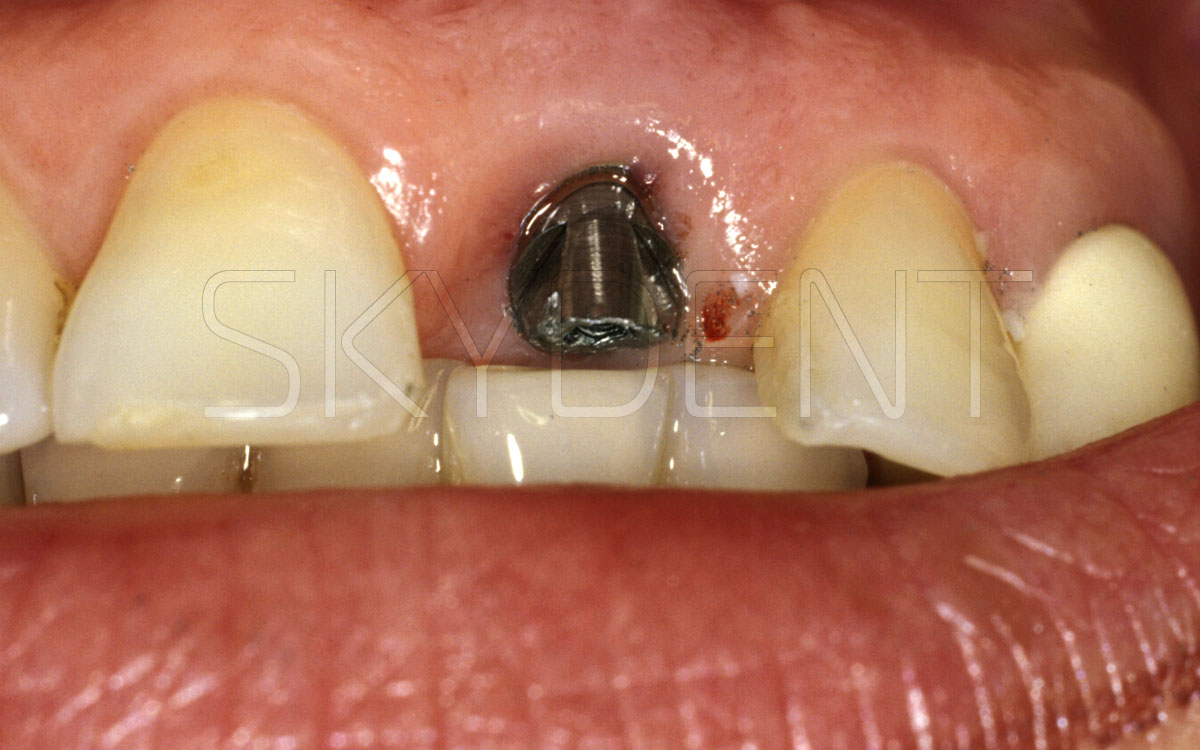
2.8.2-2H 2 months after surgery, we can easily see fixation of the temporary crown to the adjacent teeth. Note that its height is slightly less than that of the adjacent teeth.
2.8.2-2I Fitting the temporary crown. It is fixed to the adjacent teeth and does not contact the implant.
2.8.2-2J View from the occlusal surface. The provisional crown in the niche should not cause soft tissue hypoxia.
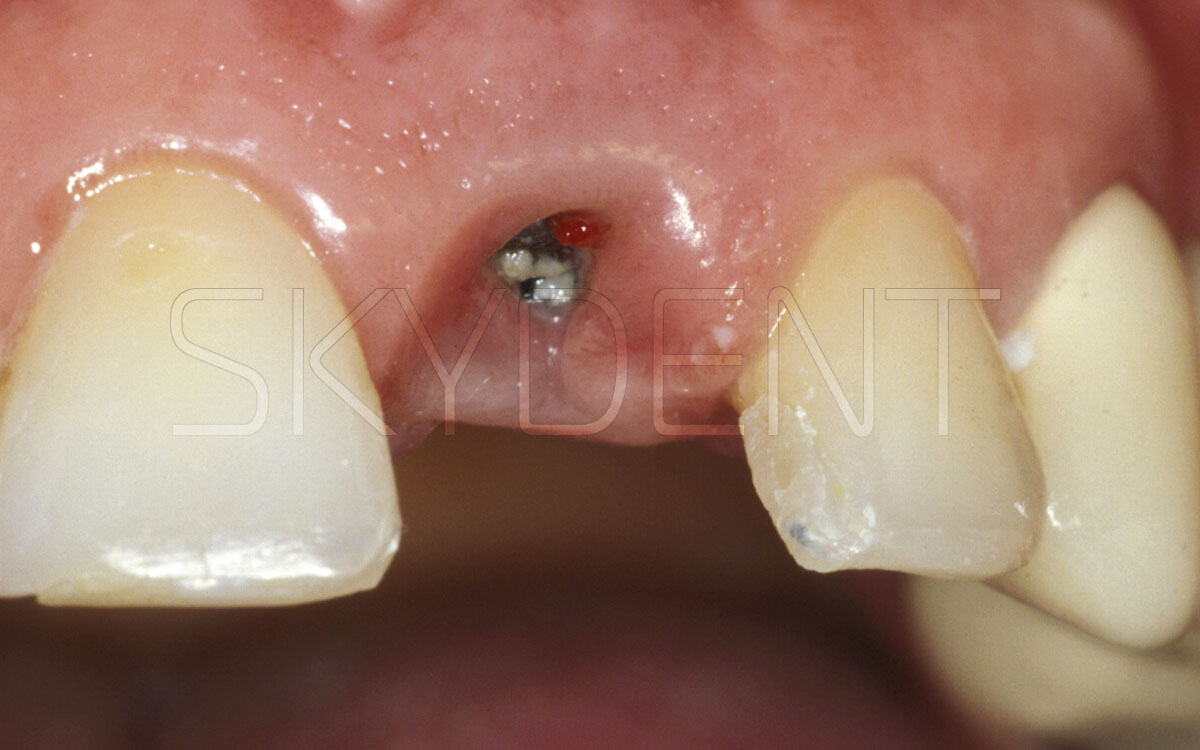
2.8.2-2K The temporary crown has been removed, and the epithelial layer is fully formed.
2.8.2-2L In a natural way, the mucous membrane has overgrown onto the implant, covering 2/3 of its surface.
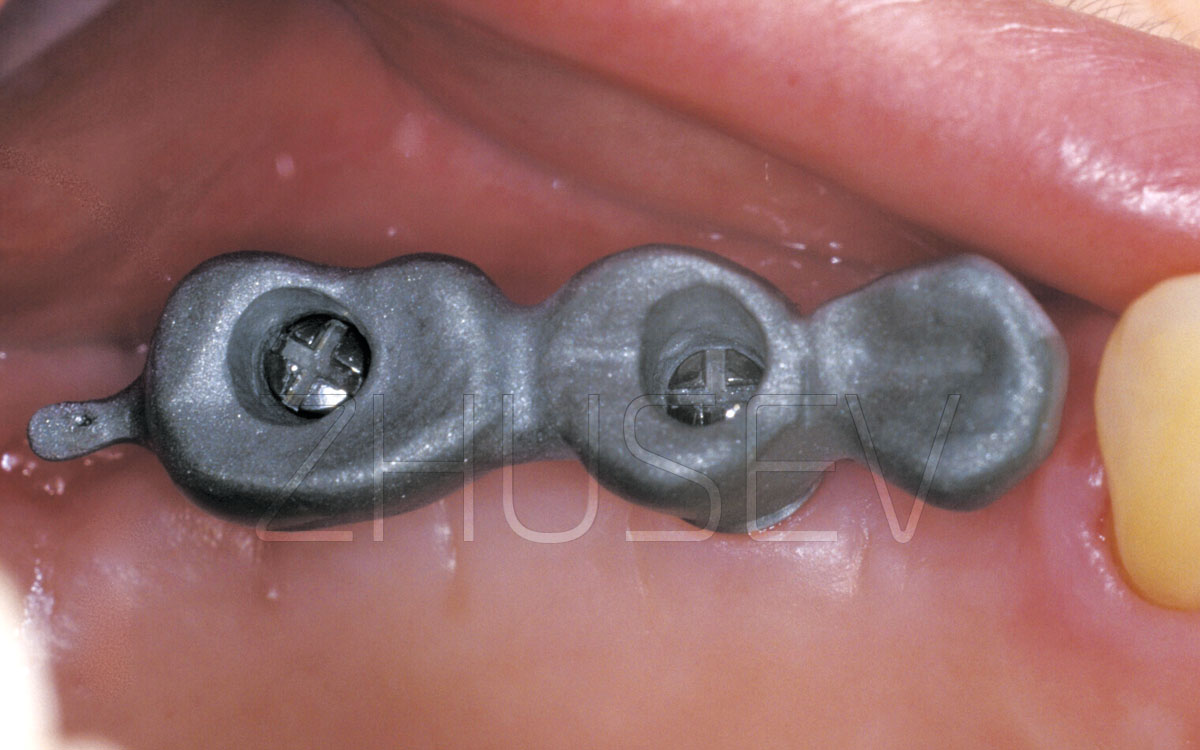
2.8.2-2M The superstructure is individually fitted depending on the patient’s bite. The mucosa has overgrown 2/3 of the implant’s surface.
If the installed implant does not cover the socket of the removed tooth incompletely, there is nothing to worry about. The main thing is that the implant has good primary stability, and the entire space between the implant and the bone alveolus is filled with a blood clot. We add the dental Solcoseryl to the closure.
In case of immediate implantation, wearing immediate prostheses installed on the mucous membrane is highly undesirable. If a temporary construction is required for the formation of soft-tissue topography (or if the patient cannot do without this tooth), it must be fixed to the adjacent teeth without squeezing the mucosa around the implant.
I would like to say once again: all cases of advanced surgical operations require well-formed manual skills of work with bone tissue, and also high sensitivity of fingers. Even if you are absolutely confident in your abilities, I highly recommend that you should first try to perform an operation on animals’ bones. The most suitable material for practicing most bone operations is a pig’s rib. This will allow you to develop new hand movements and experience specific tactile sensations.
2.8.2-2N The height of the superstructure had to be reduced, due to the deep incisal overlap.
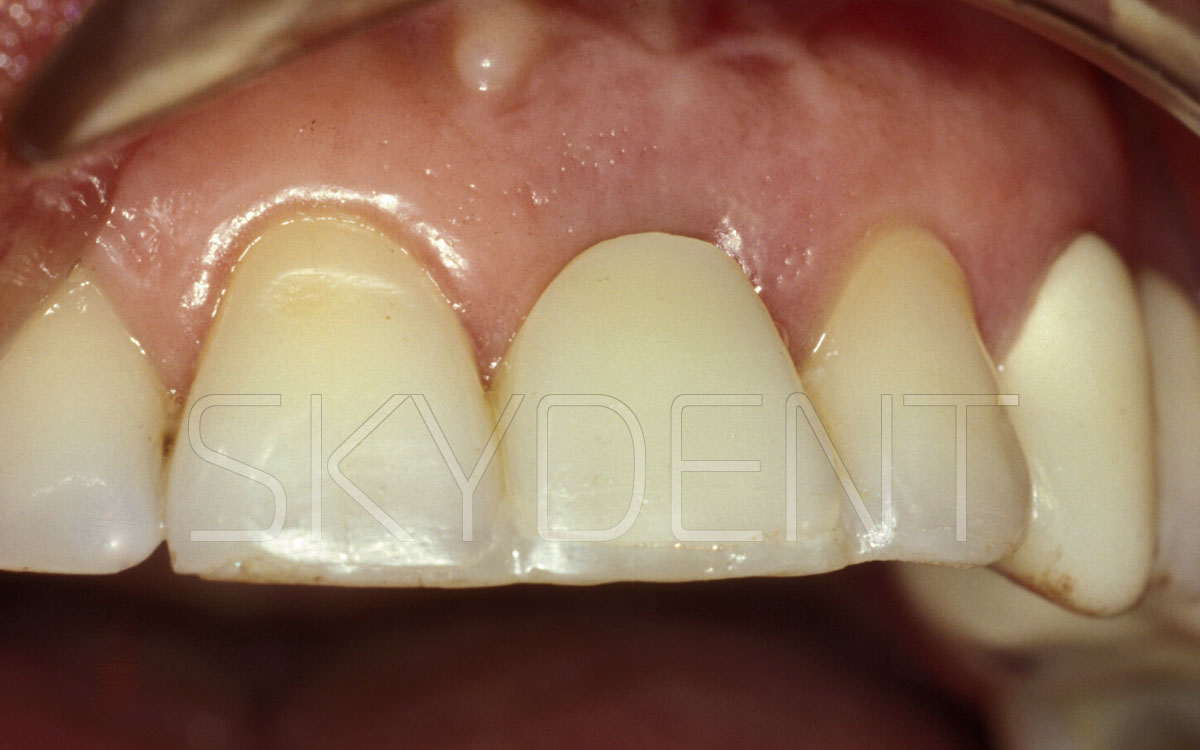
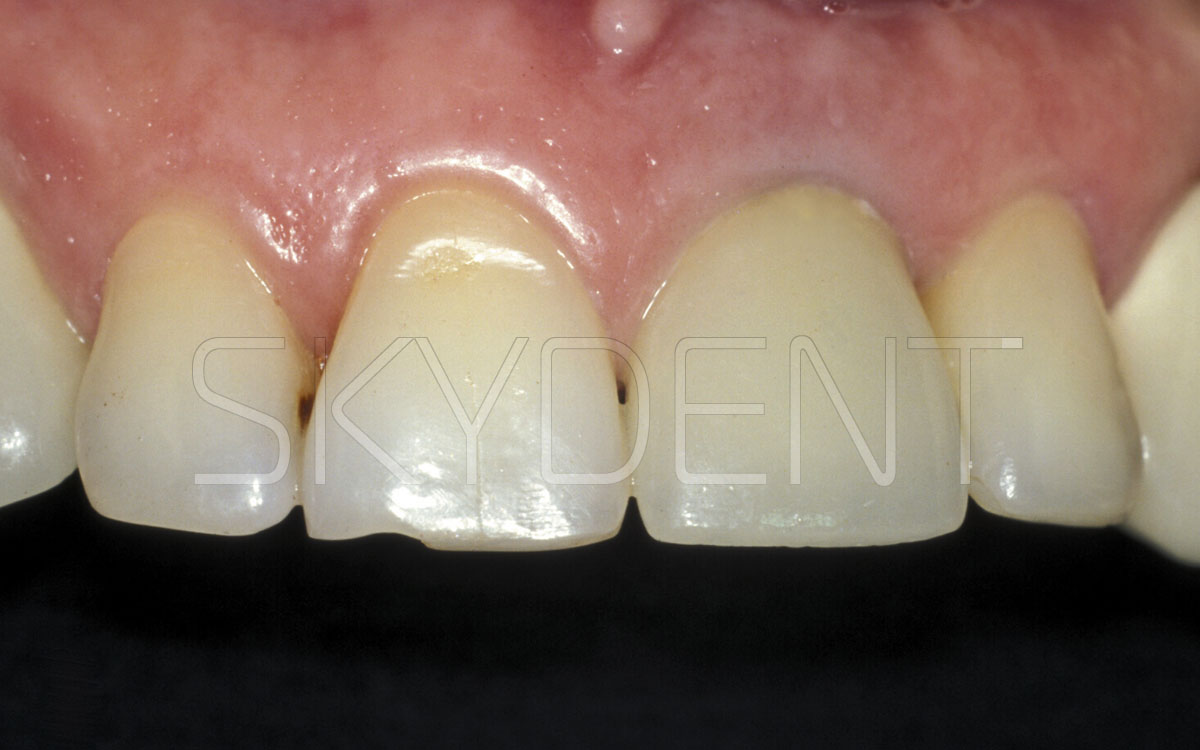
2.8.2-2O The PFM crown is fixed.
2.8.2-2P View of a smiling mouth. Pay attention to the ideal position and condition of the gingival papillae.
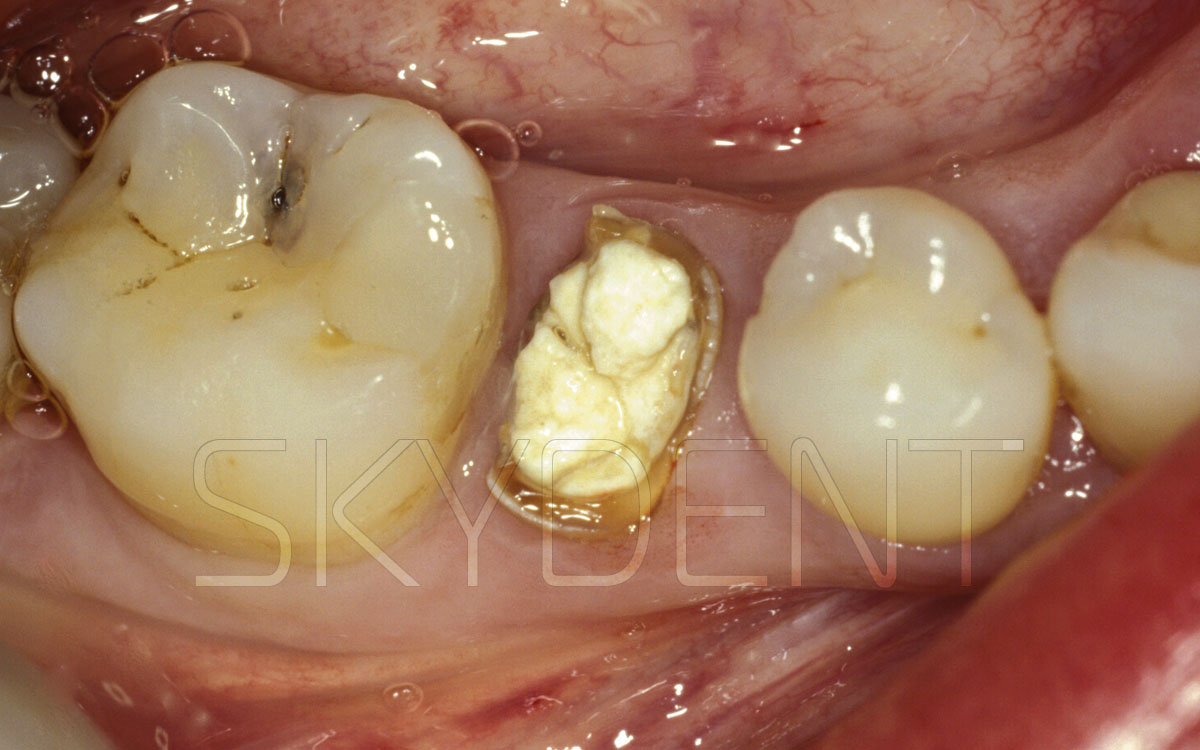
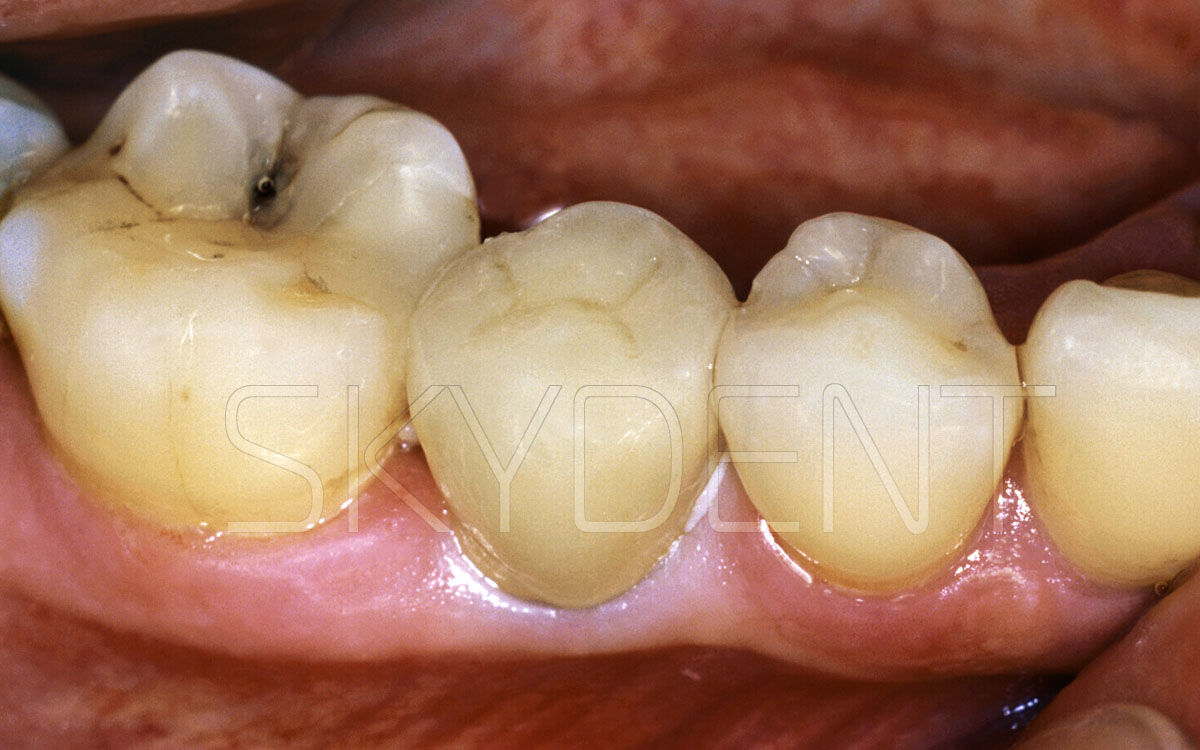
2.8.2-3A Completely destroyed crown part of tooth 45. Further restoration was rejected and immediate implantation is recommended.
2.8.2-3B The root was removed with a straight elevator, forceps were not used. The alveolar part is preserved completely.
2.8.2-3C Installing an implant in the lower jaw in the premolar area, you can save the preserve the axis of the previously extracted root.
2.8.2-3D Note that the diameter of the transgingival part of the implant completely covers the socket of the extracted tooth.
2.8.2-3E The implant completely immersed in the bone up to the level of the equator.
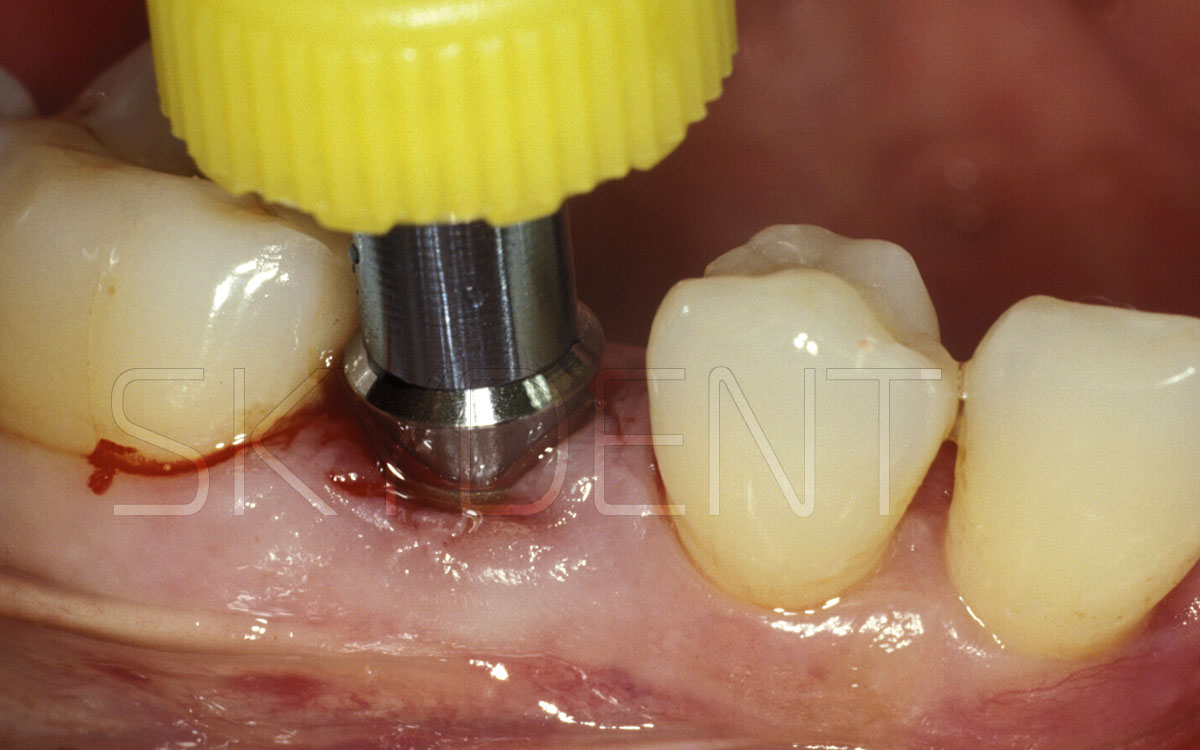
2.8.2-3F After immediate installation of a healing cap, which does not rise above the mucous membrane level, but supports its topography.
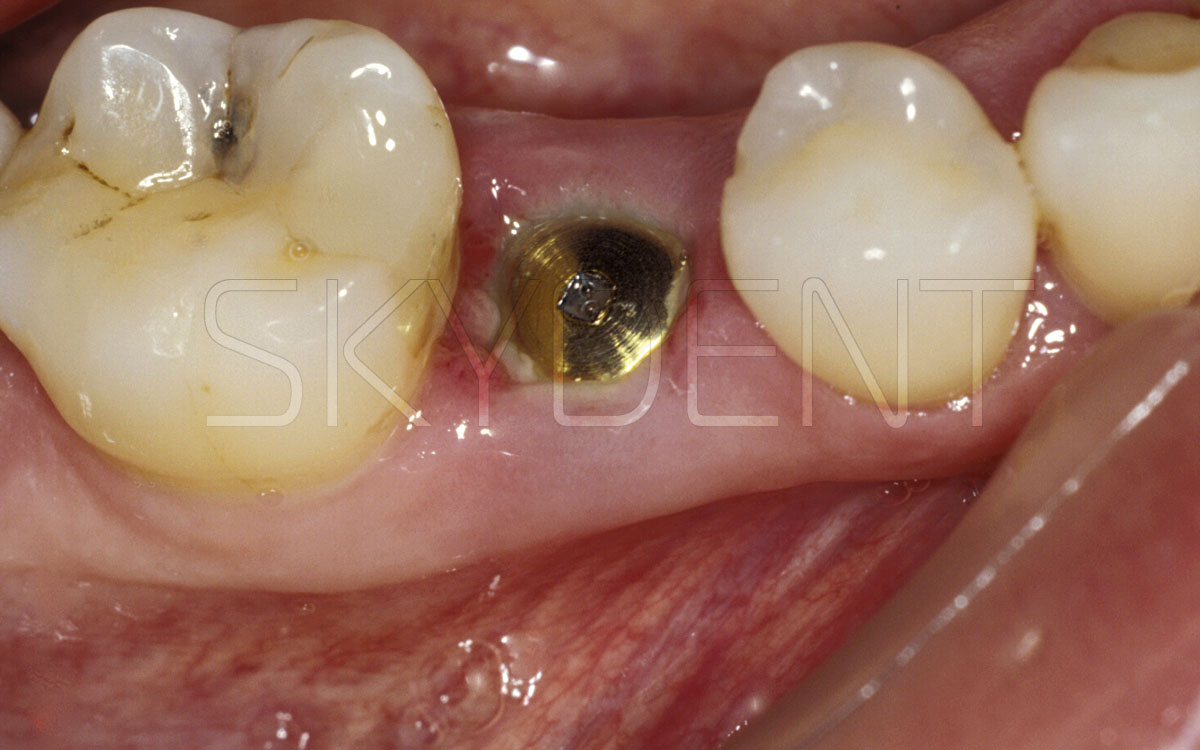
2.8.2-3G View of the operation site after 4 days. We see the mucosa overgrowing the healing cap and gradually closing it.
2.8.2-3H
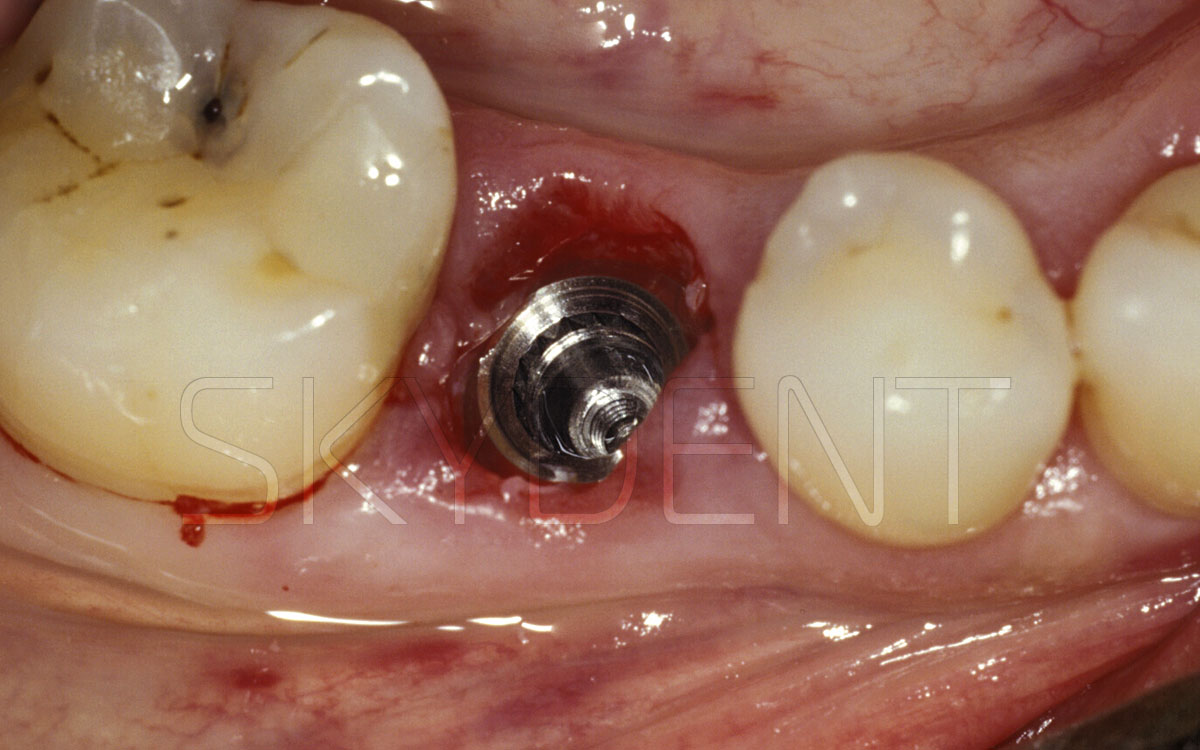
View of the implant 7 weeks after surgery. The healing cap has been removed.
It is very important, after the final fixation of the orthopedic structure, to advise the patient to increase the chewing load as gradually as possible; during the first week, they should only take soft food. After a week, you can gradually introduce meat, smoked sausage, etc., and a week later – smoked sausage, apples, etc. In general, they should try to return to the normal diet (without limitations) in 3-4 weeks. Explain that this will allow the bone tissue to adapt to increasing loads and will help to increase the life of the implant.
Many people do not differentiate between immediate implantation and immediate loading. Far from that! In case of immediate implantation, it is extremely rare to completely cover the entire socket of the extracted tooth to the full diameter and length of the implant. There will remain minor cavities between the surface of the implant and the bone alveolus. And we have to create conditions for formation of blood clot in the cavities, and their reorganization into healthy bone tissue. In this case, immediate loading can only do harm, and most likely, it will not be bone tissue that will form in these cavities, but connective tissue. The growth rate of connective tissue is much higher, and, actively expanding, it can prevent full osseointegration of the implant.
In order to determine the diameter of the implant to install, take the depth gauge of the thickest implant available, and lower it into the socket of the extracted tooth. If it reaches the depth of 3-5 mm, then everything is normal, and you can continue the surgery. But if the gauge goes freely to more than two thirds of the depth chosen, it will be better to discard immediate implantation! Remember that the tooth socket always has a conical shape, so in most cases of immediate implantation, conical implants should be used.
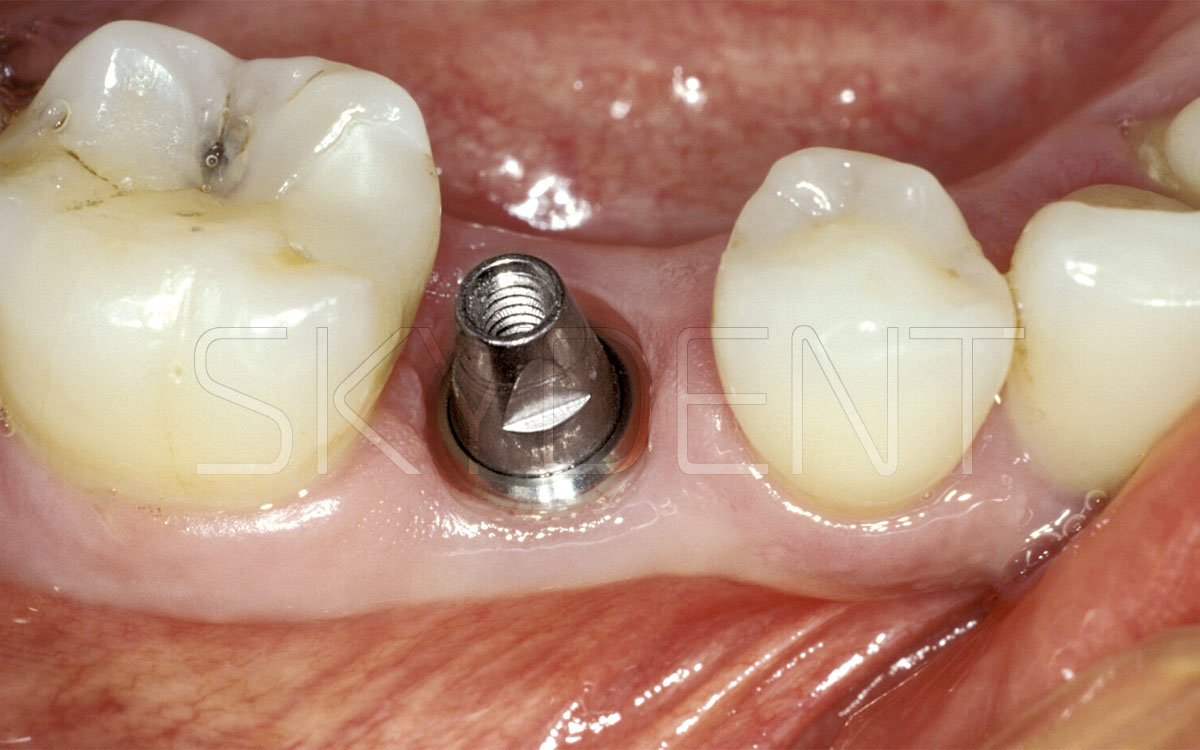
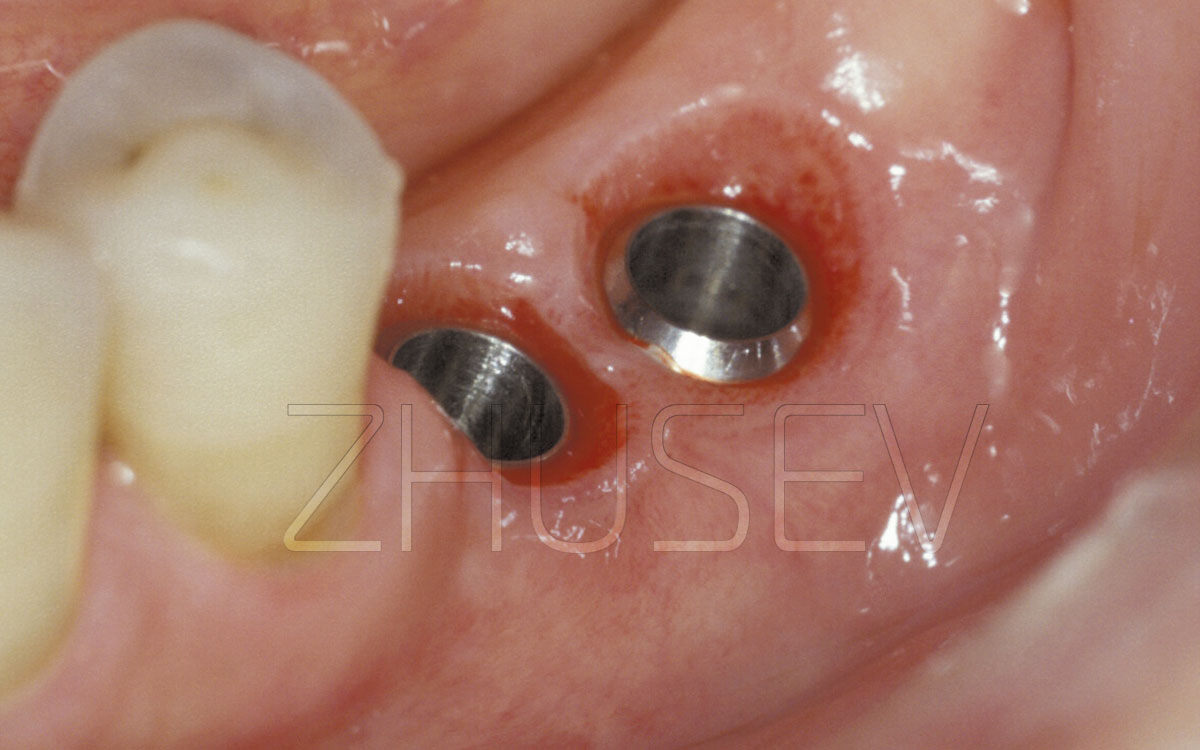
2.8.2-3I
A suprastructure (abutment) is installed. Note the well-formed gingival sulcus at the implant.
2.8.2-3J
Two months after the operation, the orthopedic work is completed.