© Non-classified materials. An illustrated manual of implant dentistry.
Main » Prosthetic procedure

3.2b Impressions. Open tray
Impressions. Open tray Impressions. Open tray Impressions. Open tray Impressions. Open tray Impressions. Open tray Impressions. Open tray Impressions. Open tray
 

Its major difference from the closed tray technique is that the impression coping case stays fixed tight in impression paste. That is why there arises a need to unscrew the fixing screw before we take the impression out of the mouth and, consequently, to use a monophasic impression material. Let us review this technique step by step.

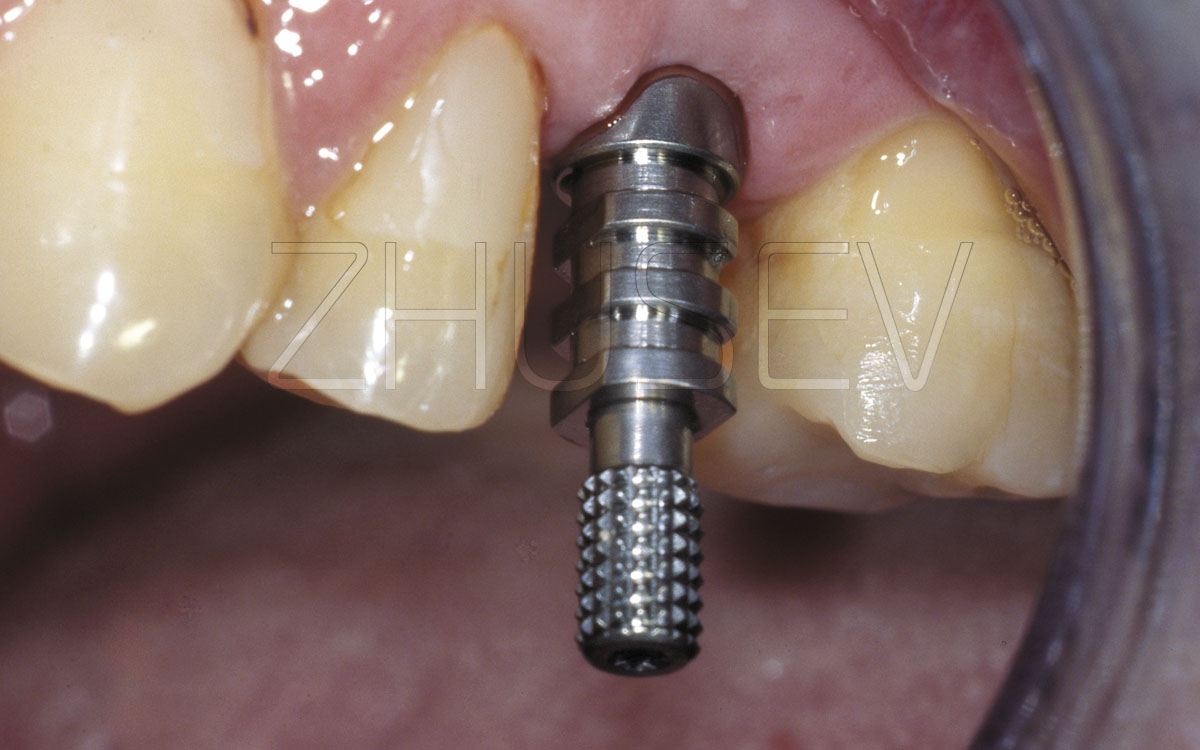
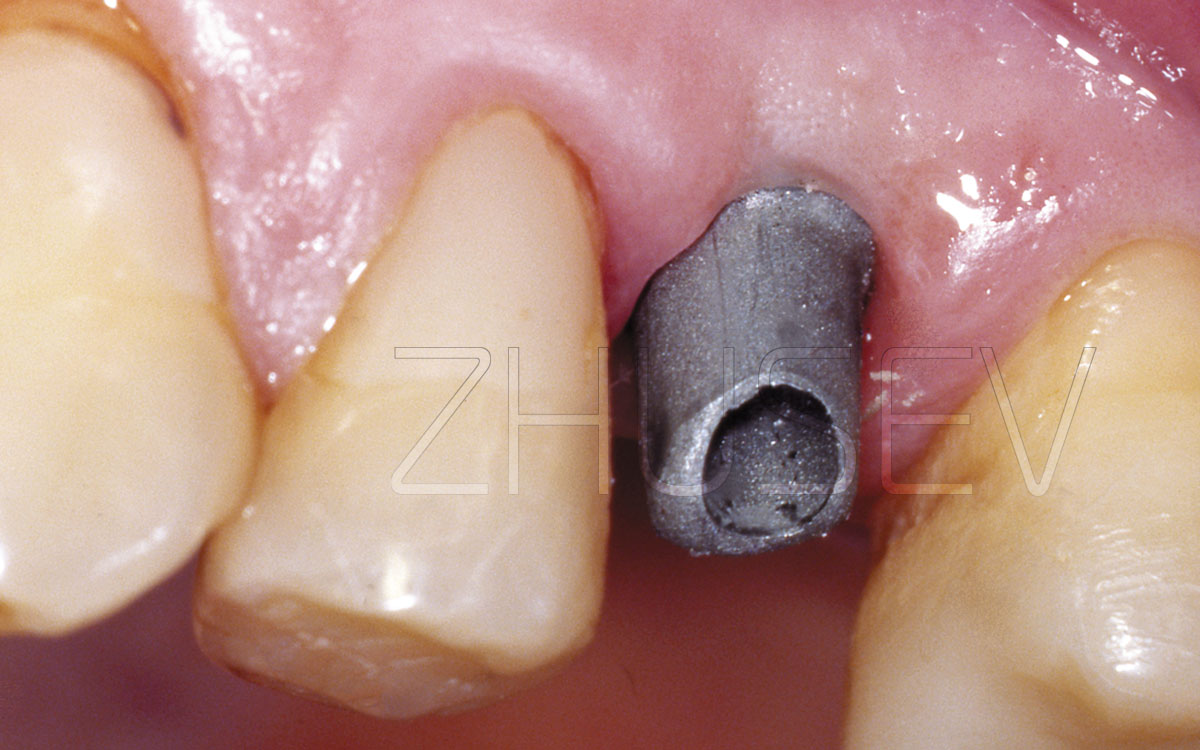
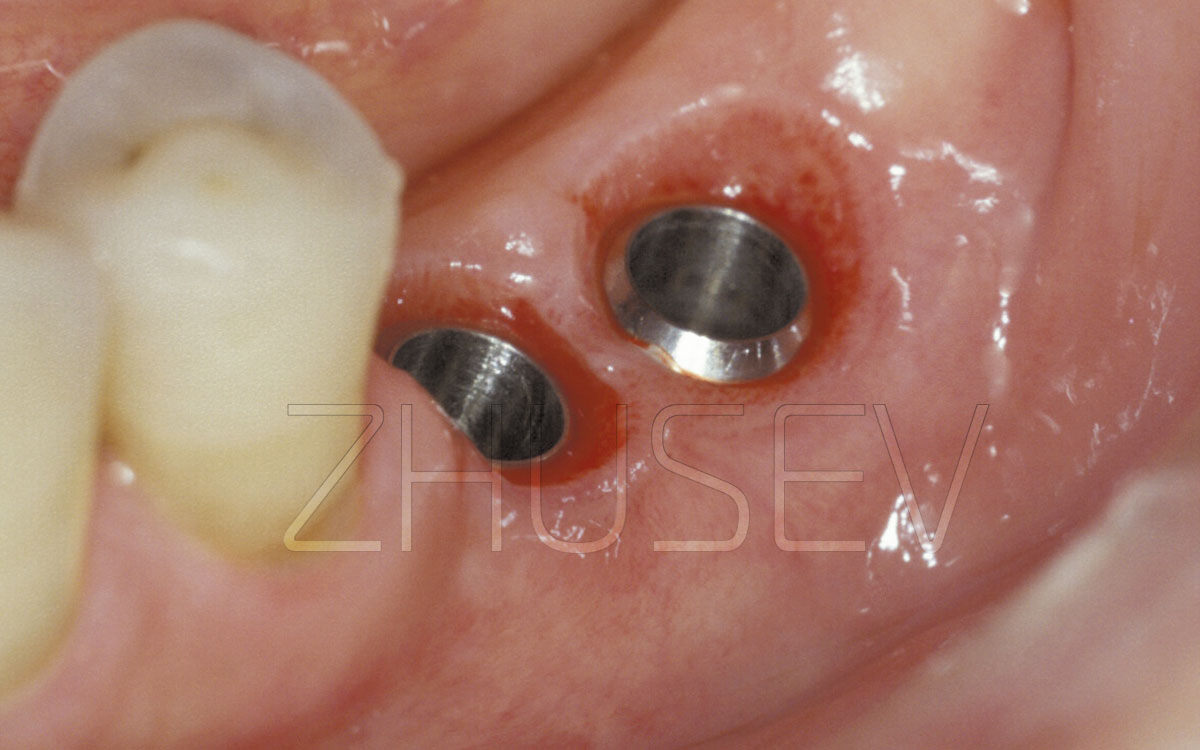
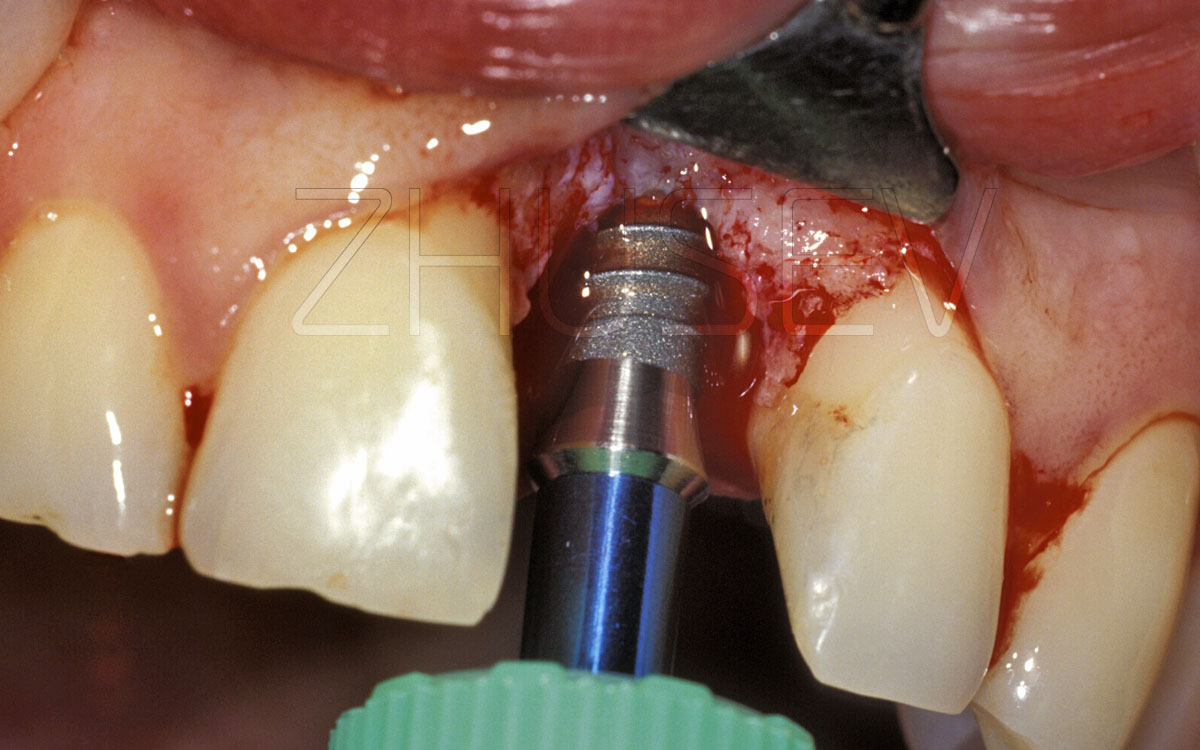
First, the impression coping should be chosen in accordance with the height, so that an impression tray with the paste cab be taken through between the fixing screw and the tooth-antagonists 3.2-4C. Then, make a hole in the impression tray above the fixing screw that makes it possible to pull this screw out (actually, because of this hole this method got the name of “open tray impression”).

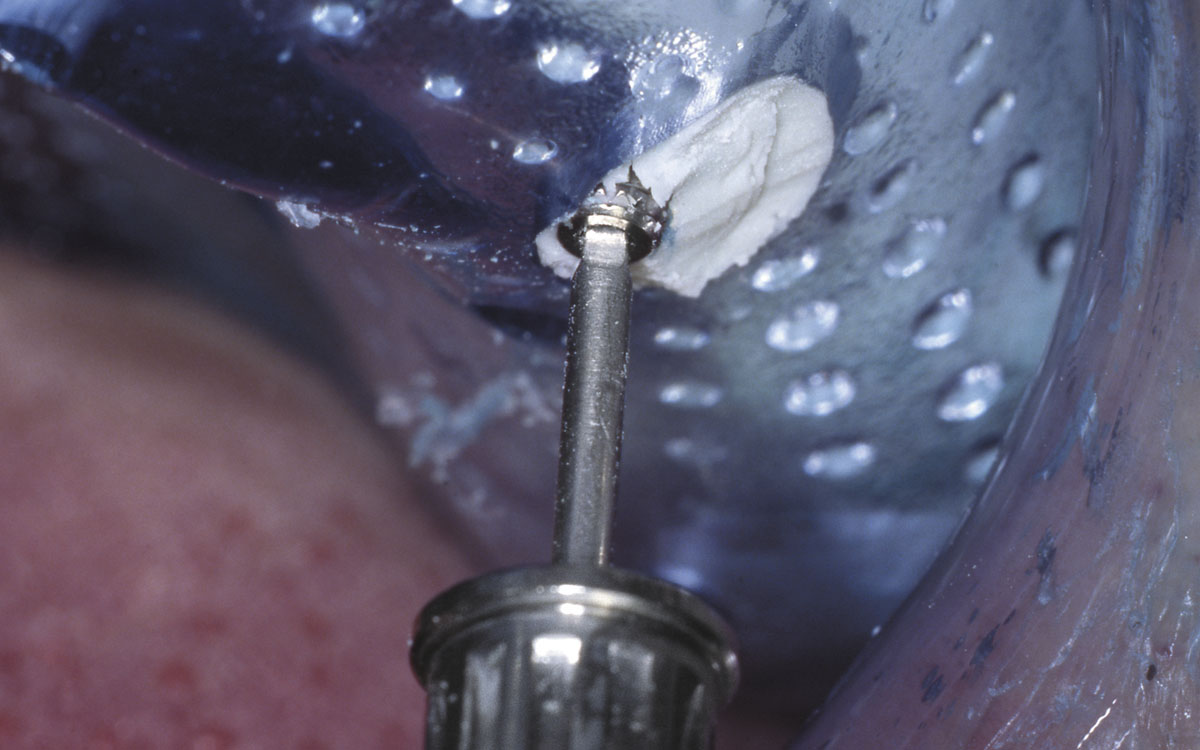
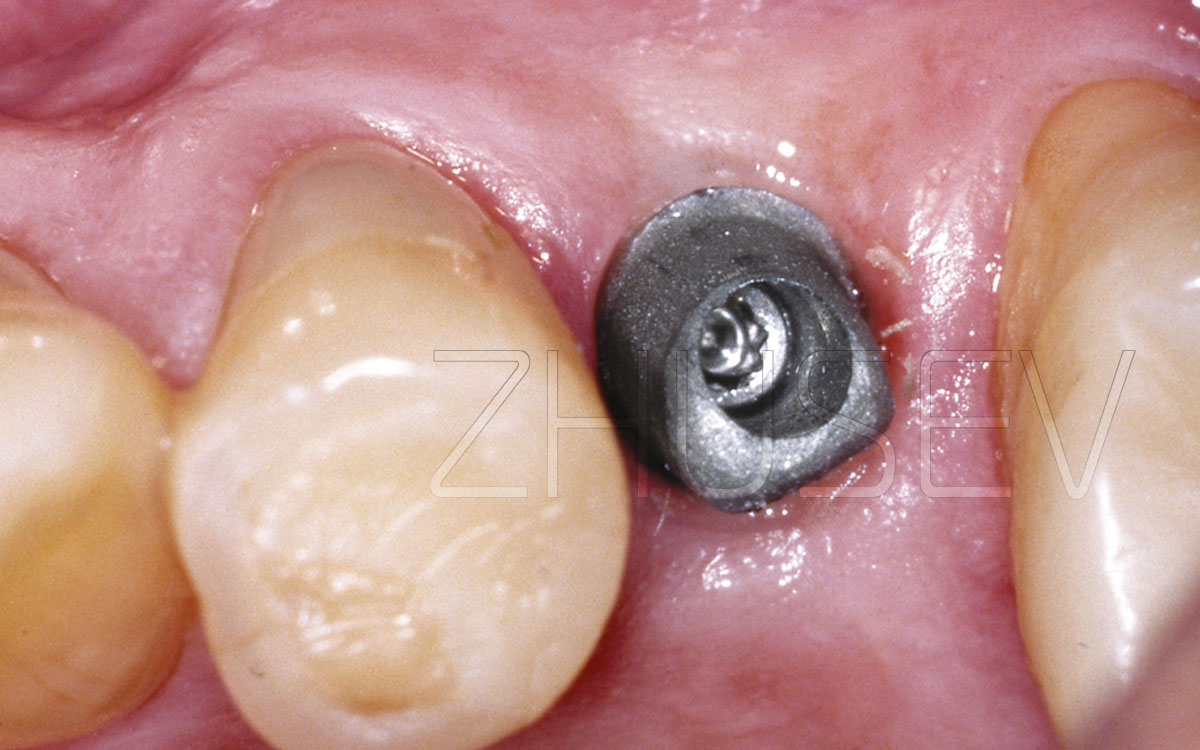
Insert the impression coping into the implant and tighten the fixing screw. Put the impression material (such as Impregnum) on the tray and take into the mouth. After the mass hardens, first unscrew the fixing screw 3.2-4D and only then take the tray from the mouth (of course, never take this tray into the mouth again and don’t re-use the corrective compound).

In this case, the impression coping should stay fixed tightly in the impression paste. Then the dental technician attaches an implant replica directly to it (with the impression coping still being placed in the impression paste). Next, in the same way, as with the previous technique, we fill the part of the implant replica with a gingival mask and cast a base of the model of die stone.

Generally speaking, if you work accurately and carefully, using either technique will not influence the quality of transferring your implant to another position. Try to take a few impressions using different techniques, and analyse the results. Ideally, you should master both these techniques in practice equally well. And in time, you will be able to choose the right method for a specific purpose.

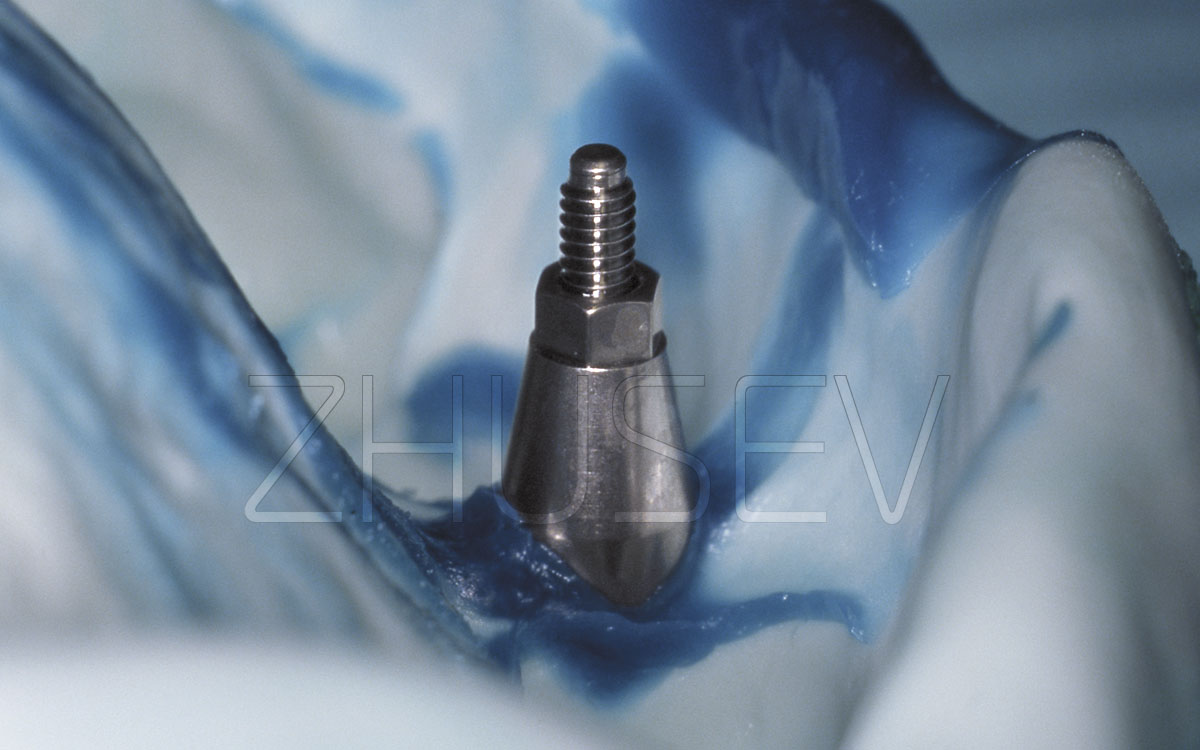
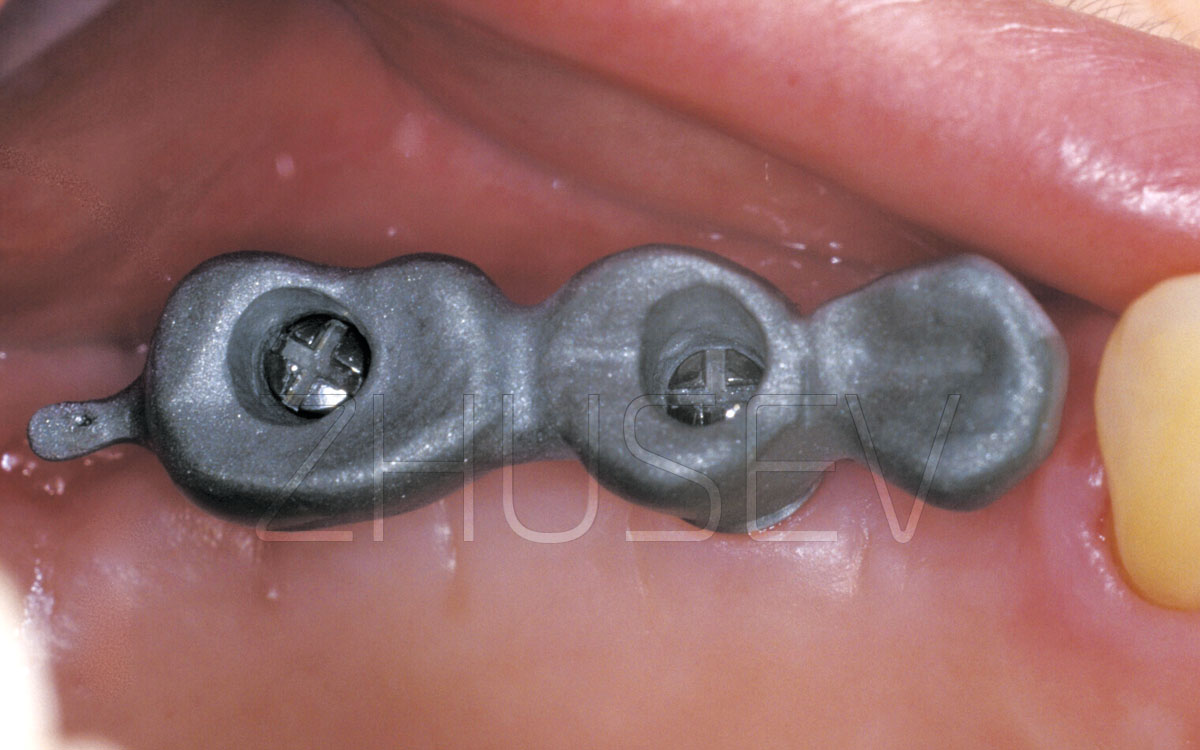
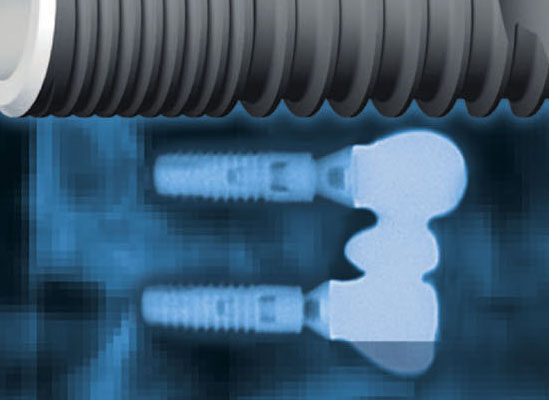
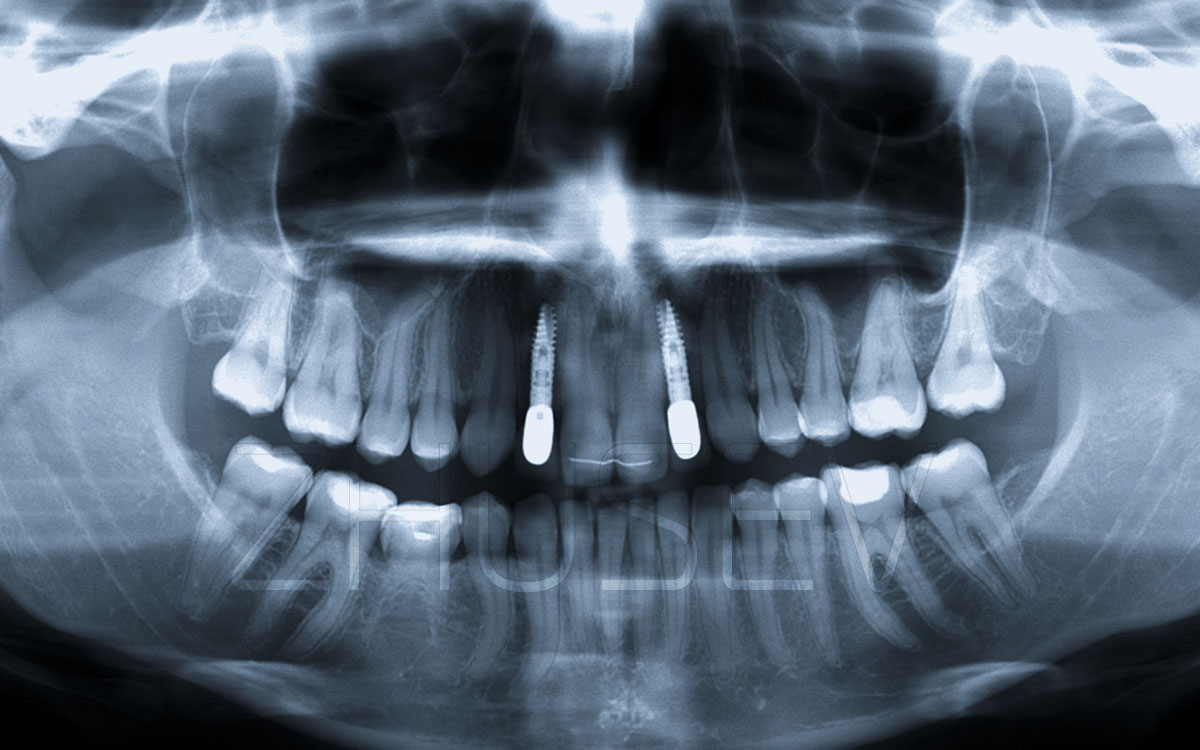
But let us come back to the dental laboratory and see what happens then. As a result of the above procedures, the dental technician makes a gypsum master cast with a metal implant replica, fixed in accordance with the implant’s position (and its place) in the mouth. And then with consideration of required inclination of the implant, the interdental height, etc., we select the type of the future crown’s bearing part, called a suprastructure (a supporting head or an abutment). All implant manufacturers produce a wide range of suprastructures of different heights, diameters, and angulations. It will be better if the suprastructure is chosen by a dental technician in the laboratory, but not an orthopedic surgeon in his office. On the gypsum model, all positions and inter-relations can be seen better. This way, the selection procedure will be more effective.

A dental technician should have all types of abutments used for the given implant system (or at least the catalogues with their high-quality pictures and description). Only in this case he will be able to select an ideal individual option, and not to try to adopt a standard abutment.

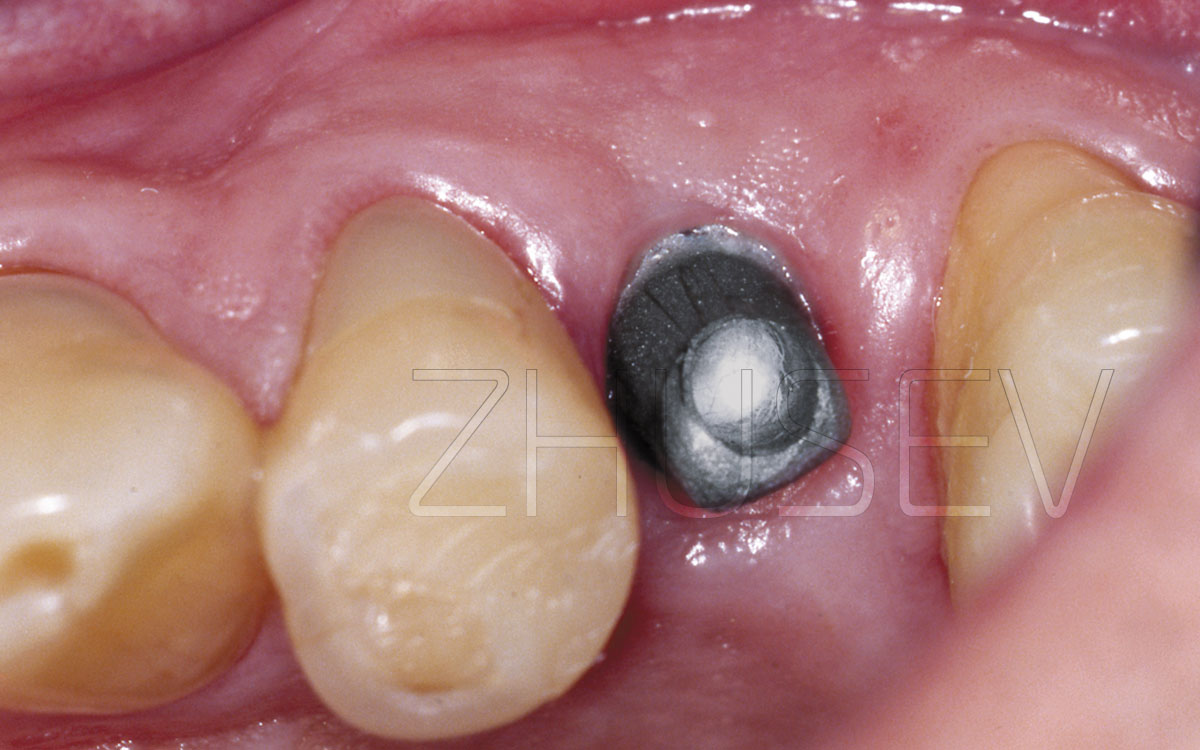
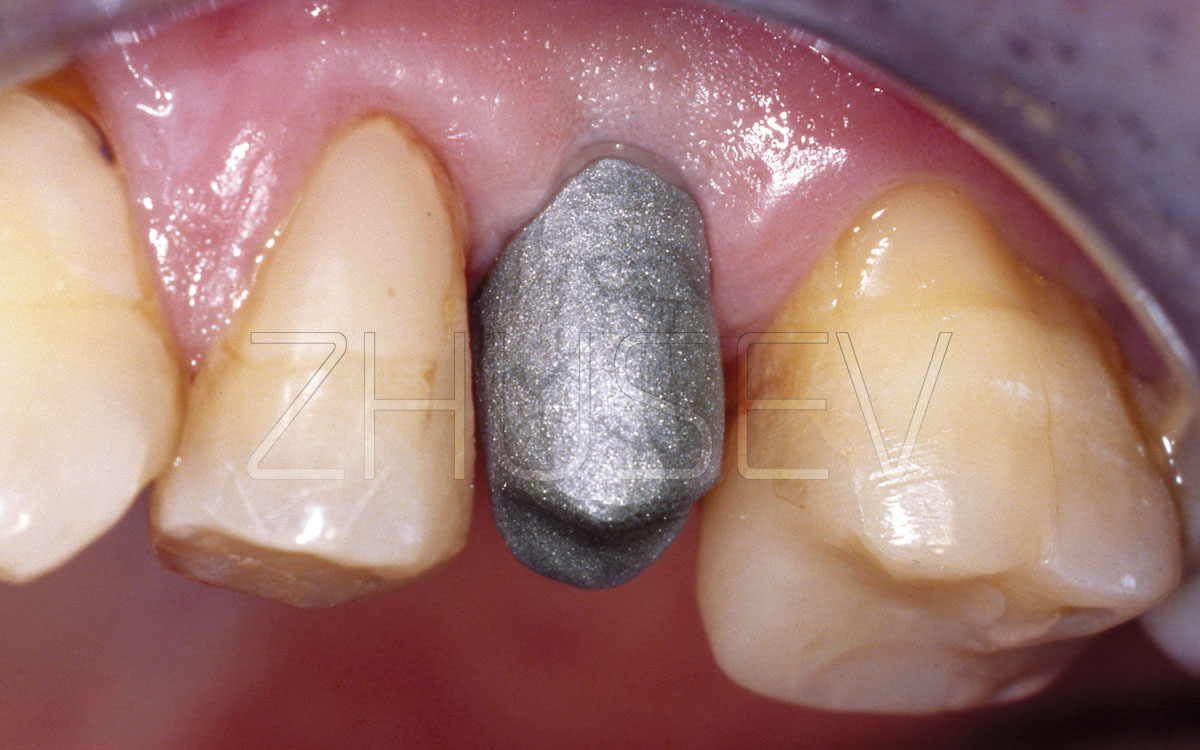
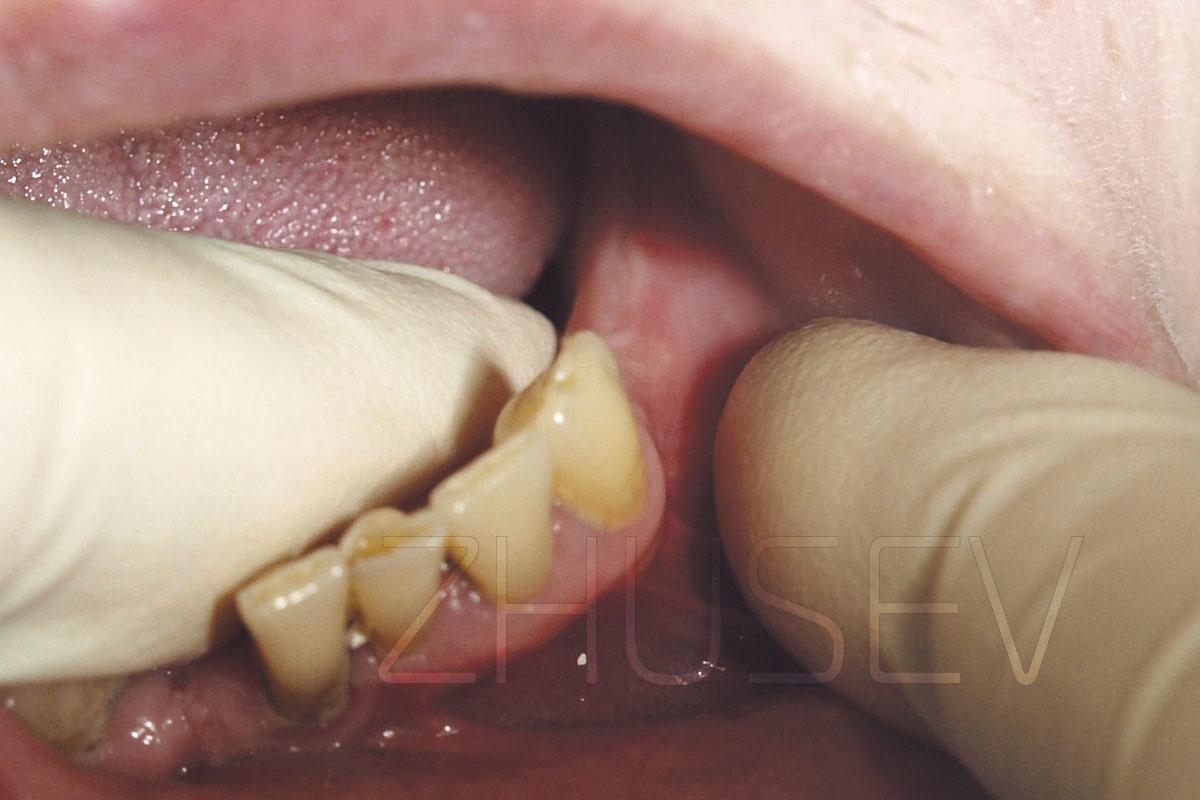
After the suprastructure is selected, the dental technician makes a model of the wax composition of the future crown and then casts it of metal. Before putting the ceramic paste 3.2-4M, it makes sense to try on the completed metal framework in the mouth, to make sure that it squeezes no soft tissues around the implant.

 
3.2-4A The healing cap should extend the level of the surrounding interdental papillae. If even slight bleeding from under the healing cap is noted, the impression taking procedure should be postponed for a few days.
 
3.2-4B We can go on to taking an impression only after the entire forming of the tissues of the mucosa’s “funnel”.
 
3.2-4C The impression coping for the open tray is fixed in the implant. The fixing screw should extend the occlusal surface of the adjacent teeth not less than 5-10mm.
 
3.2-4D After the impression compound hardens, first remove the coping’s fixing screw and only then take the impression out of the mouth.
 
  The impression coping for the open tray (pick up) and an implant replica (yellow).
 
3.2-4E After the impression compound hardens, first unscrew the fixing screw, and only then take the impression out of the mouth.
 
3.2-4F Unscrew the impression coping, carefully clean its internal surface, and insert the healing cap in its place.
 
3.2-4G View of an impression taken with the open tray technique. Pay attention that the impression coping remains fixed in the impression.
 
3.2-4H While fixing a transfer pin, never take the transfer coping out of the impression compound.
 
3.2-4I The standard abutment should be ground a little in accordance with its angulation and the actual clinical height.
 
3.2-4J On the gypsum model, check the accuracy of fitting and the cap’s marginal fit to the abutment shoulder.
 
3.2-4K Screw the abutment to the implant with a torque wrench, observing the torque values recommended for your system.
 
3.2-4L After the complete attachment of the abutment make sure that it squeezes no soft tissues anywhere.
 
3.2-4M Before cementation, cover the slot of the abutment fixing screw with an insulating gasket.
 
3.2-4N The cap on the abutment also should not squeeze the soft tissues around the implant.
 
3.2-4O View of the occlusal surface. Pay attention to the greater flatness of tuberosities, depending on the occlusion.
 
3.2-4P A cement-retained crown. The absence of soft tissue hypoxia around the implant proves its correct fitting.
 
3.2-4Q X-ray image three months after the crown’s final fixing with cement.
 

Sinus lift complications 4.7 Errors and Complications   
Problems of the prosthetic procedure 4.9 Errors and Complications   
Sinus lift 2.8.3 Surgical Procedure   
Preoperative examination 2.2 Surgical Procedure   
Occlusal screw-retained crowns 3.4 Prosthetic procedure   
On shape and surface morphology of dental implants 1.3 Introduction   
Splitting an alveolar ridge 2.8.5 Surgical Procedure   
On implants and implant key terms 1.1 Introduction   
Initial meeting with the patient 2.2.1 Surgical Procedure   
Implant selection 2.2.2 Surgical Procedure