2.8.5
Splitting an alveolar ridge
Splitting an alveolar ridge Splitting an alveolar ridge Splitting an alveolar ridge Splitting an alveolar ridge Splitting an alveolar ridge Splitting an alveolar ridge Splitting an alveolar ridge
One of the most frequent limitations in planning operations for dental implantation is insufficient thickness of the alveolar process where the height remains normal. Often this thickness does not exceed 2-4 mm 2.8.5-1A, which actually excludes installation of even miniimplants without preliminary osteoplasty.
In most cases, this is due to the conventional technique of extracting teeth by dislocating them in the vestibular direction of the oral cavity, and as a rule the vestibular wall deteriorates (and in some cases just breaks off together with the tooth root).
Besides, due to successes of orthodontists, this problem has only worsened: now they can reposition teeth correctly without any problems, making enough space for installation of dental implants, but in this case, as a rule, the bone stretches and loses its width.
To solve this problem, they traditionally used the method of transferring bone blocks from donor sites with fixation on special micro-screws on the cortical bone at the bone-deficiency site. A newer method presupposes increasing the width of the alveolar process by splitting it, which does not require auto bone extraction, and the material used is placed inside the bleeding spongy bone layer, rather than the cortical layer, which greatly improves the restructuring and replacement of the material with bone.
On the upper jaw, the operation is performed in the same way, and it is also easier, due to greater plasticity of the bone, its pneumatisation and trophicity in this area.
Before surgical splitting of bone, do not forget to give the patient 250 mg of soluble aspirin (if there is no contraindication). This will prolong the bleeding and thus improve the initial stage of reorganization of osteoplastic material.
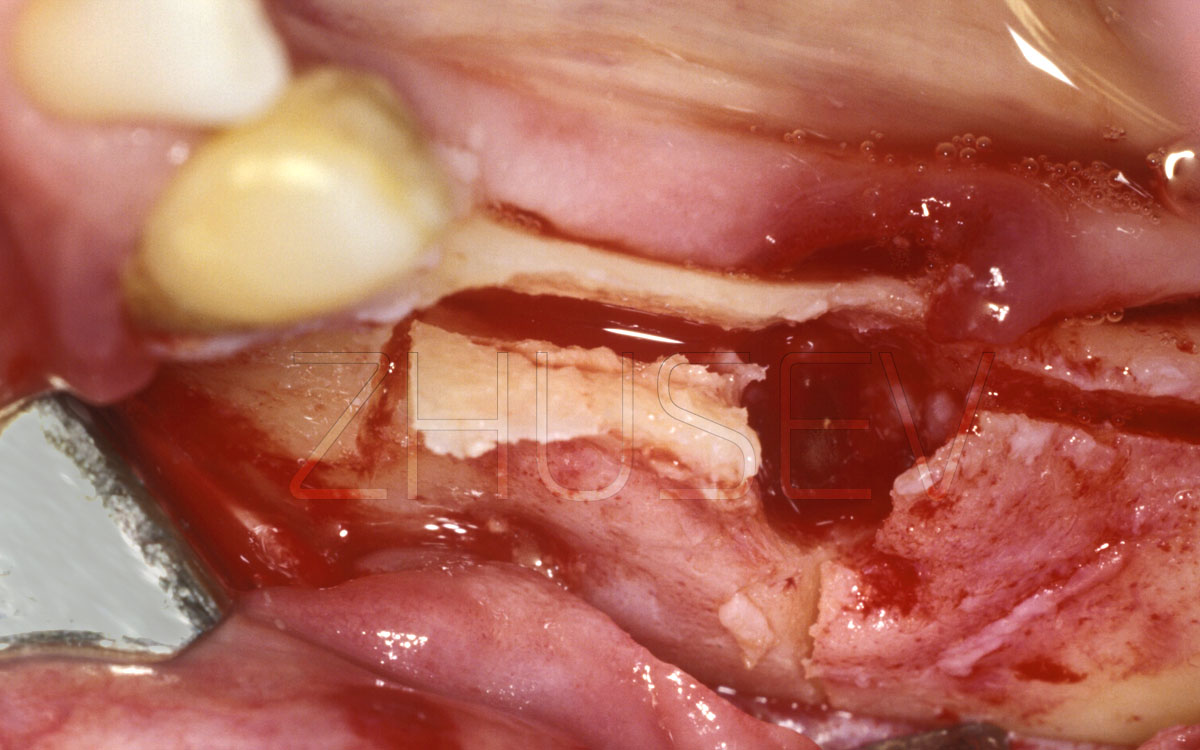
2.8.5-1A Mucoperiosteal flaps are opened. the alveolar process has a sharp top, and its width is definitely insufficient for installation of dental implants.
2.8.5-1B At first, vertical osteotomy is performed using Lindemann thin drills or piezoelectric surgery. The length of the segment is determined by the number and size of the implants, which are planned to be installed in future. The depth of the sawcut should be at least 1-2 mm greater than the length of the implant.
Let's look at the specifics of this technique and a clinical case.
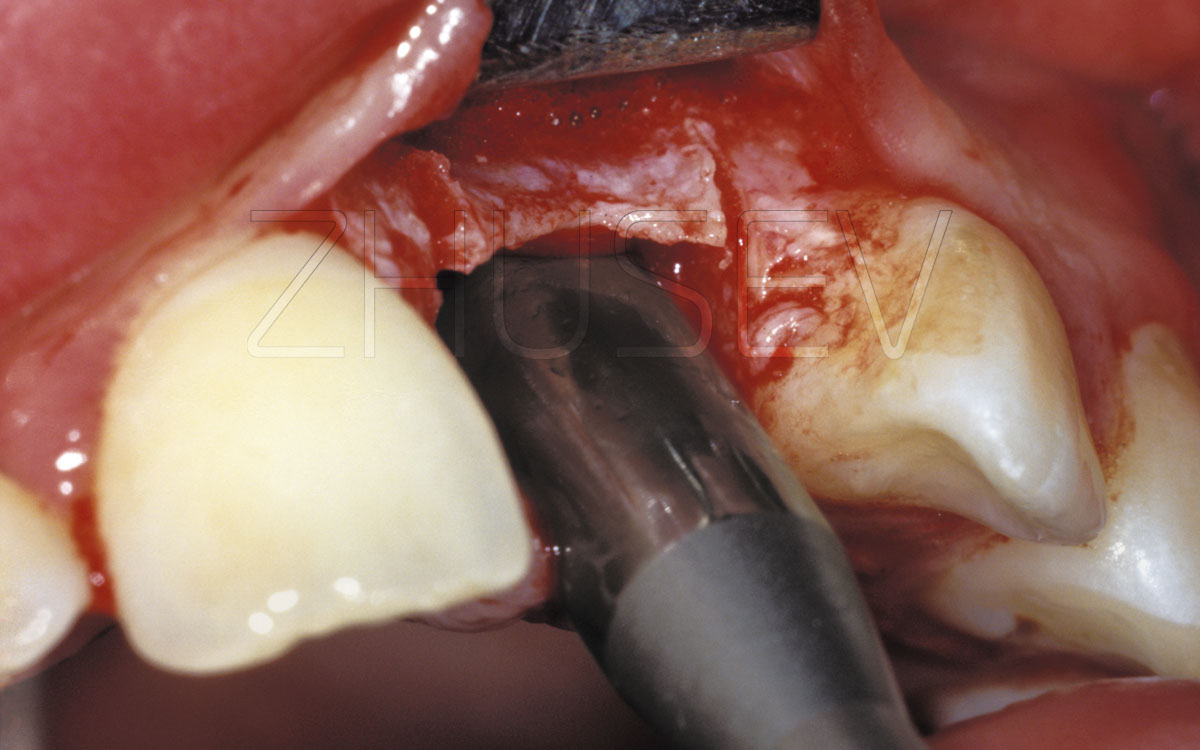
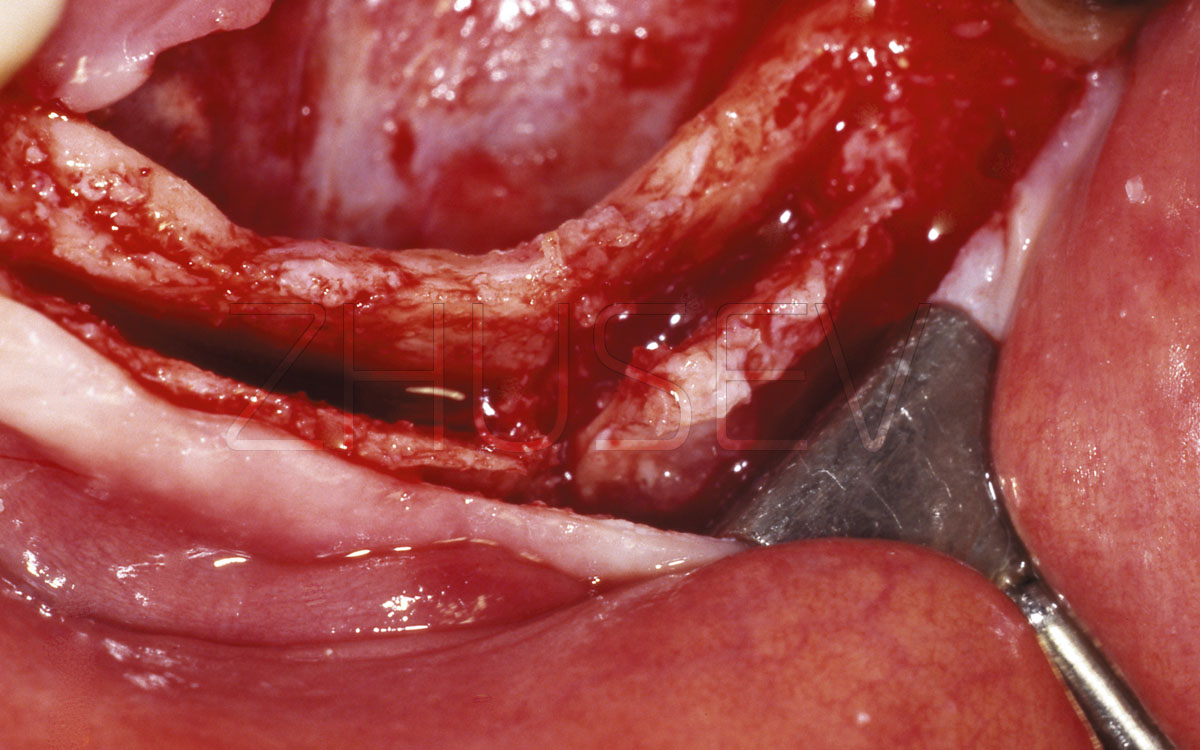
2.8.5-1C We make an additional vertical saw-cut in the front section, connecting to the longitudinal cut. Then a special chisel is inserted into the longitudinal sawcut with light pushing movements. If such a chisel is not available, it is possible to use a straight elevator, but then the advance of the instrument deeper into the bone should be more careful to avoid breaking off a fragment.
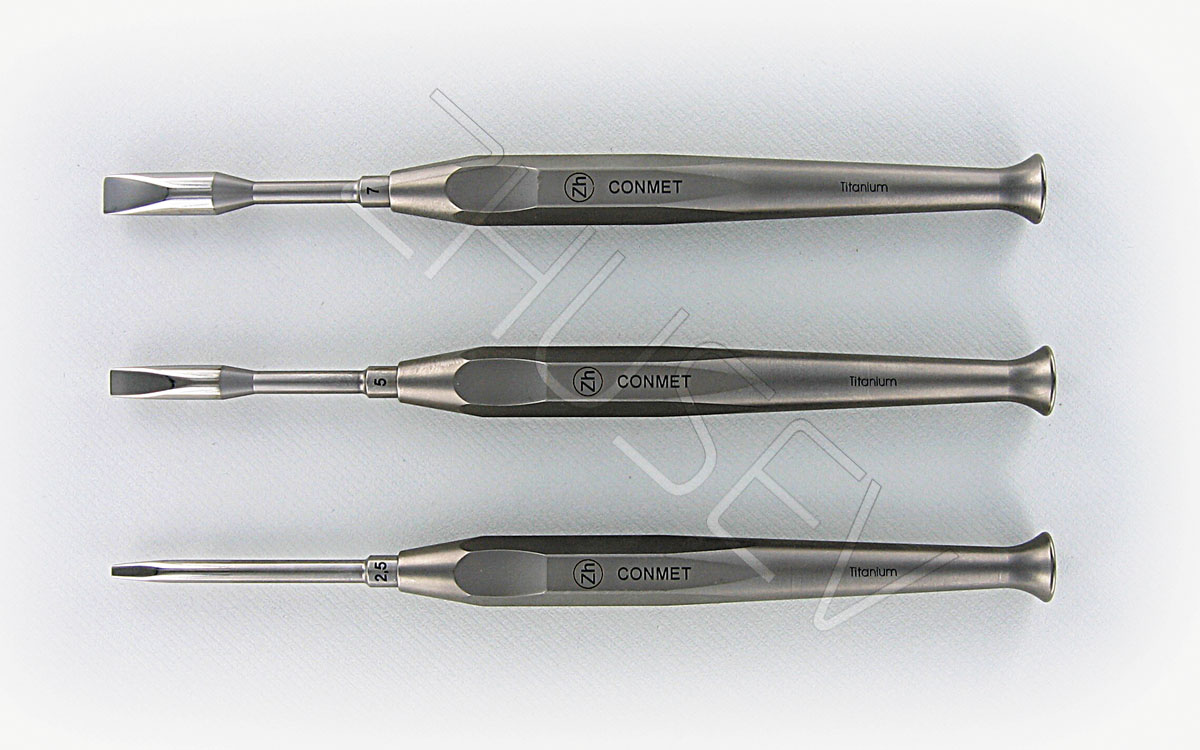
2.8.5-1D A set of special bone chisels for splitting an alveolar process.
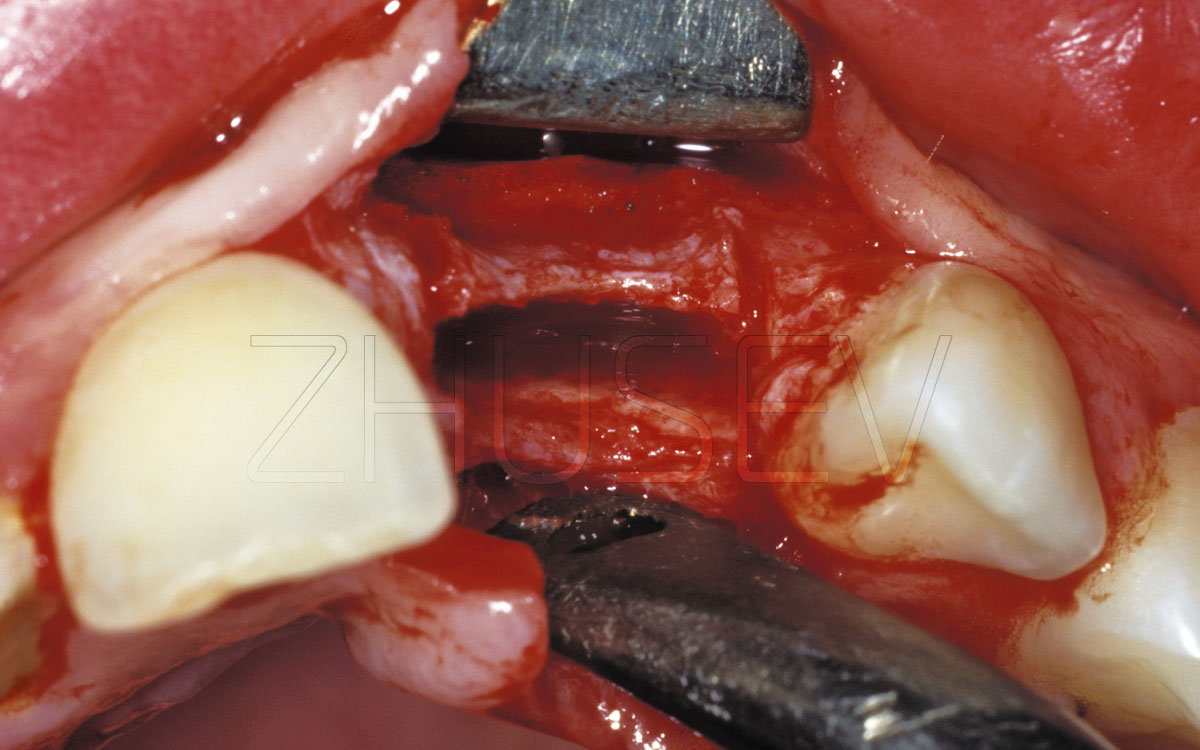
2.8.5-1E During splitting performed on the lower jaw, due to its highly mineralization, the cortical layer can crack horizontally or vertically. In this case, it is necessary to take a chisel with a wider working part and, gently pushing the bone deeper than the cracking line, carefully continue to diverge the fragments to the required width. Fragments that are cracked do not need to be broken or extracted!
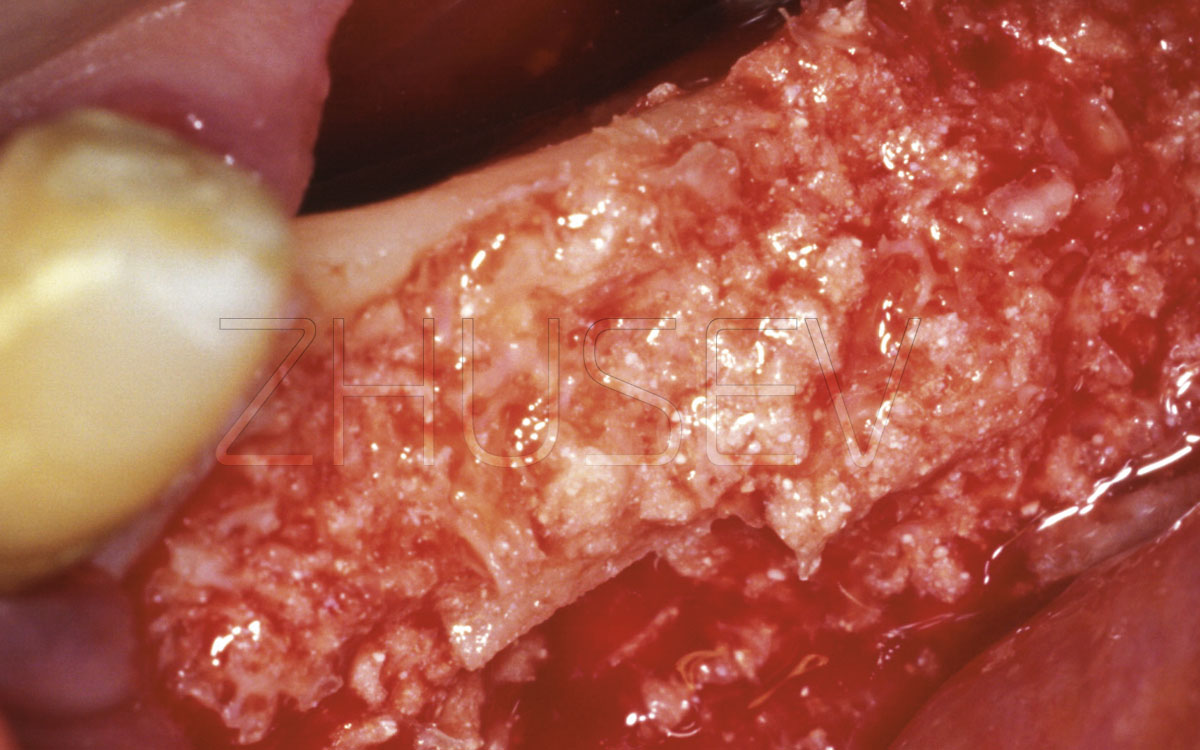
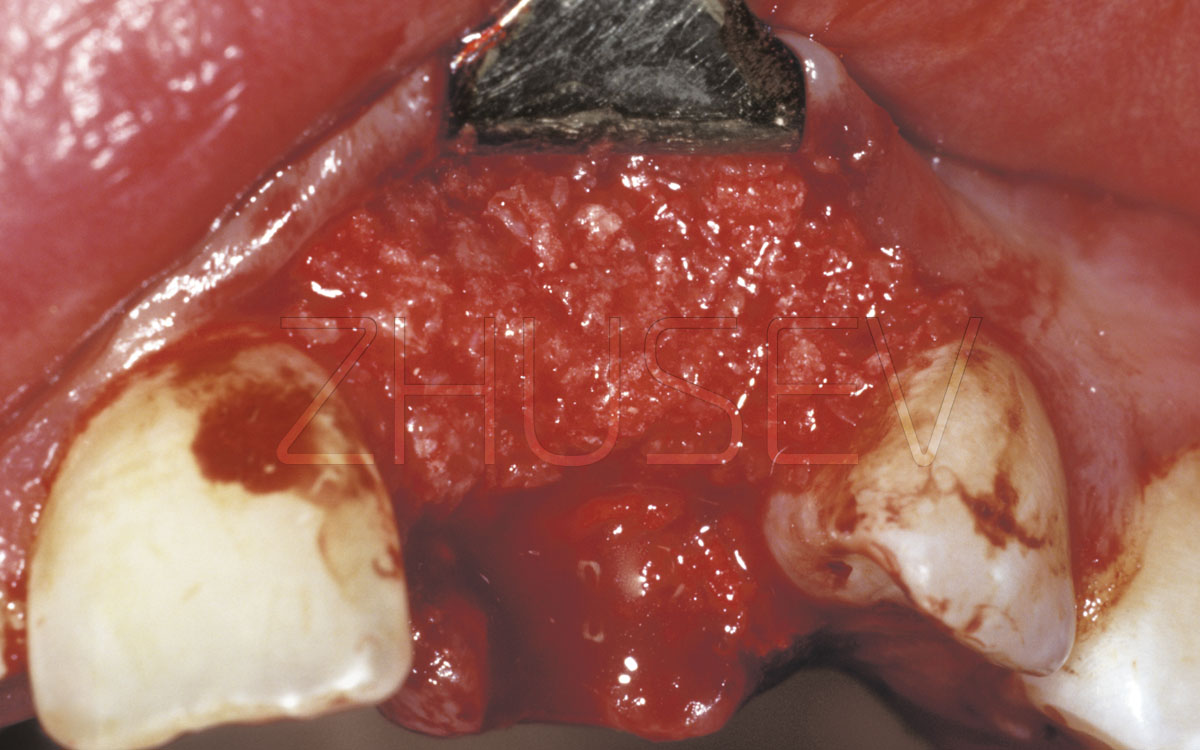
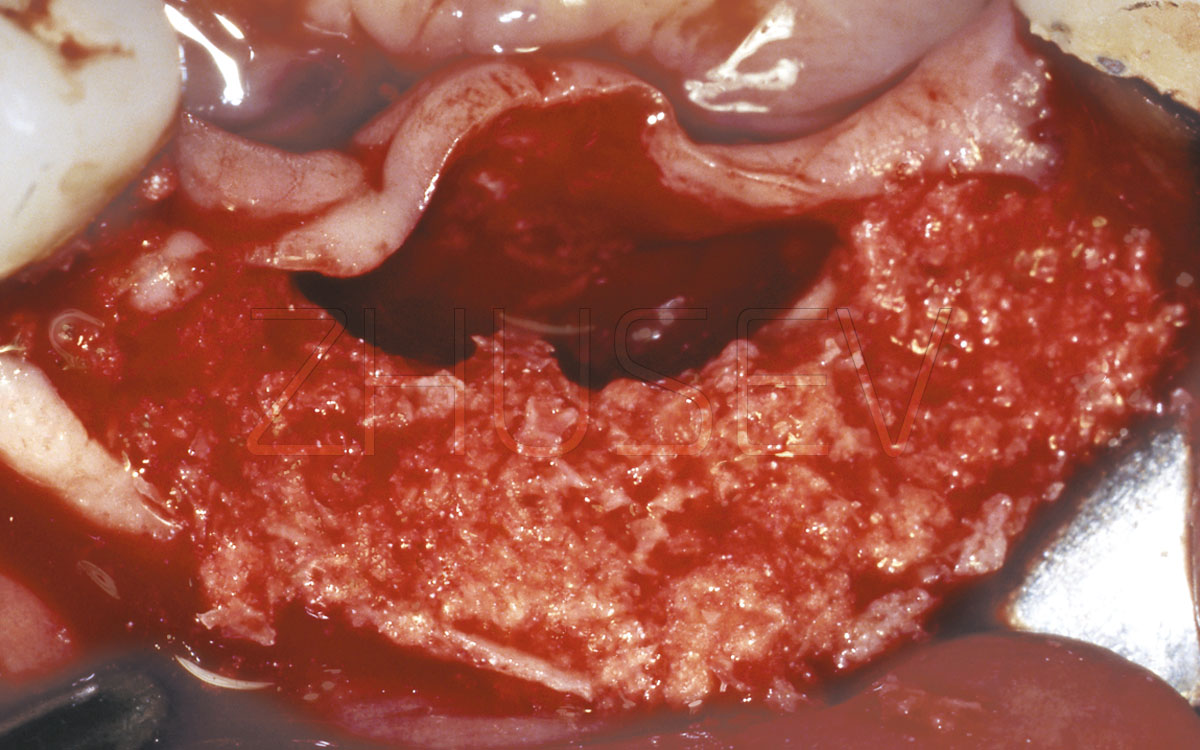
2.8.5-1F All the space formed is filled with osteoplastic CollapAn-L. It is very important factor to support maintenance of bleeding in the wound! To do this, you can appoint the patient 500 mg soluble aspirin for 30-40 minutes before surgery.
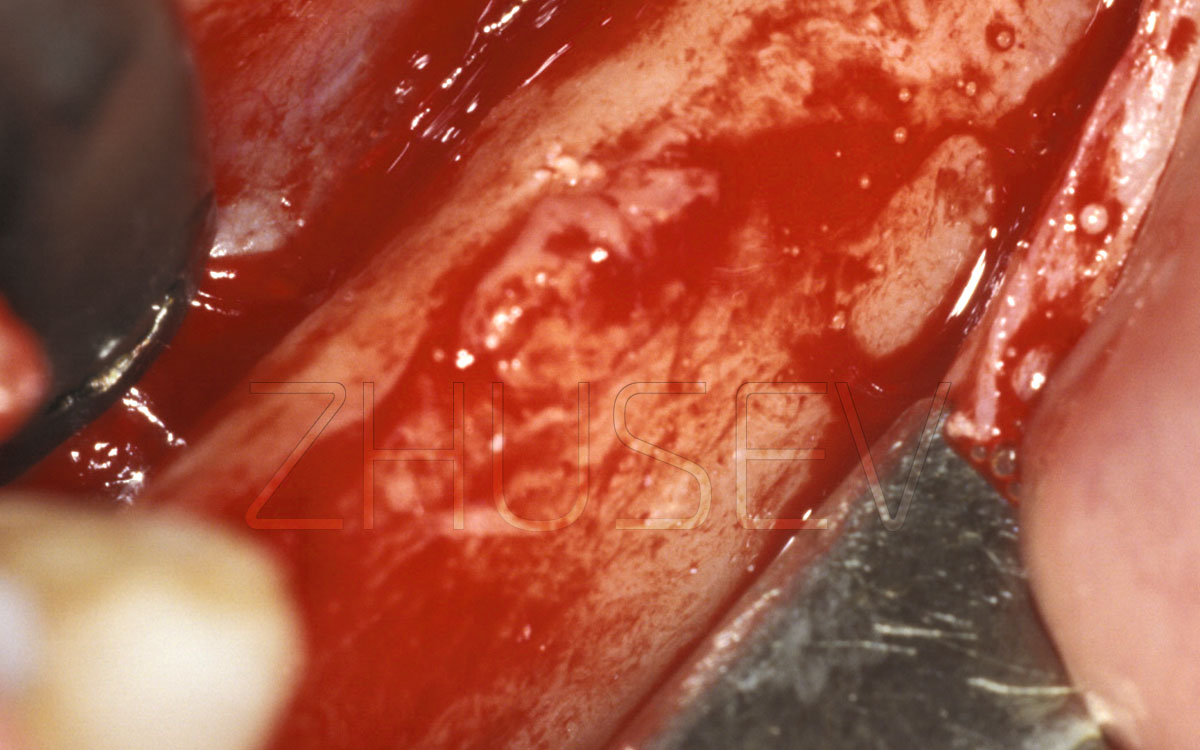
2.8.5-1G The wound hermetically sutured and additionally covered with dental Solcoseryl. Tell the patient to apply the ointment in the sutures for 5-7 days since surgery, 3-4 times a day.
2.8.5-1H Six months after the operation. Perfectly formed bone of excellent condition.
2.8.5-1I Note the high mineralization level in the newly formed bone tissue and the thickness of the cortical layer.
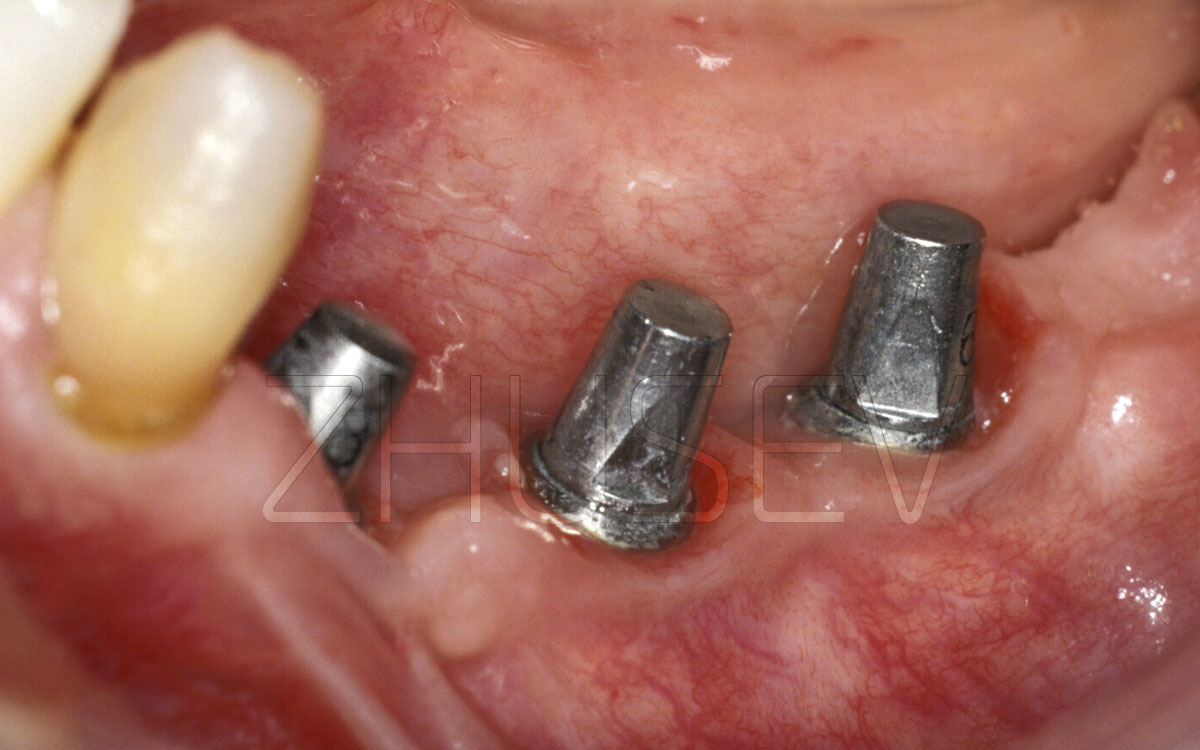
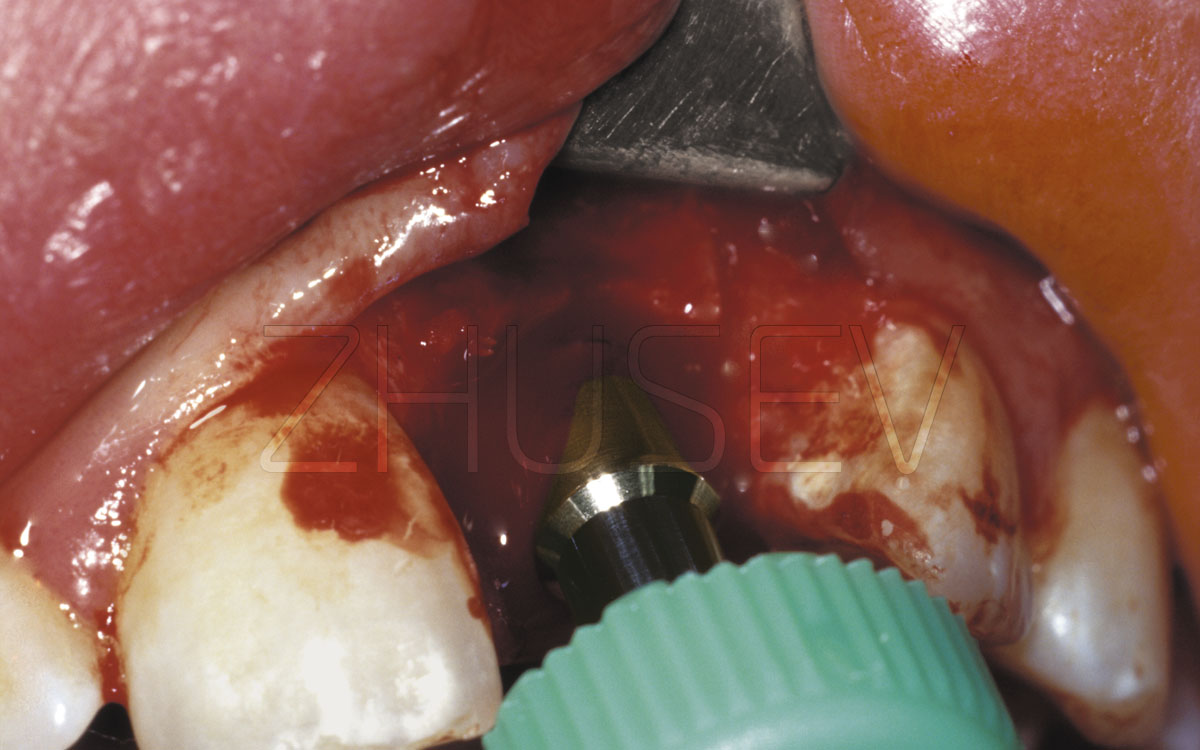
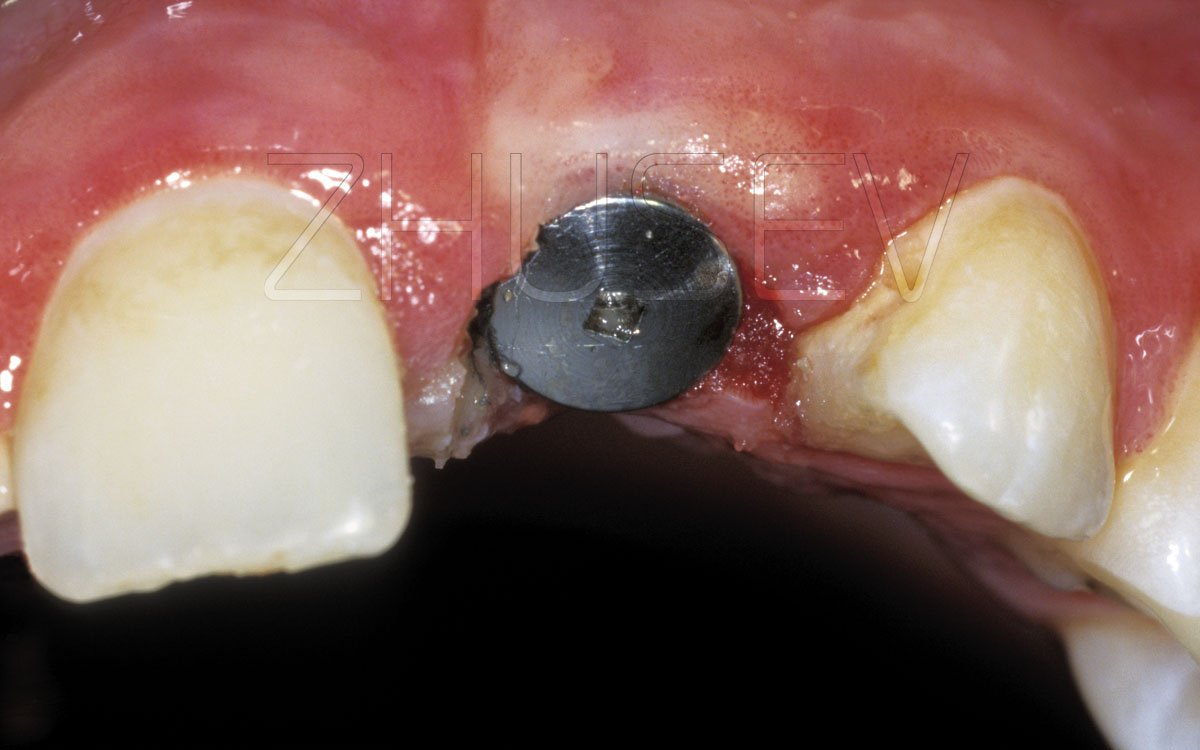
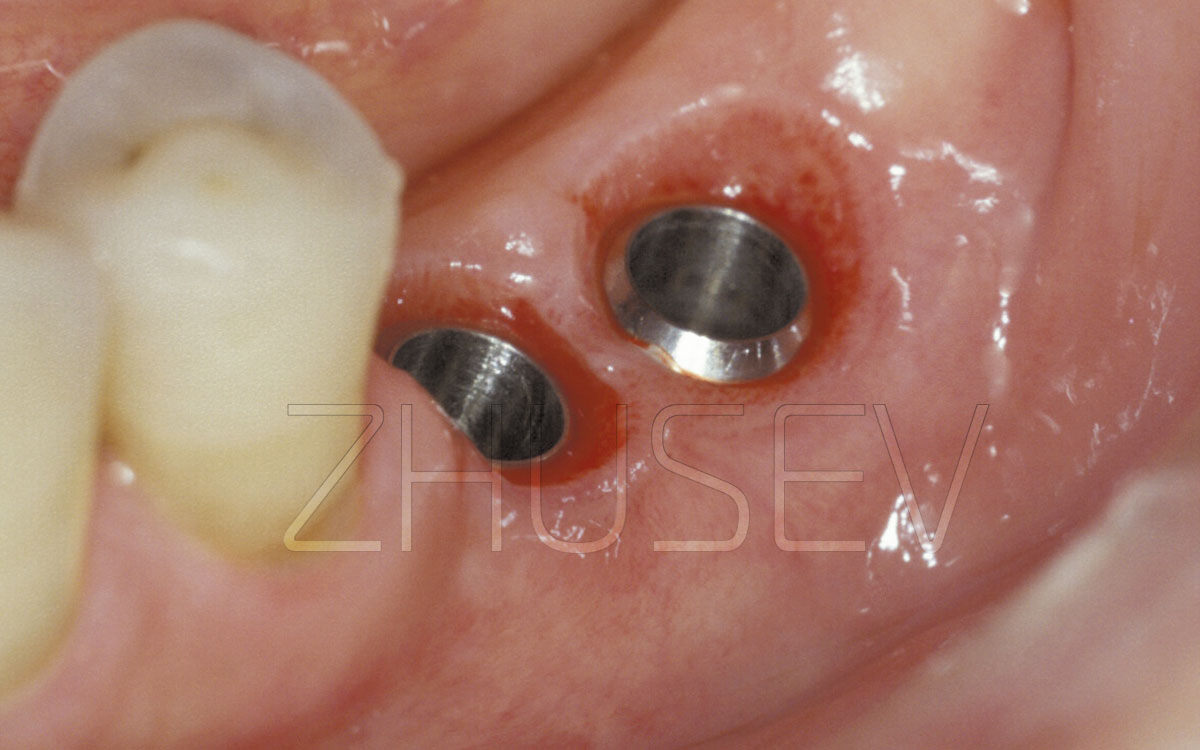
2.8.5-1J Implants 4,0 mm in diameter are installed, with the equator diameter of 4,8 mm.
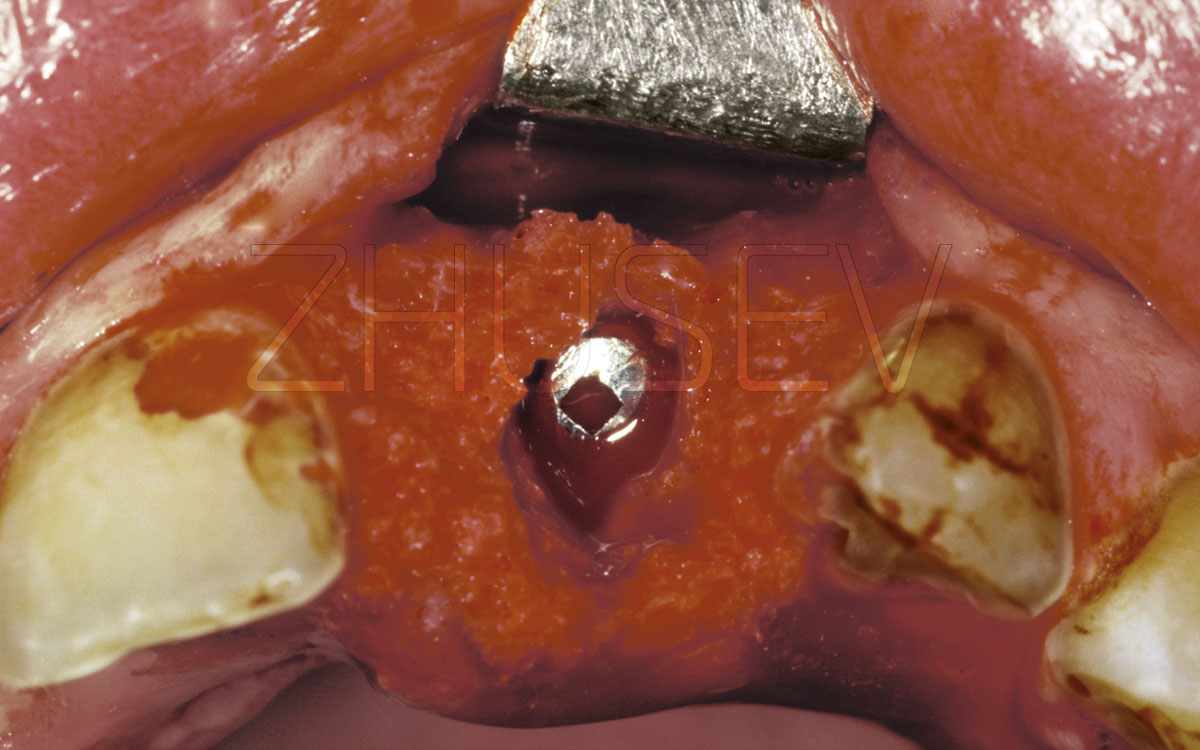
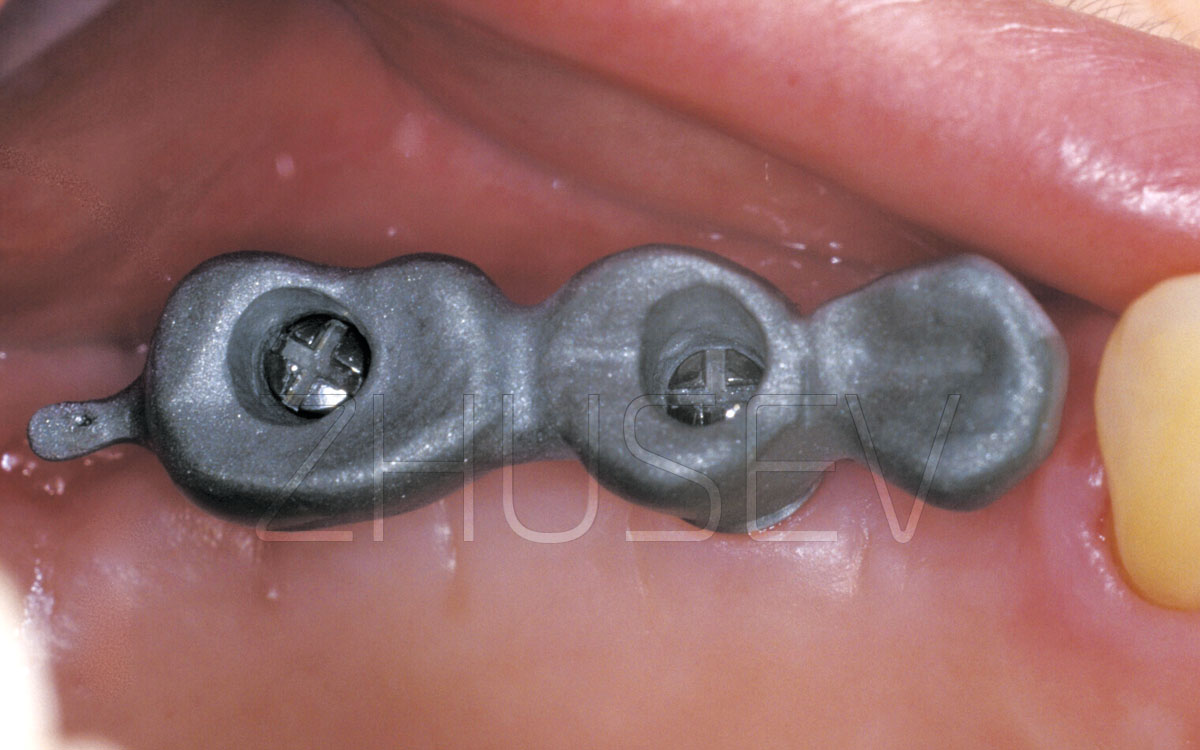
2.8.5-1K In the area of the split, three CONMET implants are installed, which will allow to make an orthopedic structure that is not connected with the natural teeth.
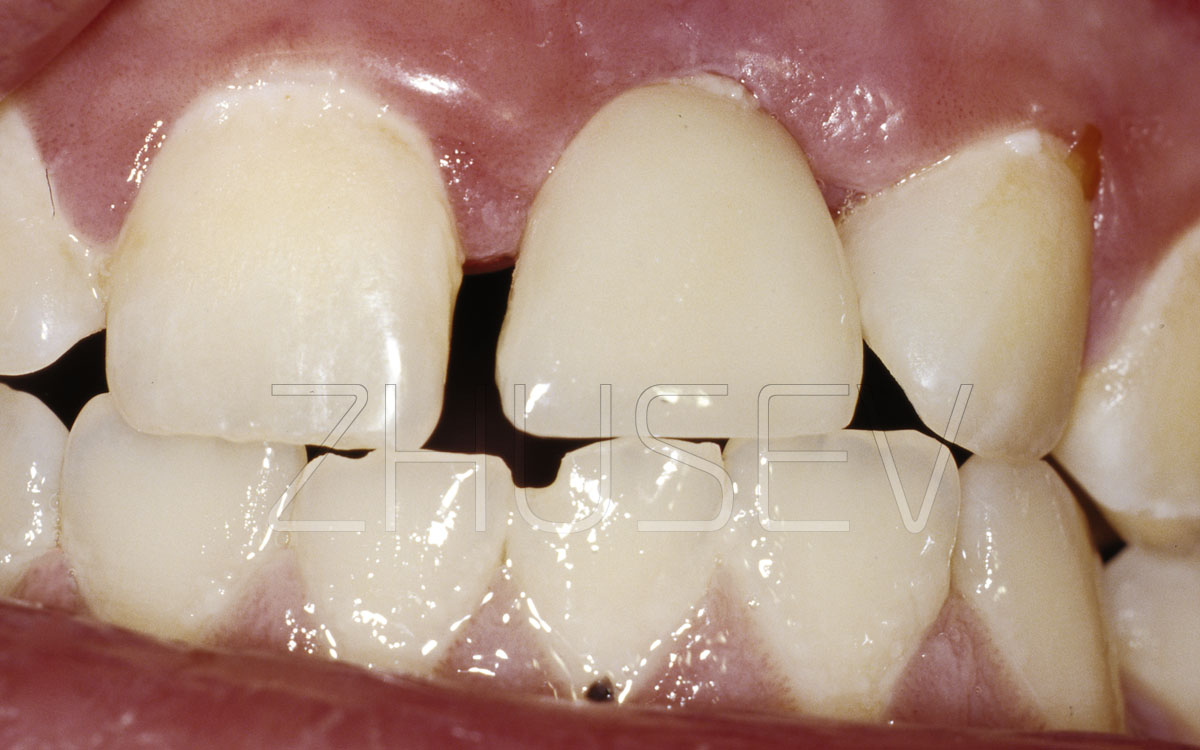
2.8.5-1L Two months after the implantation, an orthopedic construction was made, temporarily cemented. After 6 months, the design was removed to assess the consistency of the implants and condition of the tissues. Implants are completely stable.
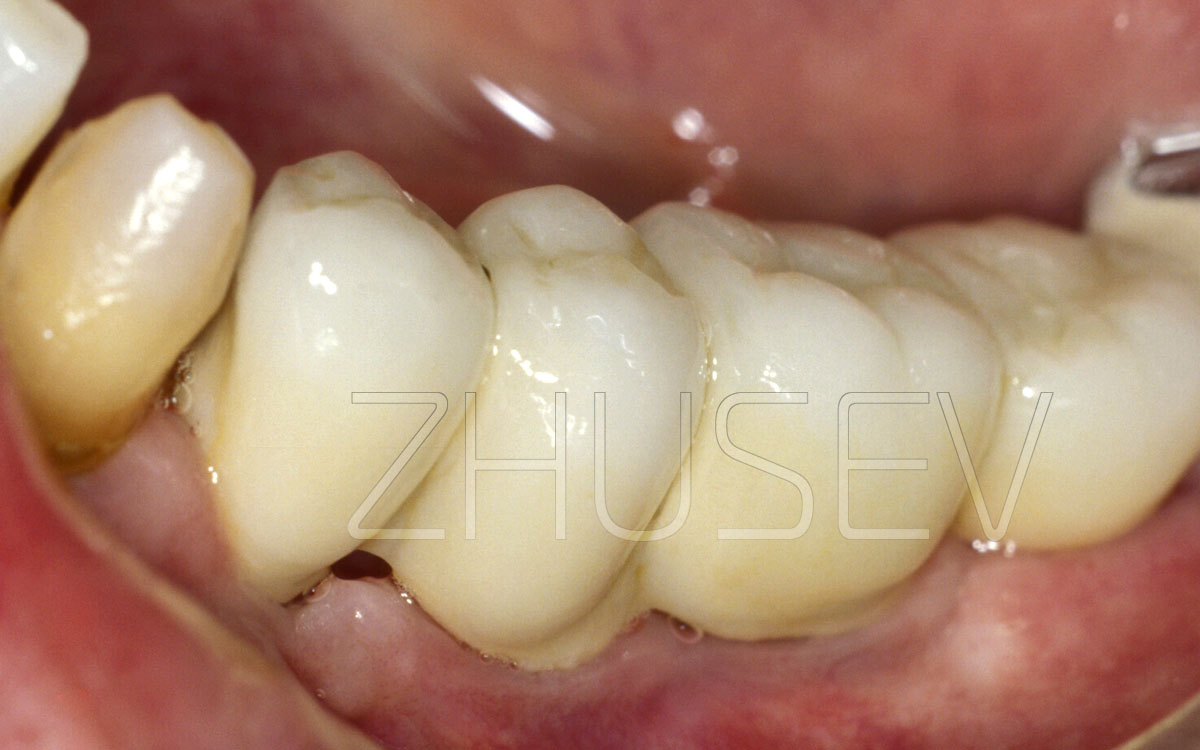
2.8.5-1M Orthopedic structure 12 months after implantation.
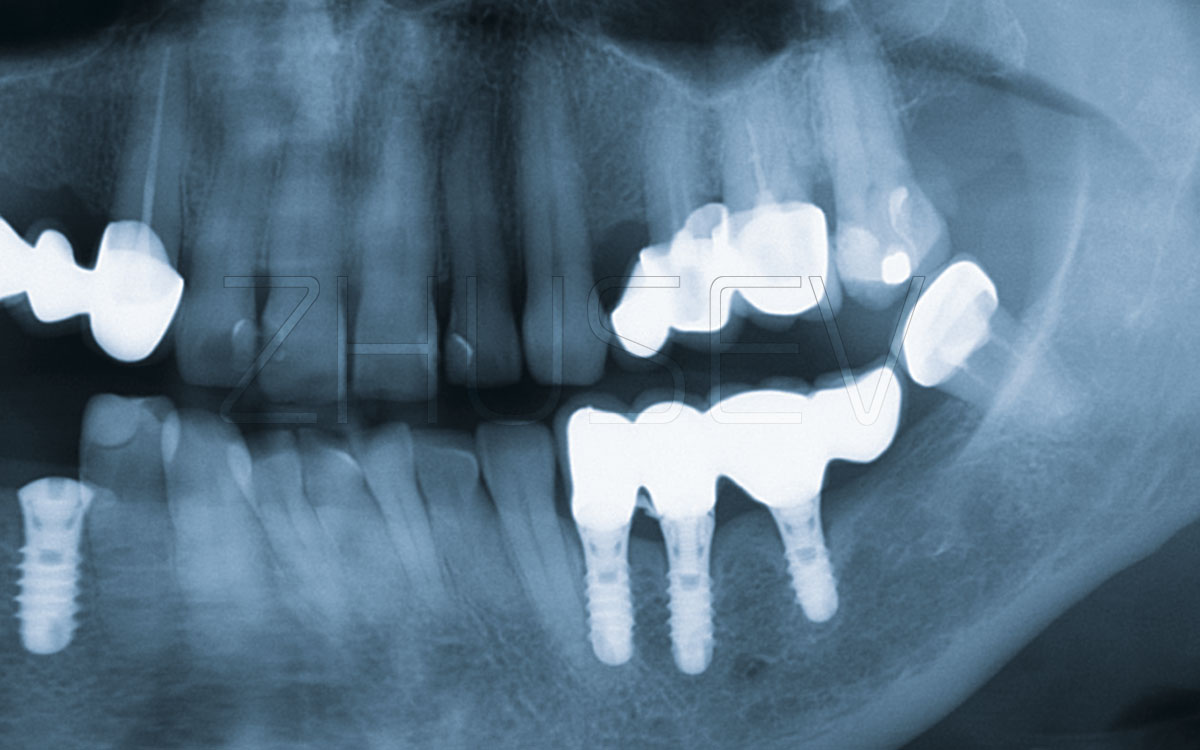
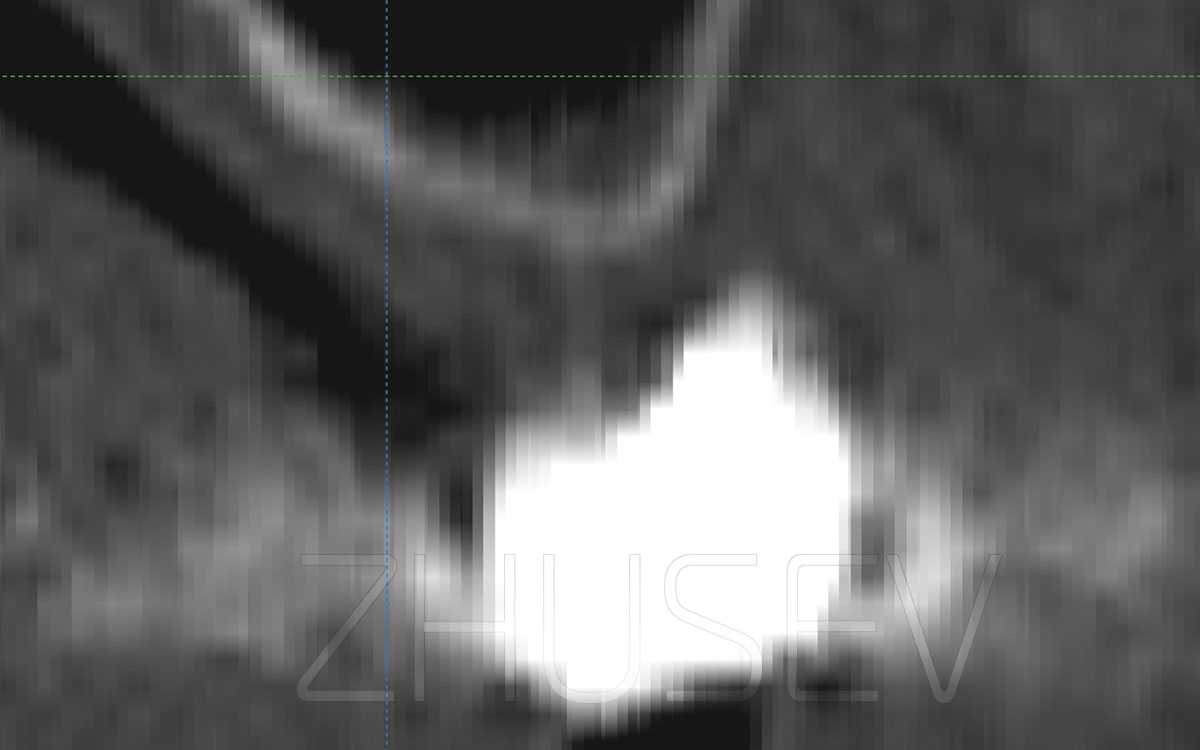
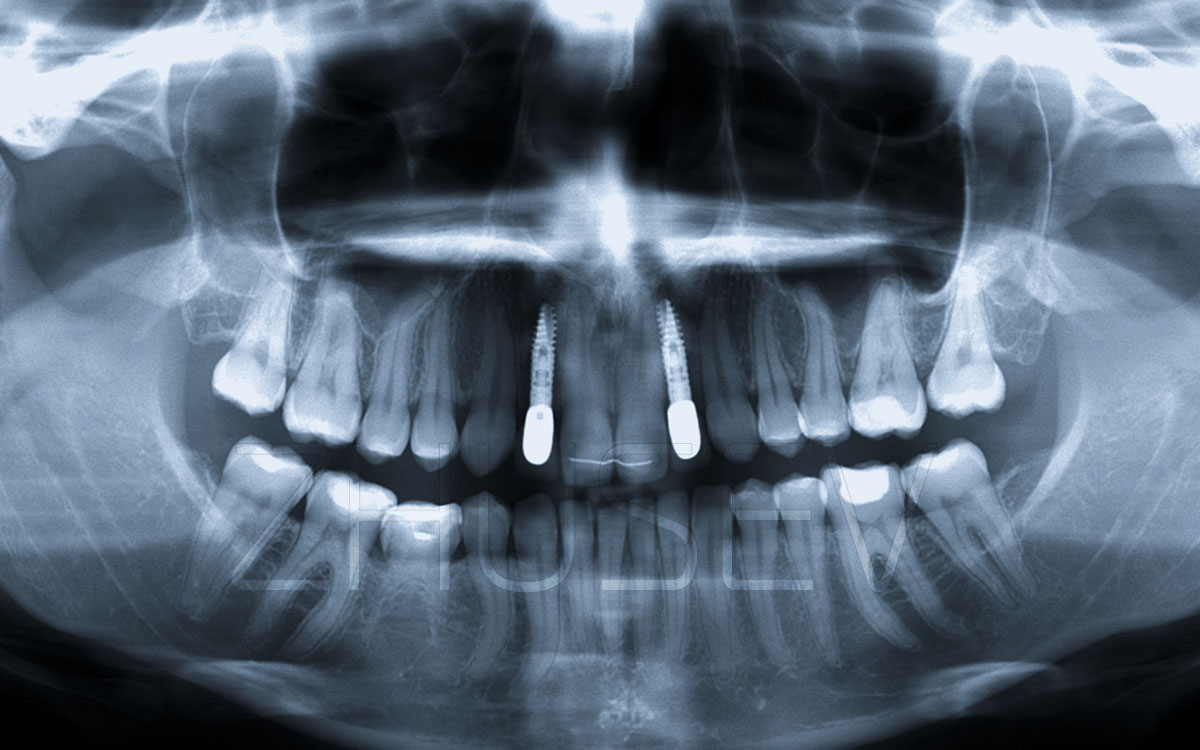
2.8.5-1N Reference X-ray 3 years after surgery.
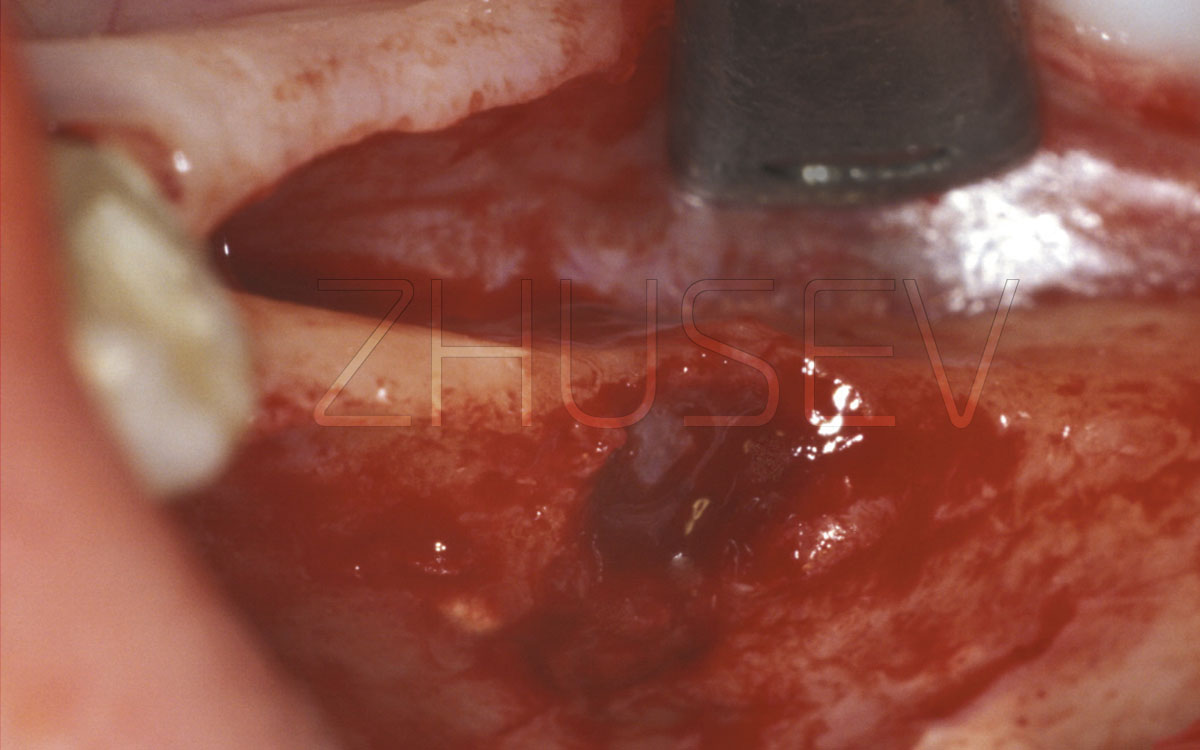
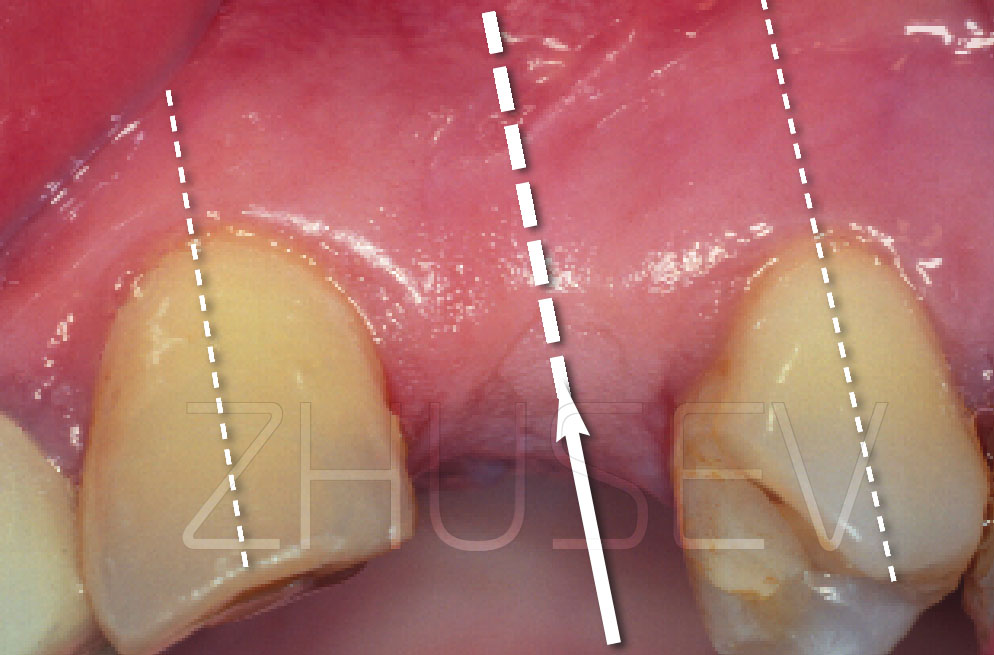
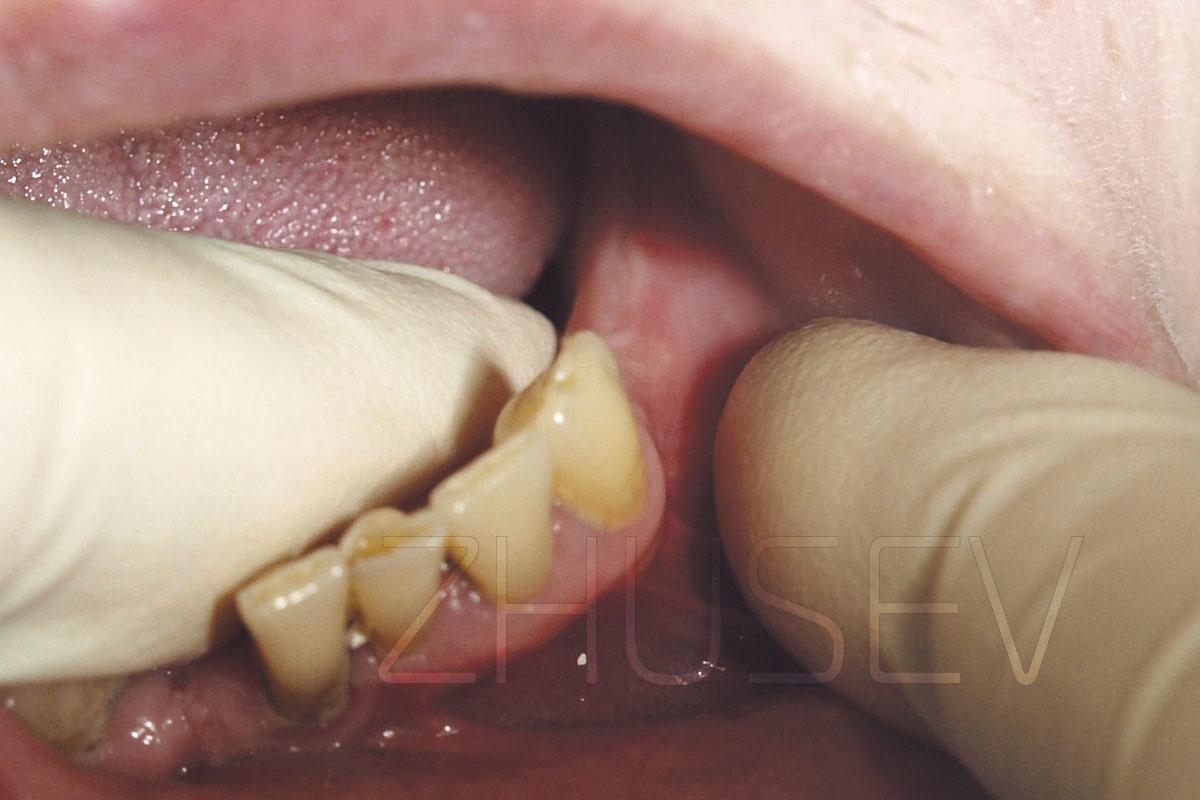
2.8.5-2A This is the way an alveolar process may look after orthodontic treatment or after a traumatic extraction with a fracture (break) of the vestibular wall of the bone alveolus.
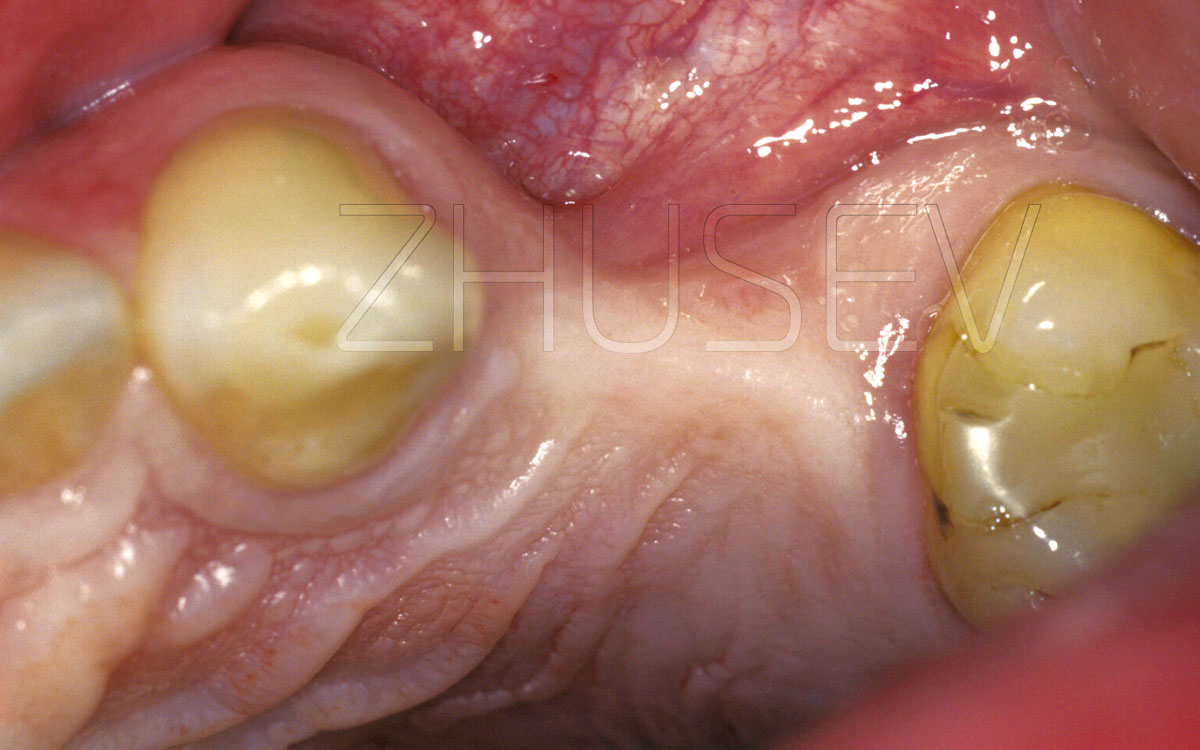
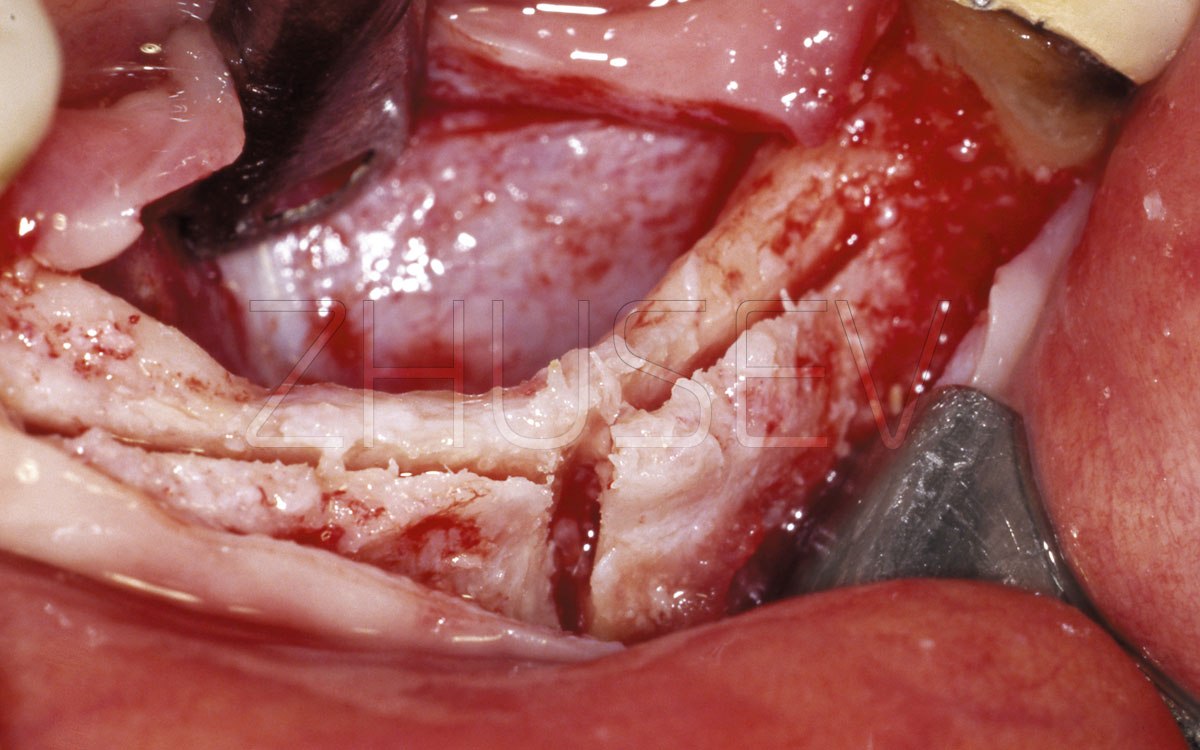
2.8.5-2B When the mucoperiosteal flap is opened, we observe significant bone deficiency on the vestibular side.
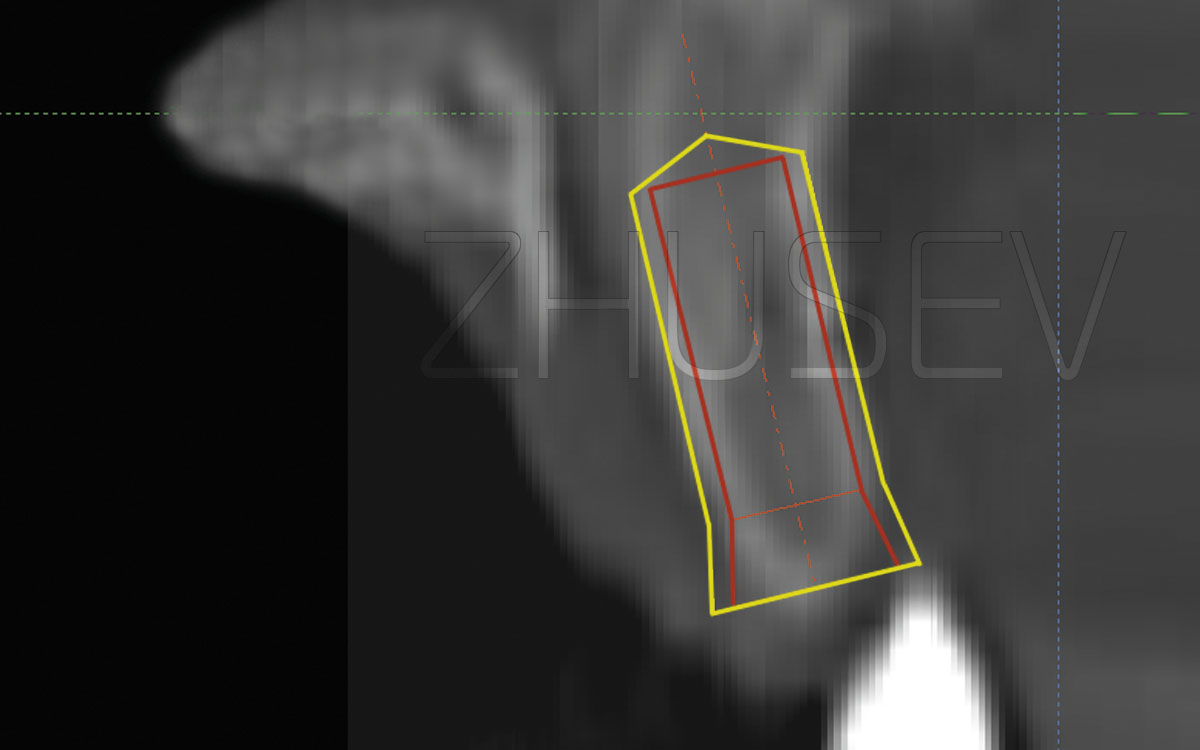
2.8.5-2C Look at the cross-section of this segment in a computer tomogram. It lacks only 2 mm in width for normal installation of an implant.
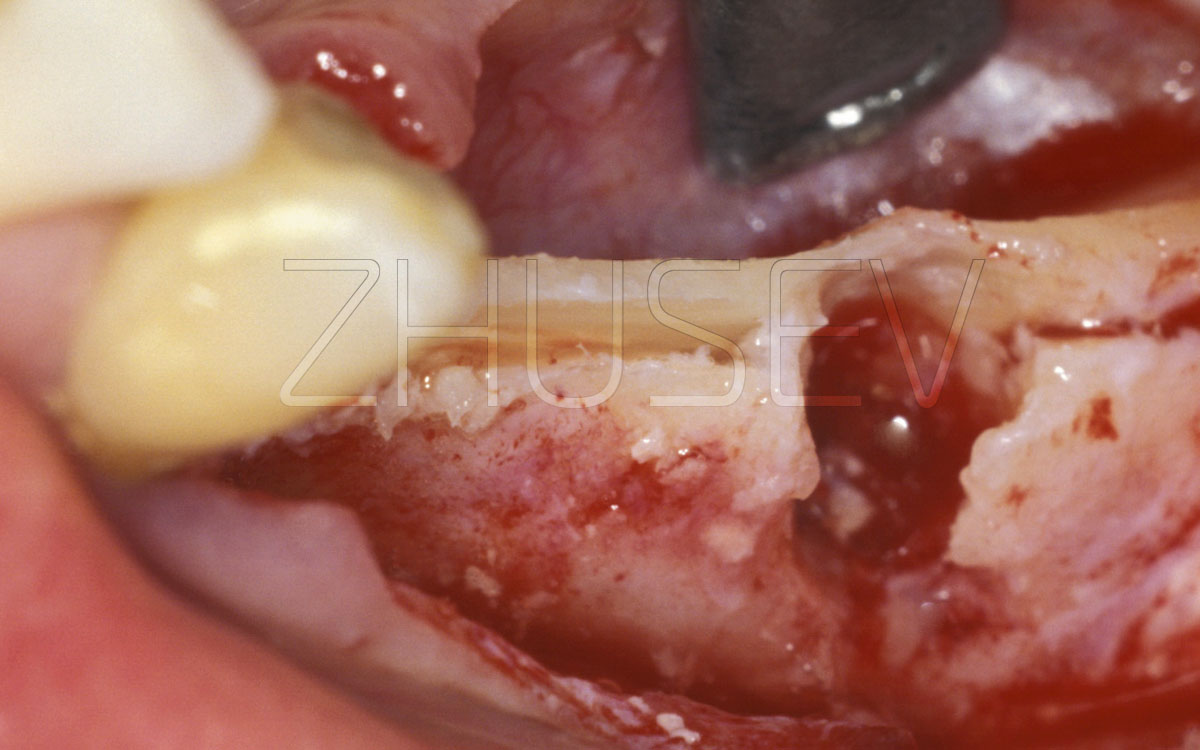
2.8.5-2D When splitting the bone in an area that borders on both sides on live teeth, it is necessary to move away from them 1-2 mm inwards to avoid damage to their periodontal.
2.8.5-2E Lifting the sawn fragment. Slightly rotating the chisel this and that way, smoothly insert it inside the bone. The speed of progression must be commensurate with the suppleness of the bone fragment. Never hurry and do not apply excessive force.
2.8.5-2F View of the displaced vestibular wall. The distance is 3-4 mm.
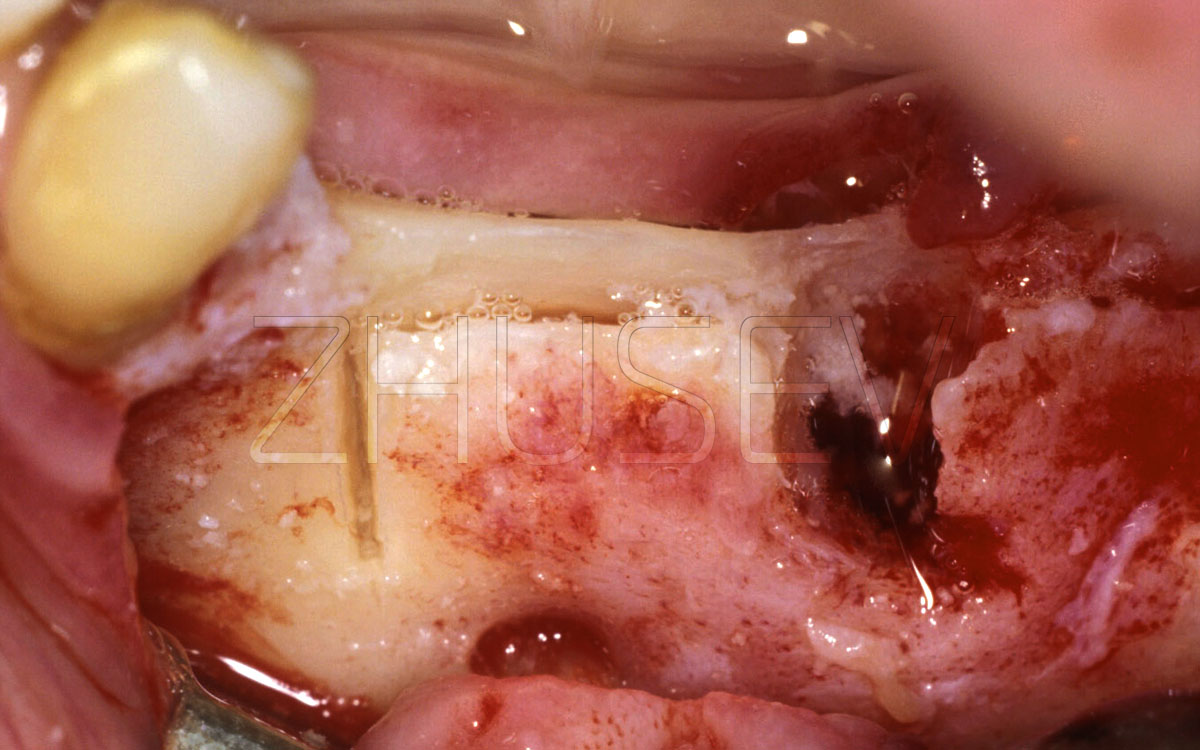
2.8.5-2G It is very important that the used osteoplastic material should be pre-hydrogenated in a sterile saline solution and well impregnated with blood.
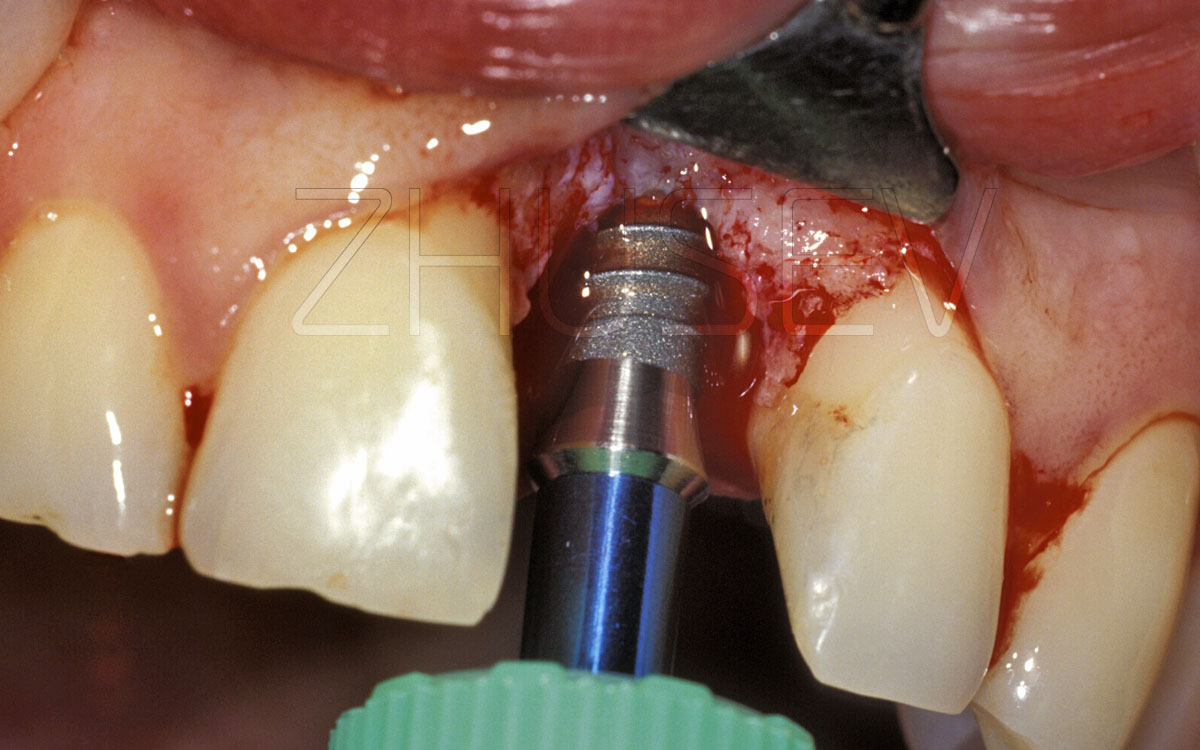
2.8.5-2H If the level of bleeding is good, constant, and the blood viscosity is moderate, it is possible to install the implant simultaneously with the slitting.
While splitting the bone, be sure to assess the suppleness and elasticity of the mucoperiosteal flaps. During the operation, periodically bring them back to their original place and see if you can suture the wound without any significant tension on the tissues. If necessary, make a wider and deeper separation of these flaps.
You should also take into account that during the first postoperative days the tissues coalesce, and stronger pressure of the soft tissues can lead to convergence of the bone fragments that you guided in different directions, pressing and squeezing out the osteoplastic material (especially if its consistency is elastic). As a result, the volume created during the operation can be significantly reduced.
To prevent this, I strongly recommend that during the operation, when the bone fragments are diluted and you have filled one-third or half of the volume with osteoplastic material, place a small rectangular fragment of the cortical plate between the walls as a spacer. Then gently push the movable wall and make sure that this bone "brick" keeps the wall from the displacement.
2.8.5-2I The osteoplastic material should always be placed in a slightly larger volume than the one you want to have in the end, because in the process of bone restructuring and the replacement of the osteoplastic material, the total volume always decreases.
2.8.5-2J After 4.5 months, we use a soft-tissue trimmer to install a healing cap.
2.8.5-2K Completed work a year after installation of the PFM crown.
2.8.5-3A When splitting larger segments, we first conduct a vertical osteotomy on the entire area that needs more width.
2.8.5-3B If the width of the anterior part of the jaw is to be increased, then we must perform vertical osteotomy along the middle line.
2.8.5-3C After osteotomy, we diverge the fragments to the sides. Do this especially smoothly.
2.8.5-3D All the space that has been freed up is filled with auto-bone or osteoplastic material.