Nowadays, dental implant planning is a complex procedure, which involves efforts of orthodontists, dental surgeons, and dental technicians.
It is desirable that the patient should be informed of the advisability of a prosthetic solution by the orthodontist. The orthodontist will assess the necessity of reducing adjacent teeth for a tooth supported bridge or the possibility of using dental implants to support other replacement teeth. The orthodontist will design an orthodontic treatment to help a patient achieve a beautiful and functional smile. Having preplanned the final results of a prosthetic treatment and the means of achieving them, the orthodontist will refer the patient to the dental implantologist, who will consult the patient on the possibility of inserting an implant in the maxillary or mandibular regions. The dental surgeon will determine whether it is possible to insert the required number of implants in the areas suggested by the orthodontist. If this is not possible, a surgeon will propose another scheme.
The initial meeting with the patient is very important. It is advisable that the patient should attend the orthodontist with ready X-ray images. X-ray images should be done on the initial consultation day or a day before that. X-ray images taken several days or weeks in advance are reliable only if the patient has received no dental treatment after that. There are some cases when a restoration (repeat restoration or perforation) of a tooth which took place after an X-ray image had been taken, brought about drastic changes in the surgical procedure.
Listen to the patient’s complaints with due attention. Letting your patient describe their problems, you should try to determine the following: the cause of tooth loss, the development of concomitant abscess and received treatment, and the period of time elapsed between the problem occurrence and the patients’ visit. Tactfully ask the patient whether they have received consultation on the dental implant issue from another specialist and, if the answer is positive, ask the patient to explain why they decided to seek your medical attention. Patients often complain that they have lost their teeth (or dental implants) because of their dentist’s incompetence. These things happen, but never think that you are better qualified than everybody else! And it goes without saying that you should never encourage your patient to believe that their loss of teeth is caused by a dentist’s negligent practice. You should explain to your patient that their dentist has probably done everything in their power to save the patient’s teeth, but due to some external factors and the patient’s individual characteristics (including anatomical and clinical characteristics) they have failed. In the majority of cases it is an objective truth. If you see that your patient still blames the dentist, beware! It can so happen that later they will blame you for even minor problems associated with the received medical treatment.
Make sure you ask your patient about concomitant diseases and their development. Ask what medications they are currently taking. Let the patient read the Informed consent for dental implants. Never conceal any information about surgical warranties and possible complications! It is important to understand that implants do not last forever. Medicine is an art, not a science! Even if you are absolutely sure in the successful outcome, do not make your patient believe that an implant will deliver permanent results. Be careful what you promise. But your comments and arguments should be convincing. An insecure doctor is an ordeal for a patient! Make your patient confident in the successful outcome. Make your patient believe that all your life has been entirely devoted to implant dentistry. Let your patient ask all questions they are interested in during the initial meeting and only after that proceed with treatment.
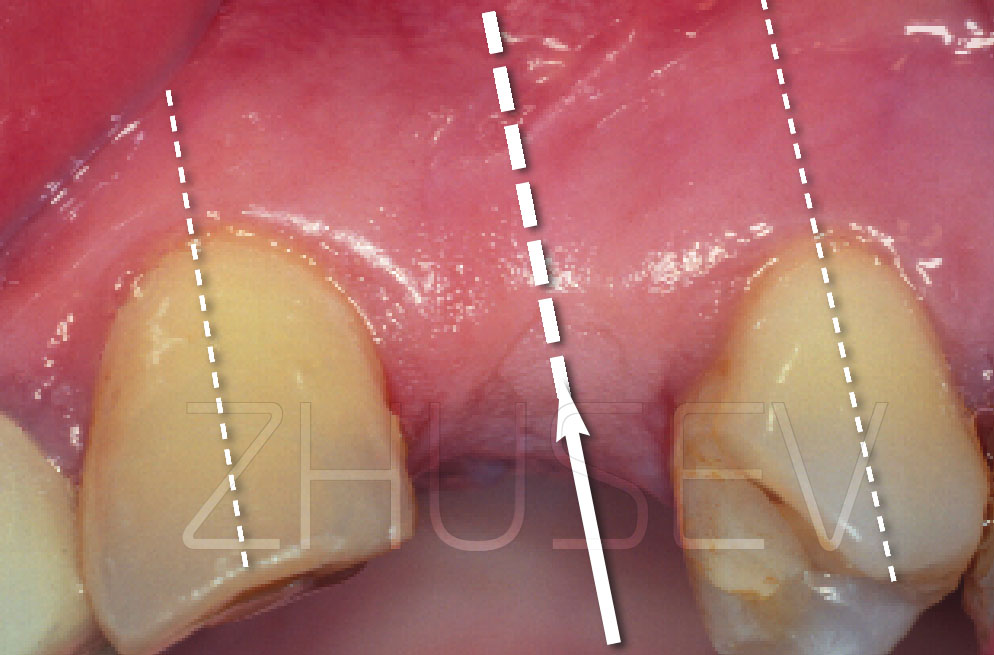
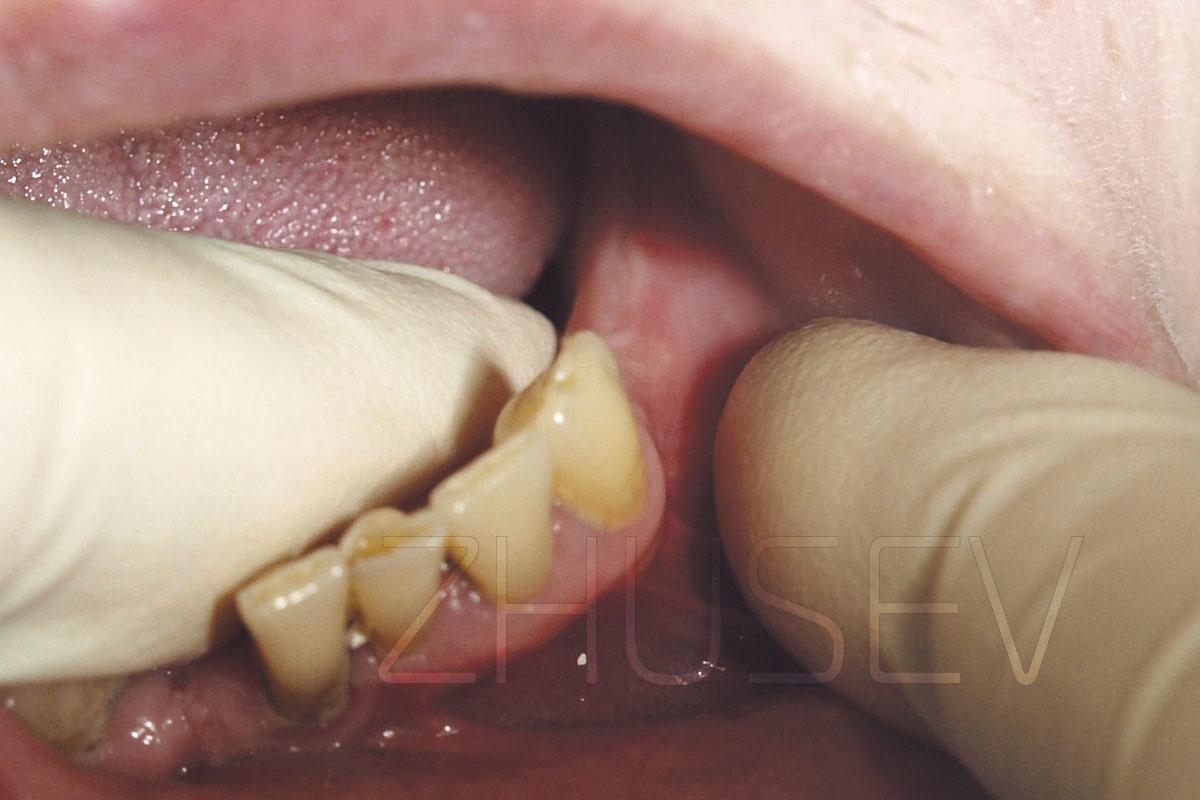
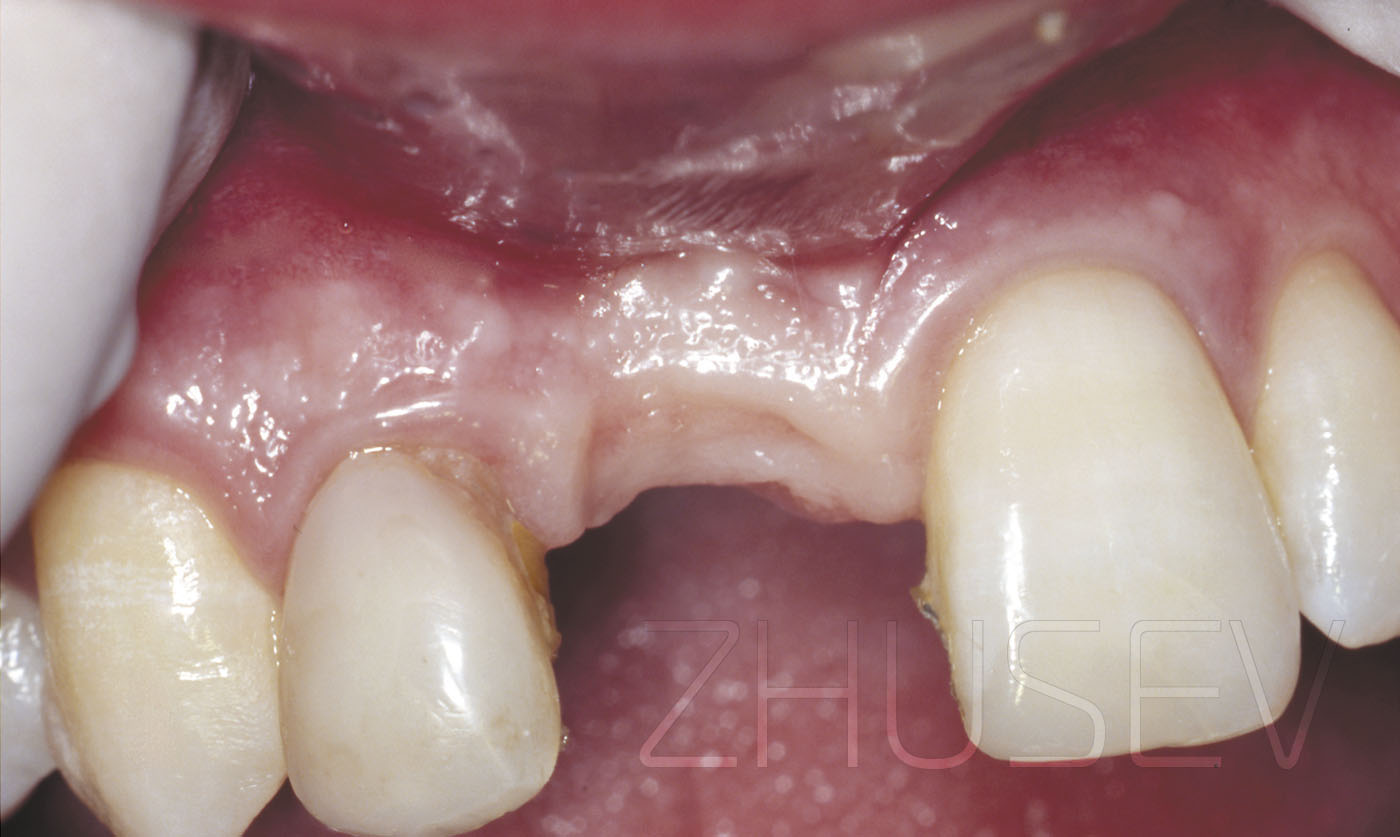
Examining the patient’s oral cavity, assess the condition of the oral mucosa and the teeth, see if the teeth are mobile, assess the level of oral hygiene. Be attentive when evaluating the clinical quality of restorations (during surgery, saline solution ejected from the dental handpiece can provoke ingression of pathogenic microbes colonizing the restoration into the bone at the implant site).
Then, palpate the alveolar process to identify you patient’s individual anatomical peculiarities, bony prominences, concavities, mucosa width and tissue mobility.
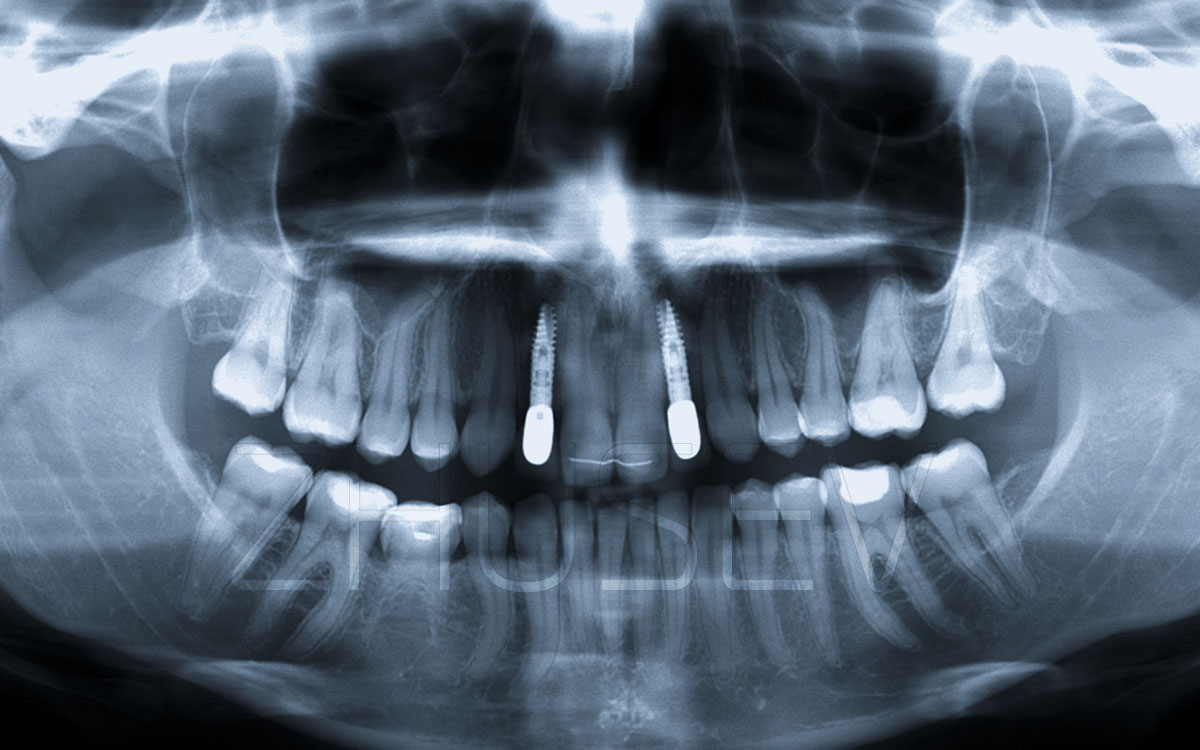
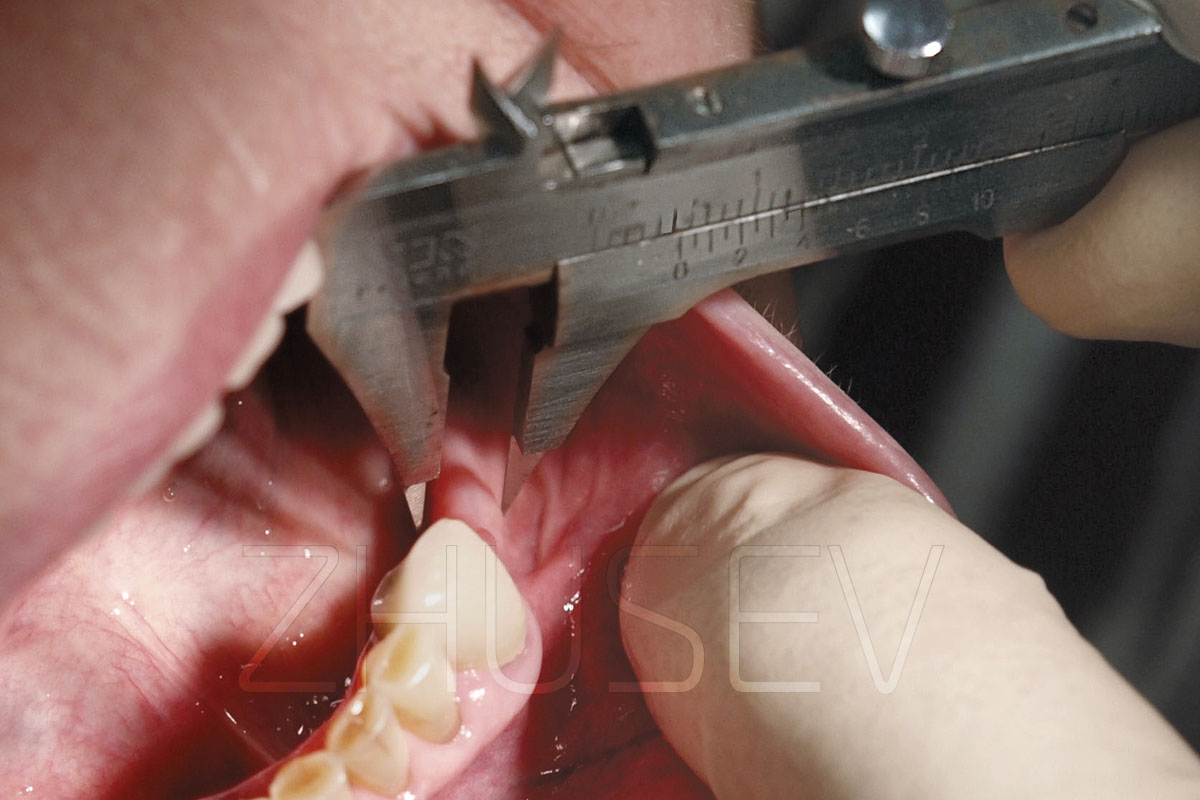
Remember that the orthopantomogram image is always 20 – 30% larger than the real size. To determine real dimensions, it is advisable to make a focal image of the implant site. It is desirable that you should have an orthopedic caliper. Using it, you will be able to determine the mesiodistal crown dimension and compare it with the X-ray image to clearly appreciate the distortions.
Remember that an orthopantomogram image and a focal image are only informative in terms of the height of bone tissue. The width of bone tissue is determined empirically by means of examination and palpation.
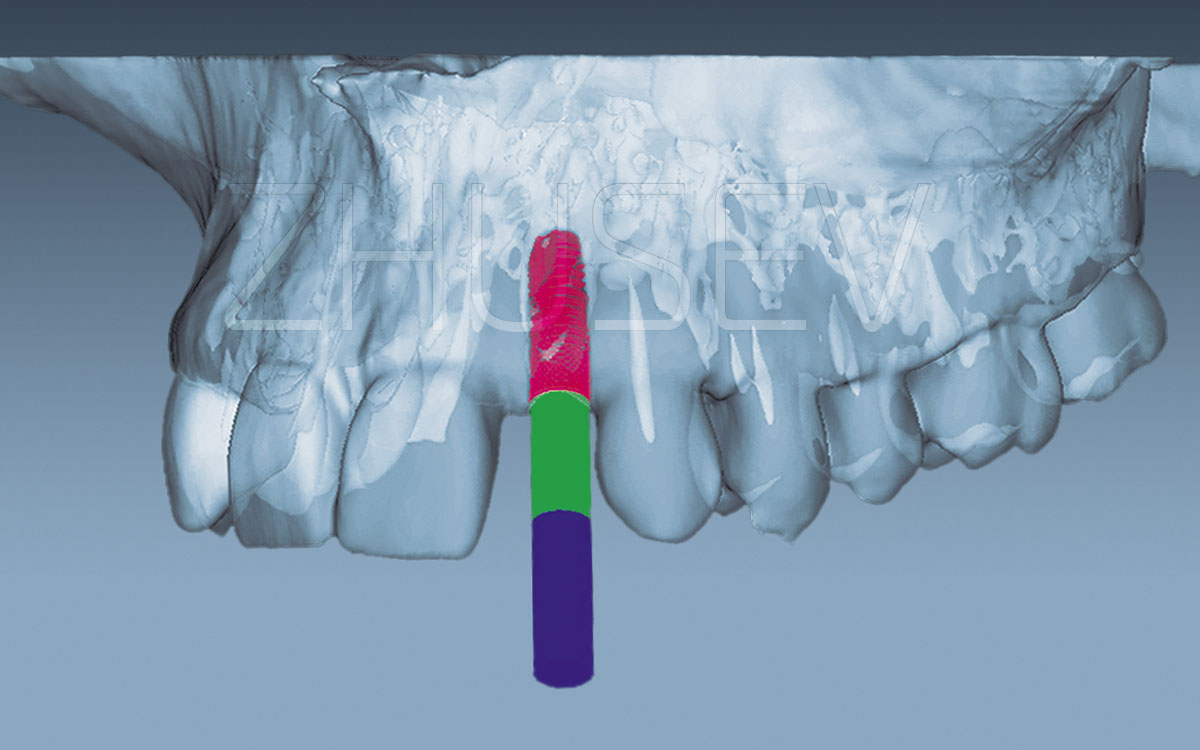
The most accurate results can be obtained by X-ray computed tomography, which provides undistorted information about the required anatomical structures displays three-dimensional anatomy and enables one to virtually perform dental surgery. The data obtained by X-ray computed tomography can be used to create a solid replica of the patient’s maxilla or mandible or another anatomical structure and create a surgical template for dental implant positioning. Let us discuss it in detail.
X-ray computed tomography is a relatively new method. The mathematical model and the basic principles of the method were formulated by Allan Cormack and Godfrey Hounsfield, who in 1979 were awarded the Nobel Prize in Physiology and Medicine for their work. The first machine which enabled the implementation of the method appeared only in 1972. The first tomogram was obtained in the same year. The first patient to undergo the procedure was a woman with suspected cerebral affection. The tomography scan showed a dark orbital cyst.
A computed tomography scanner uses a combination of an X-ray generator, a scanner with an X-ray tube, a detector (the most common matrix size nowadays is 512x512 pixels, though there are models whose matrix size is 1024x1024 pixels. The latter ones are most likely to replace the former ones in the nearest future), a computer to process data, a terminal, and a printer.
The scanner moves around the patient’s head and neck to create cross-sectional images by measuring X-ray attenuation properties from many directions. (In some laboratories, scanners are stationary with a mobile X-ray generator.) The huge amount of received data enables the computer to create cross-sectional images of the examined parts of the patient’s body. During the procedure, the patient is moved along the longitudinal axis of the scanner. By processing series of resultant cross-sectional images, the computer is able to restore 3-dimensional images of internal organs. The only matrix obtained images are axial images 2.2.1-4.

Axial CT images are the most accurate, all other images are computer-reconstructed and computer-interpolated. All other images are obtained via computer modelling. It is important to underline that occasionally it is necessary to get initial images which are not perpendicular to the table on which the patient lies (i.e. perpendicular to the patient’s spinal column) but are obtained by tilting a certain angle.
Any CT scanner gantry can tilt and a tilt angle is called gantry angle. For the needs of dental implantation, ST scanners should be used at gantry angle 0°.
Nowadays, all CT scanners store information in the DICOM (Digital Imaging and Communications in Medicine) format, which was developed by the American College of Radiology and the National Electrical Manufacturers Association (ACR/NEMA).
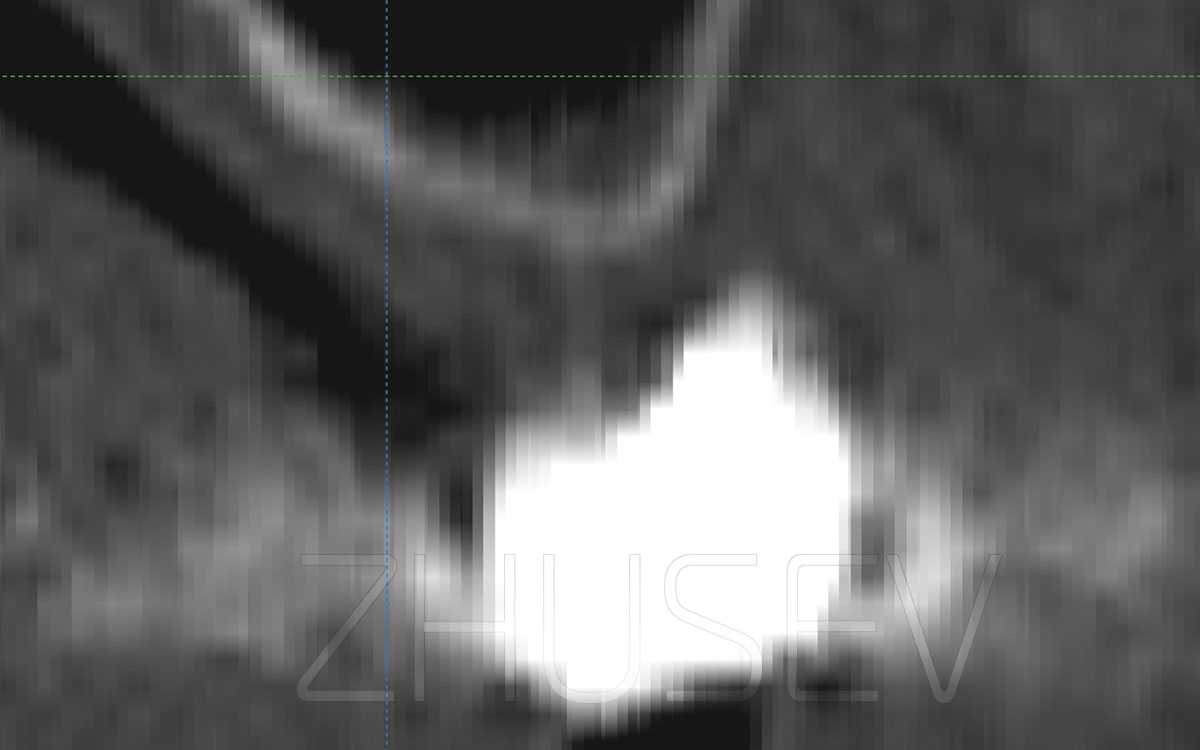
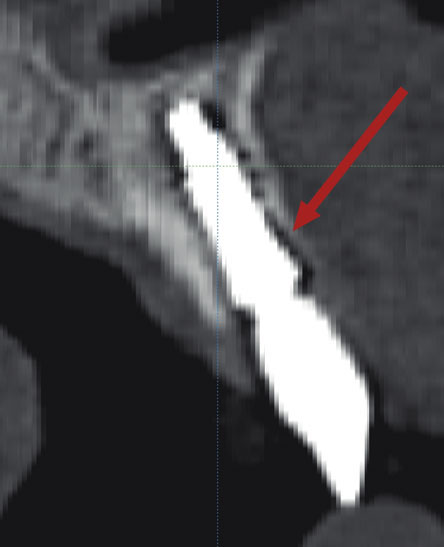
A CT scan is black and white as an X-ray image, though, in fact, CT images are different shades of grey. The more effectively tissues absorb X-rays, the lighter they are in the scan (close to white), and vice versa, the more effectively tissues reflect X-rays, the darker they are in the scan (close to black). Hounsfield created a scale of optical density and called it the Hounsfield unit scale 2.2.1-5, water density being zero Hounsfield units (HU).

Air has the lowest Hounsfield unit value of –1024 (represented in black in the picture), while tooth enamel has the highest Hounsfield unit value, which is 3096 (represented by white colour in the picture). Hounsfield scale enables one to determine both qualitative and quantitative composition of bone tissue by analysing a computed tomography scan.
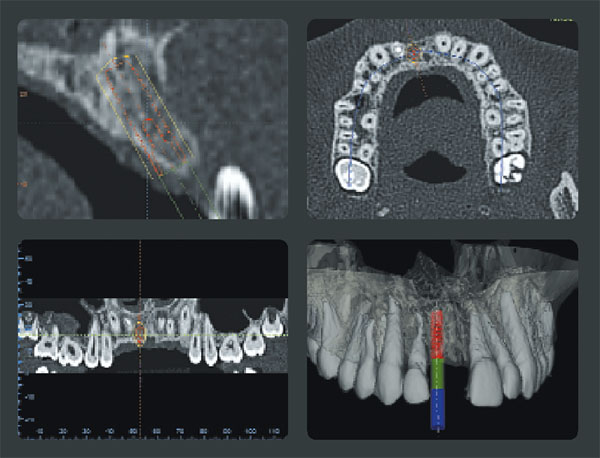
Nowadays, computed tomography scans are processed via modern software applications 2.2.1-6 which are specifically adapted for implant dentistry needs. These applications allow importing data from a computed tomography scanner (the DICOM format) and provide ample opportunities for visualization of 3D images and scan processing. They also contain a database of dental implants and enable a dental surgeon to perform a virtual surgery. Moreover, these applications enable one to perform linear and angular measurements and to identify the qualitative composition of bone tissue adjacent to the implant site (HU).
A major advantage of modern applications which permit import of DICOM files from a computed tomography scanner is that they permit converting screen images into STL (stereolithography) files.
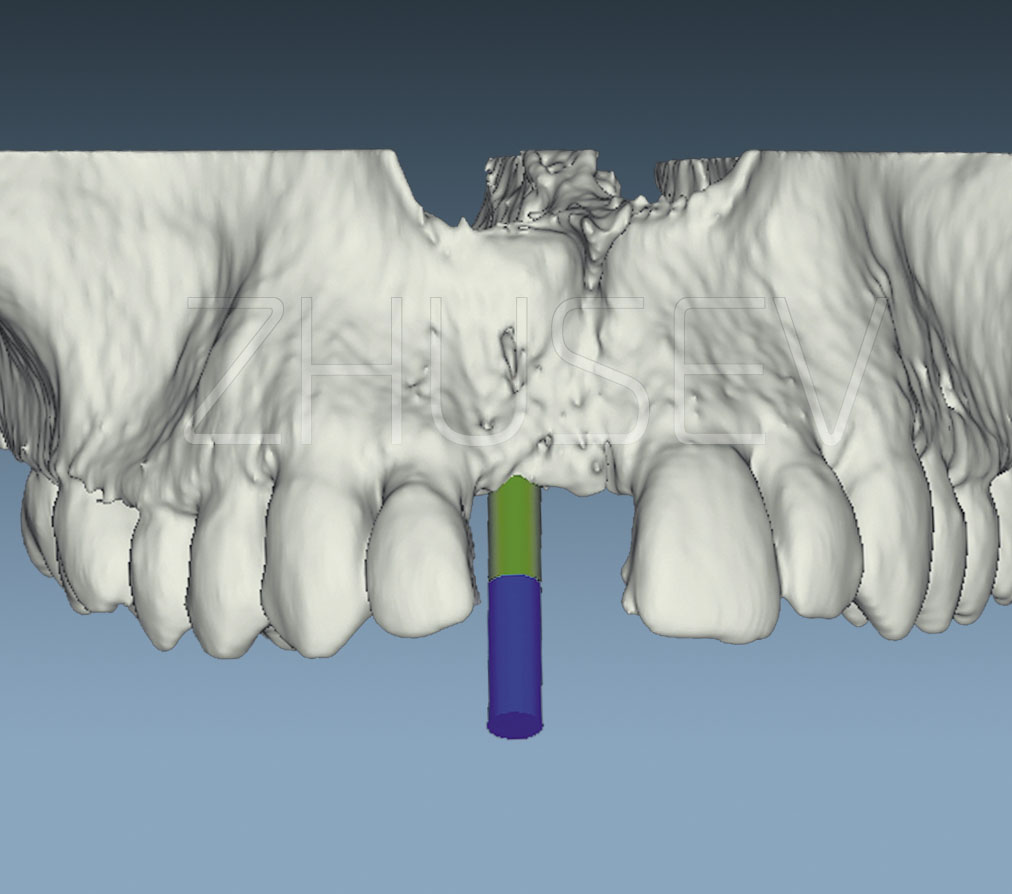
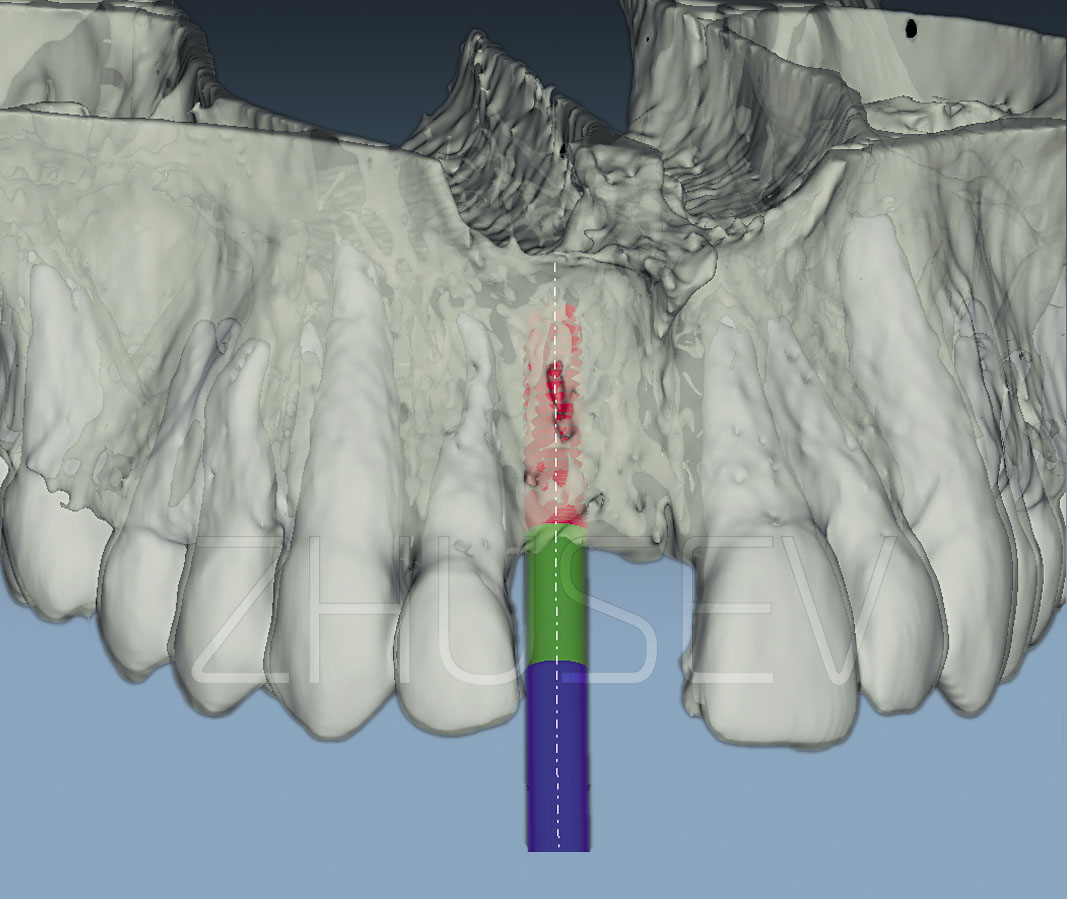
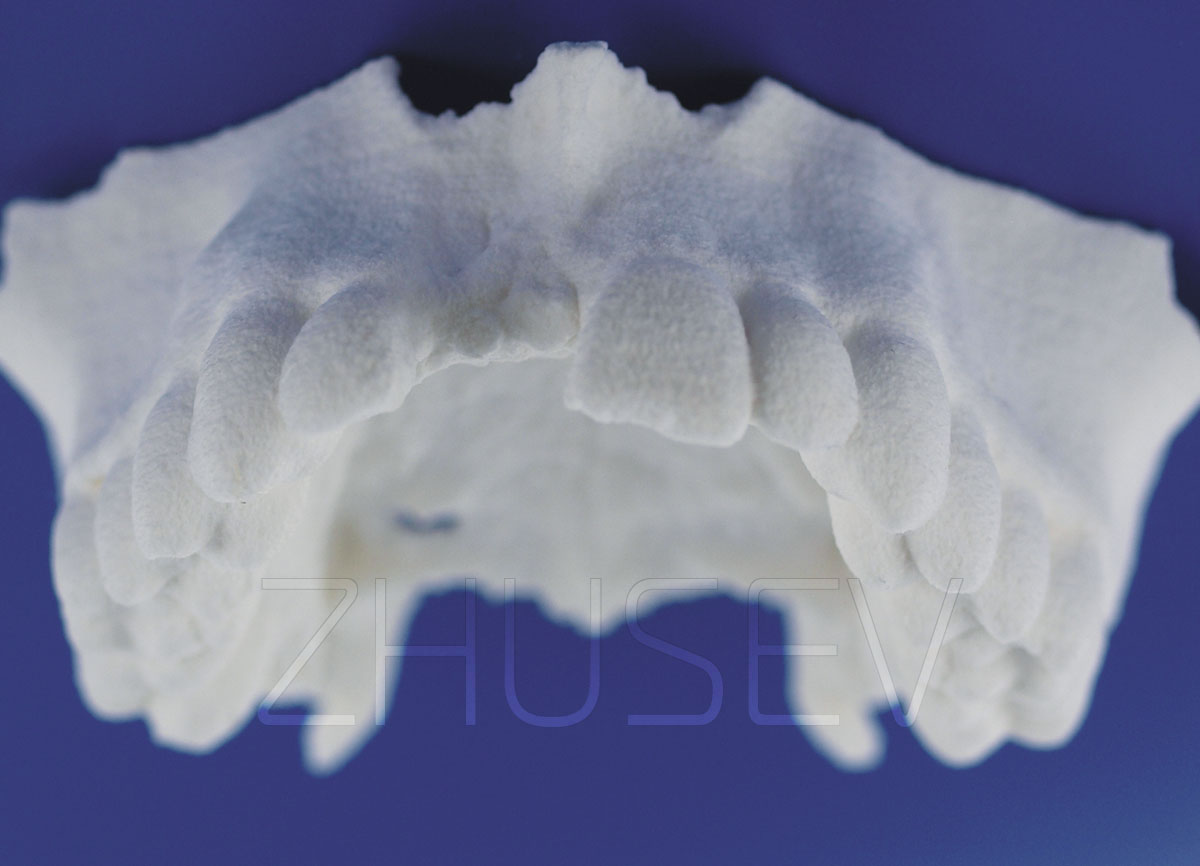
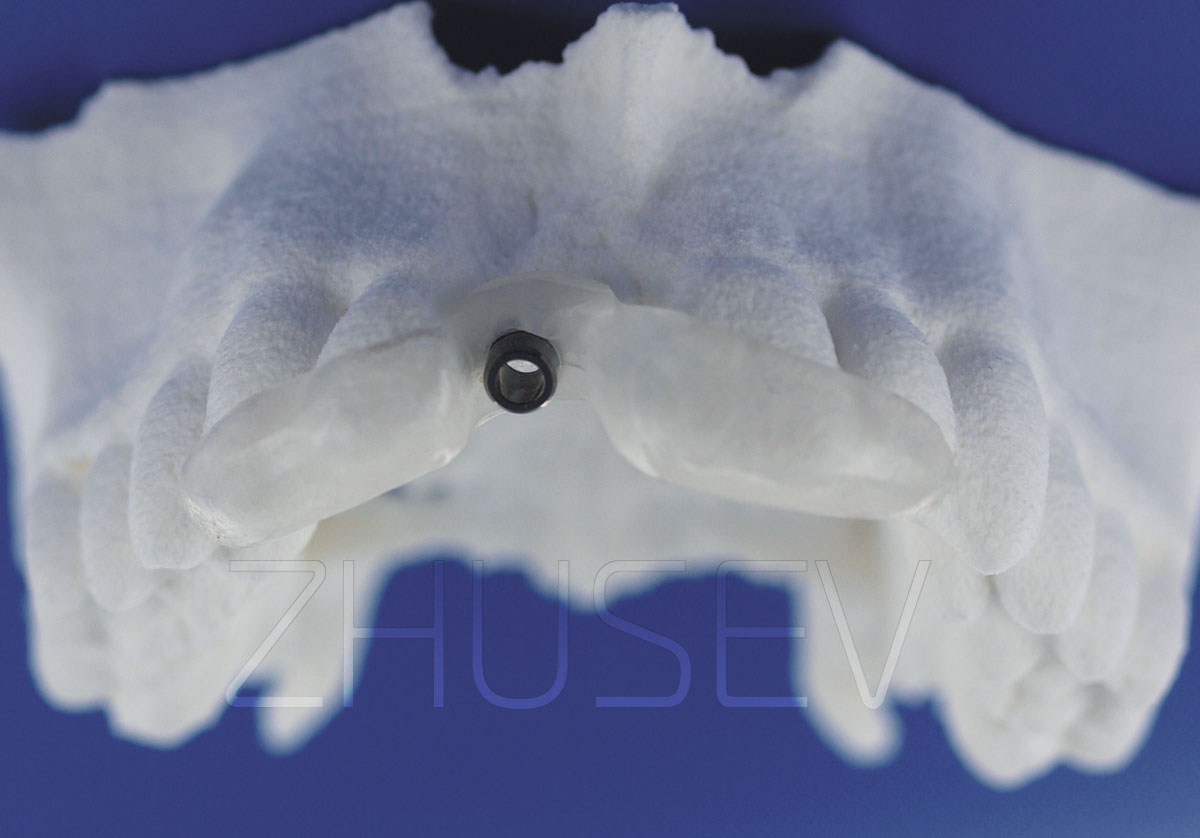
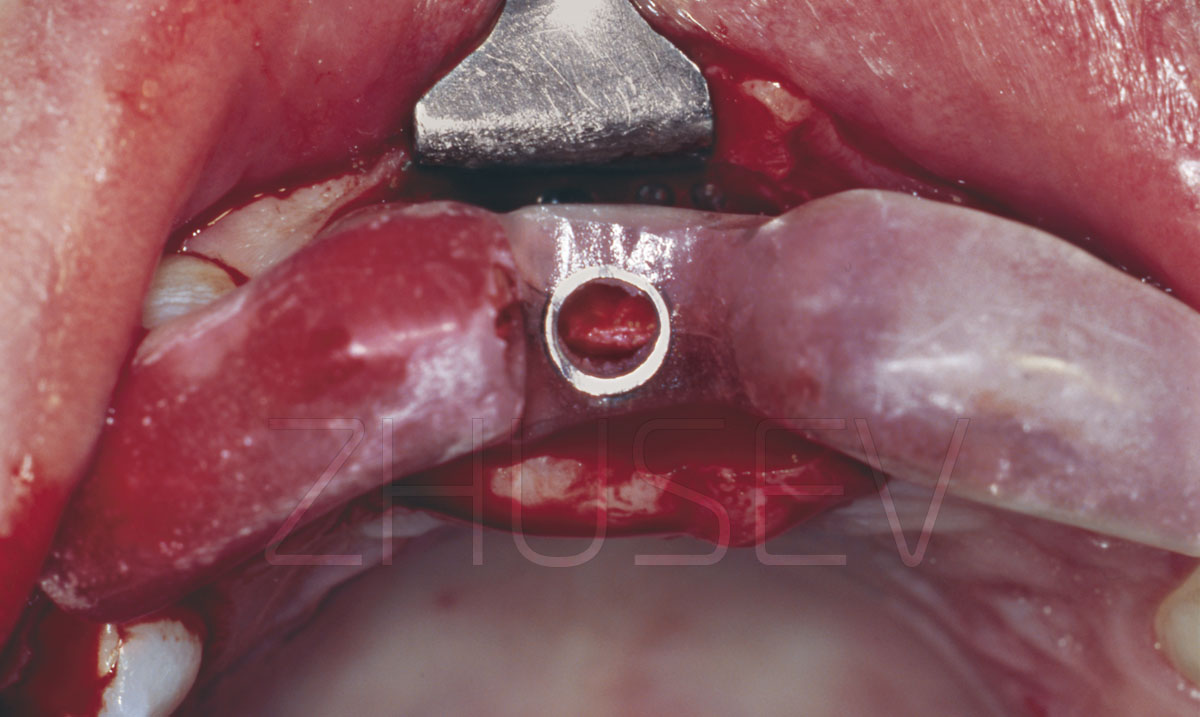
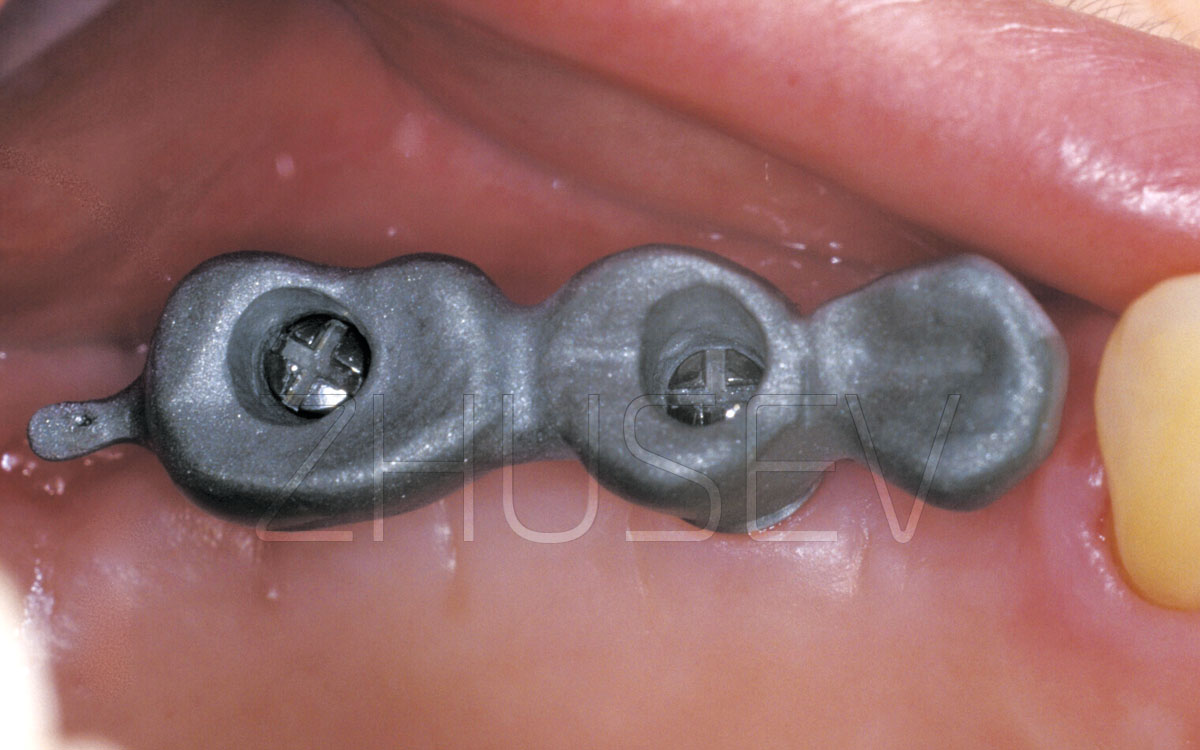
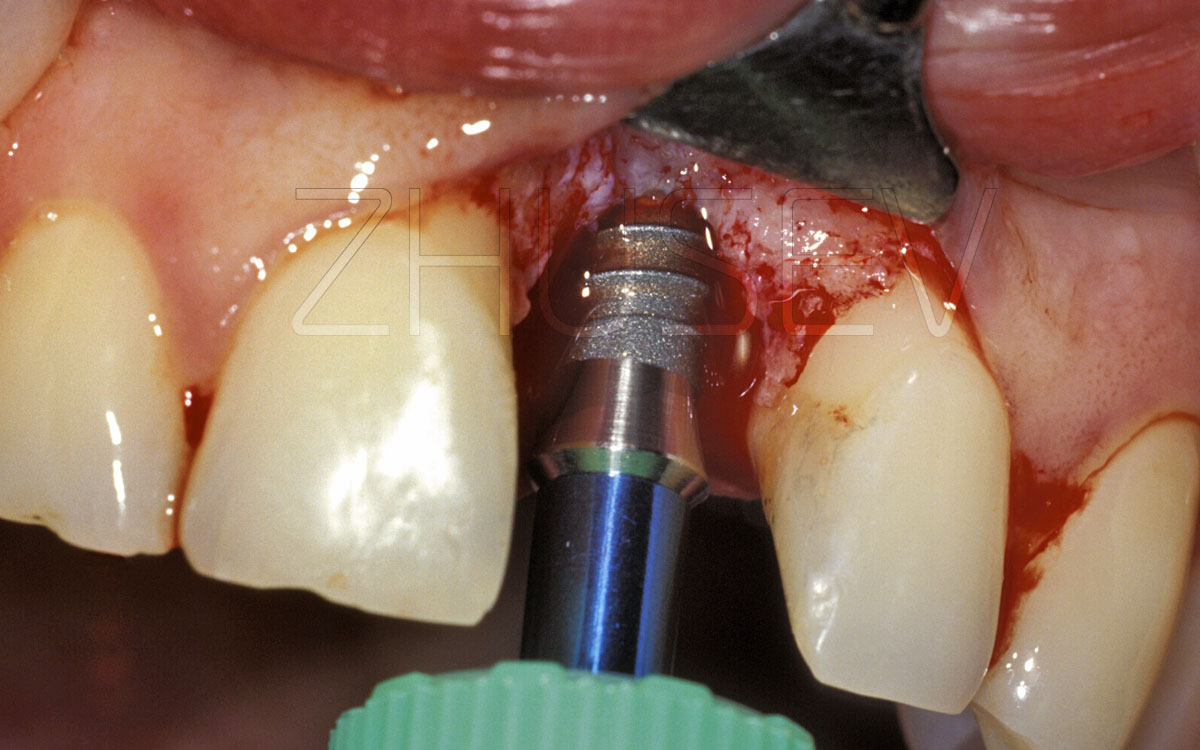
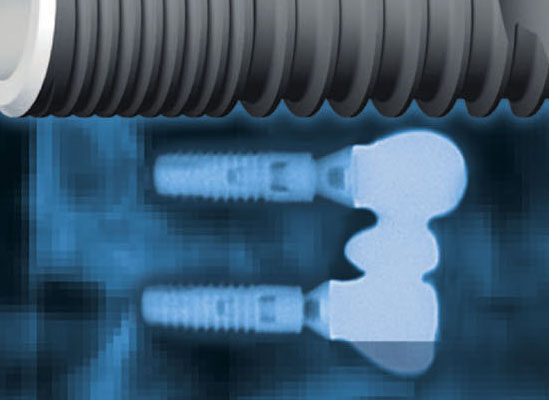
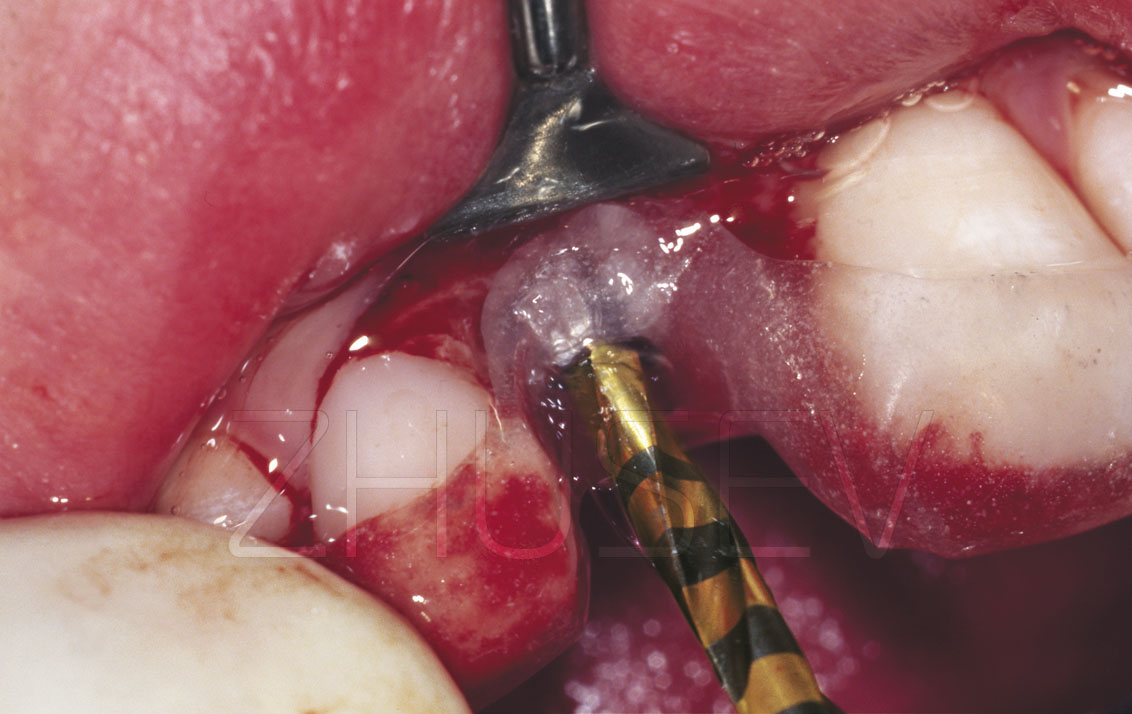
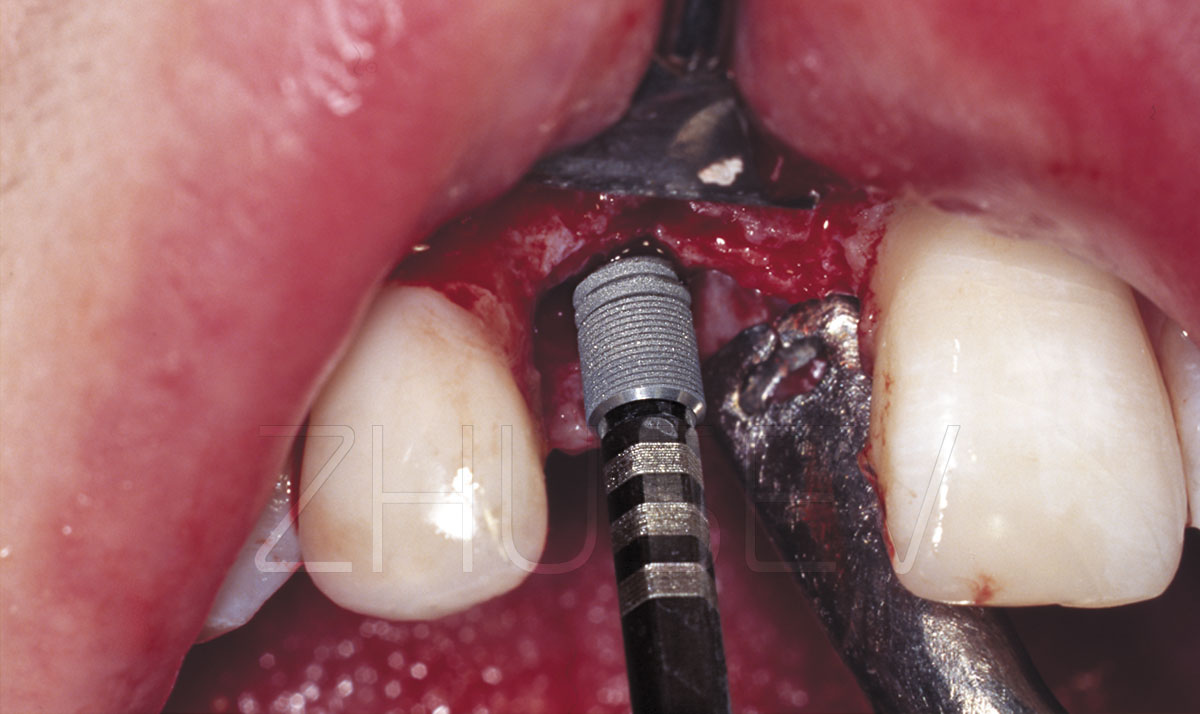
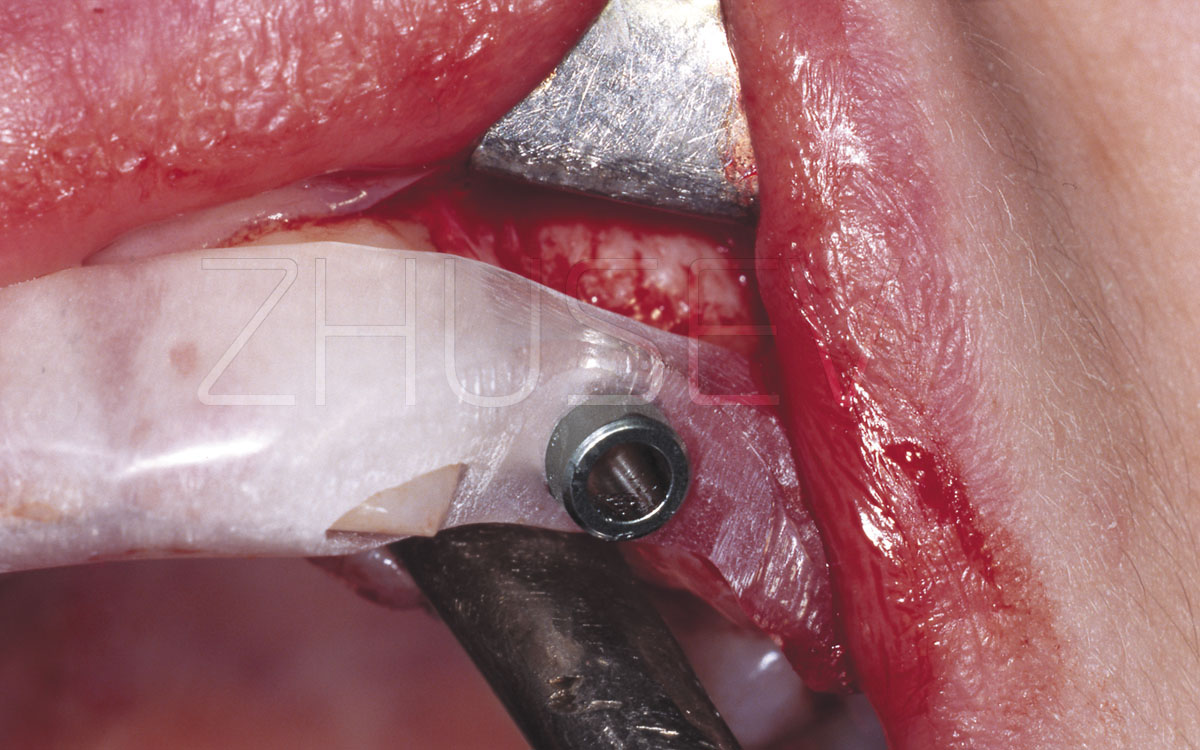
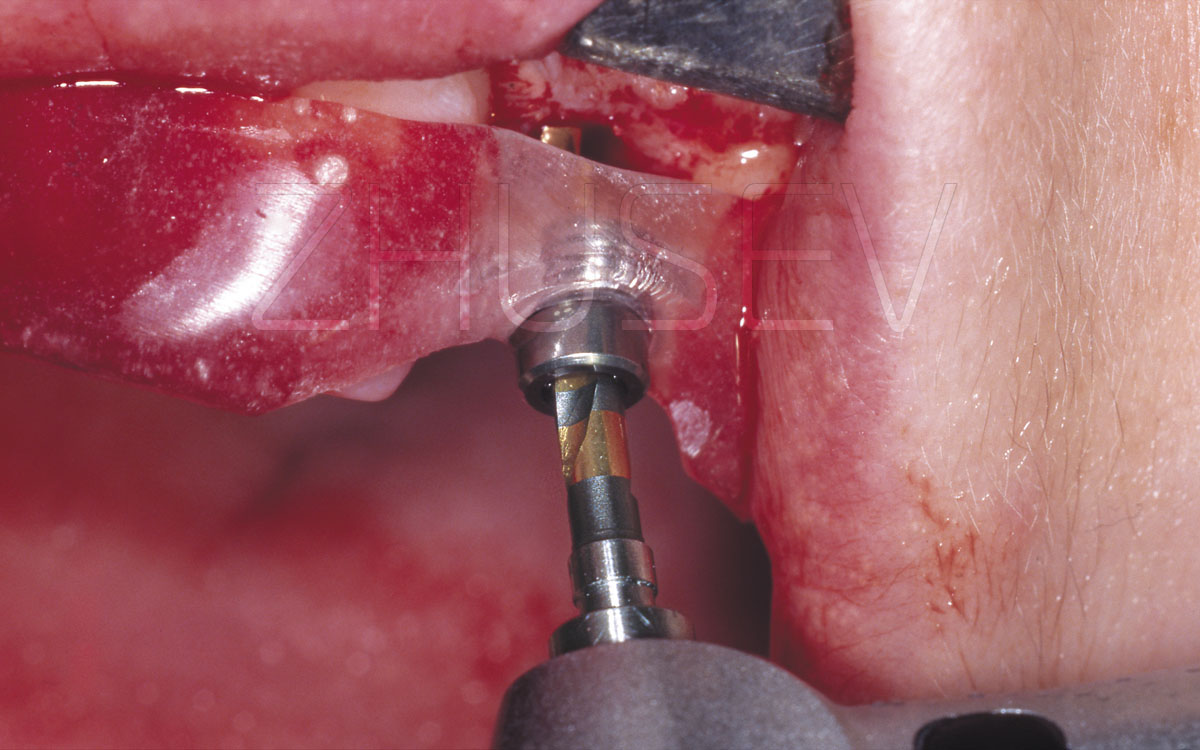
An STL file permits creating a solid replica of an object in the screen. You send the file to a 3D printer and in an hour or two get a ready model. Surgical templates can be tooth-supported 2.2.1-7, mucosa-supported (in toothless patients), and bone-supported. A titanium sleeve is always placed within a plastic surgical template. The diameter of a titanium sleeve is equal to the diameter of a bur. To ensure a more precise drilling, several surgical templates which contain different sleeve diameters are used. It is also possible to use one surgical template with several telescopic sleeves which are inserted one into another.
All aforementioned templates are characterized by different precision levels. Tooth-supported surgical templates are the most precise ones, while mucosa-supported templates as well as bone-supported templates must be attached with titanium screws to prevent template displacement during surgery. To minimize deviation during drilling, it is necessary to place the sleeve as close to the bone as possible.
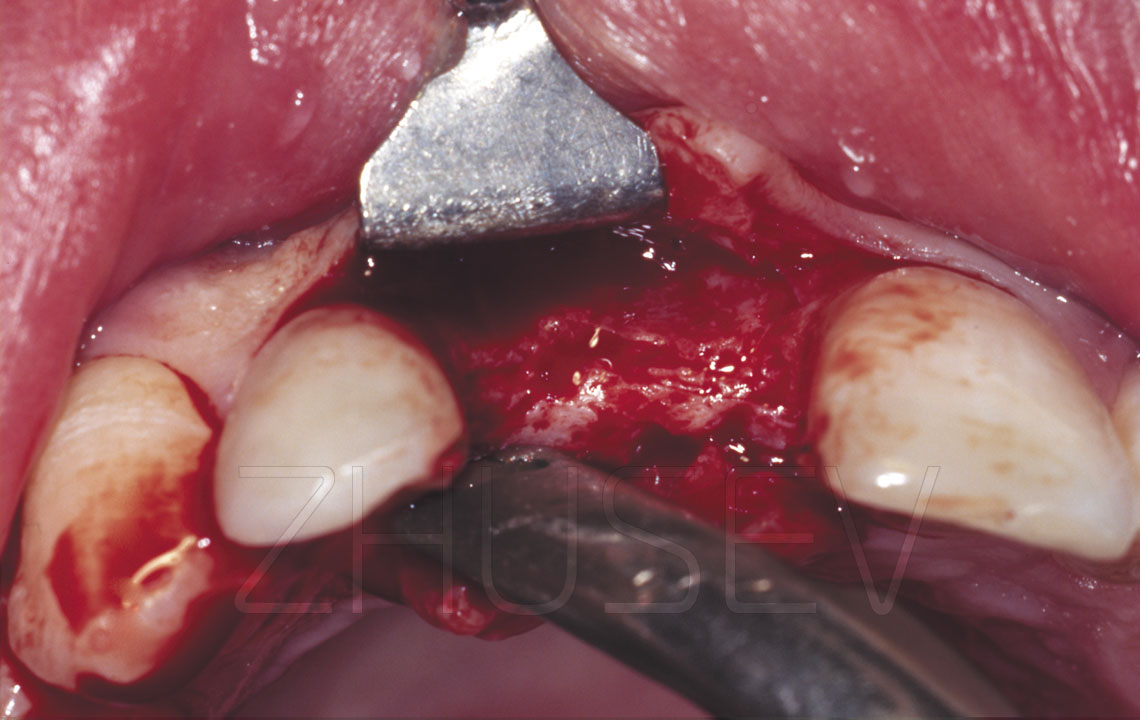
Surgical templates, though seemingly simple and accurate, should be used by experienced and careful surgeons. It is especially true in cases when a mucoperiosteal flap is not pushed back. In this case, it is difficult to ensure precise implant depth and alignment. Before a permanent implant is embedded, it is necessary to withdraw the template and to make reference measurements using a depth gauge and taking into consideration the mucosa depth.

Thus, a preoperative examination performed by a dental surgeon and an orthodontist, enables them to clearly visualize the clinical task and possible solutions.
Make the patient confident in the success of the procedure, but remember to warn them that a surgical procedure is an extreme measure. If the surgical procedure is not entirely necessary, you had better dispense with it. If the patient is determined to receive dental implant therapy, they should assist you in saving their own teeth.
Schedule a surgical procedure only if the patient has no further doubts and you are sure the selected strategy is proper and the forthcoming surgery will be successful.