Speaking of implantation, we often think that the work’s main burden lies on the surgeon, and the orthopedist and the dental technician seem to recede into the background. We think: what is so special about their work? They neither “cut” the patient, nor listen to his post-operative complaints! What they really have to do is just to select the proper abutments and good luck. They even don’t have to do much grinding and preparing of the materials.
This opinion is absolutely wrong. It is the knowledge and skills of the orthopedist, and the dental technician’s creative attitude that a long-term result of the entire work depends on. Then be sure to try and build up an effective team among you.
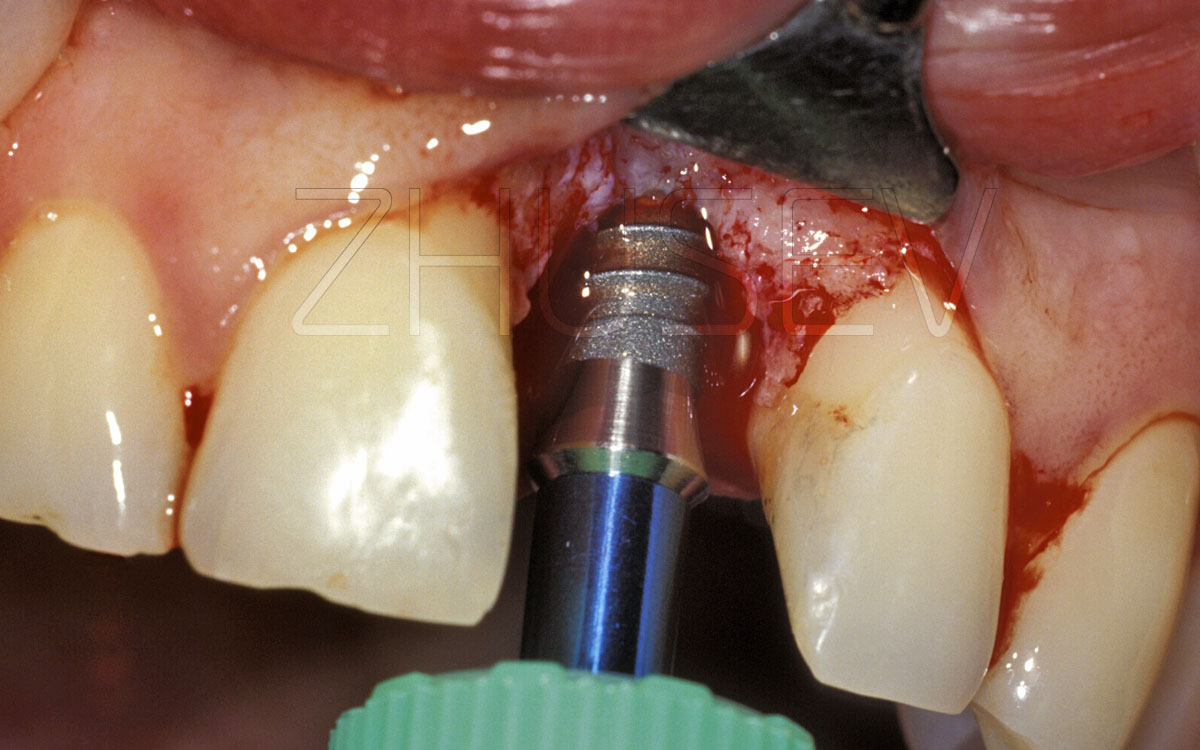
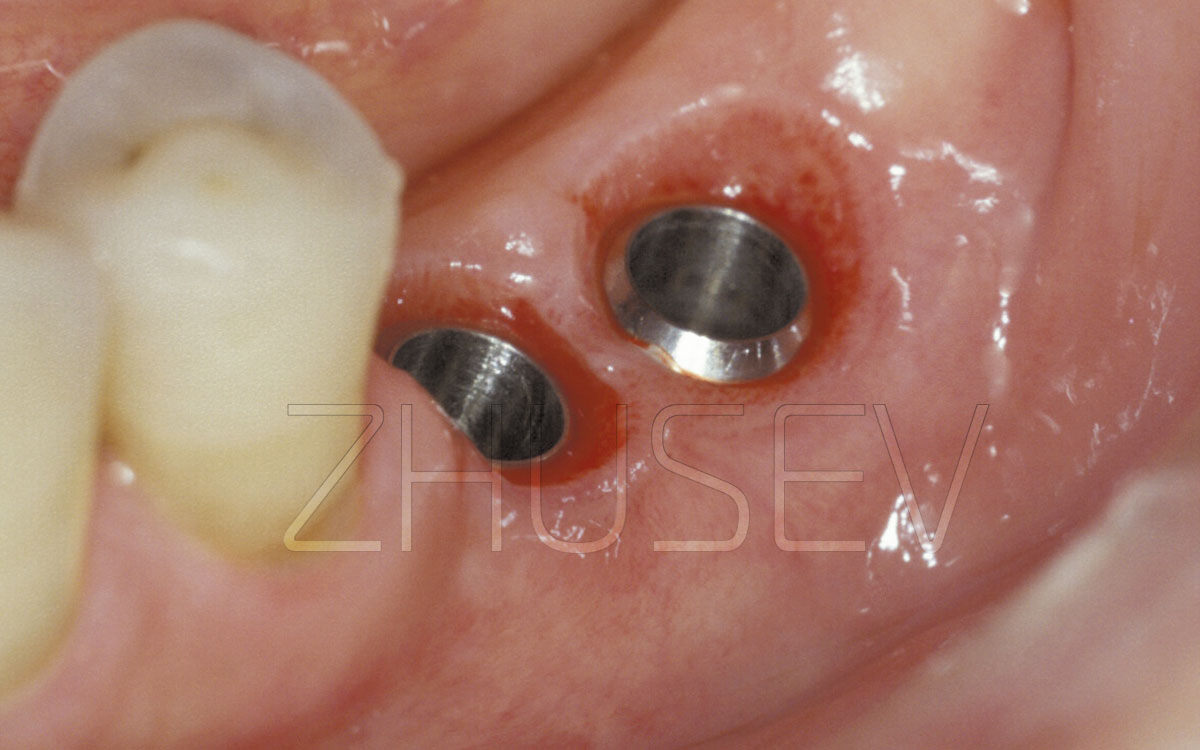
The highly-trained orthopedist and dental technician can always provide long-term problem-free functioning of the entire implant-supported prosthetic construction. And vice versa, lack of attention and a formal approach could botch the most reliable work of the surgeon with the best implants applied. As we remember, the stage of prosthetic procedure starts since the moment when the surgeon installs the healing cap. It is at this stage when the first orthopedic problems may occur. The patient always tends to hurry and is ready to run and get his tooth impressions on the same day when the healing caps are installed.
Don’t let yourself be persuaded, and don’t make haste! The soft tissues around the healing cap need time to restructure and mature! During the first several days, these tissues are very vulnerable and non-resistant to any external aggression, they can become inflamed even because of damage caused with a food bolus 4.9-1.
The process of the mild tissues formation cannot take less than 5-7 days. Moreover, the deeper under the gingiva the implant is installed, the more time this period will take. Sometimes, it can take more than 15-20 days.

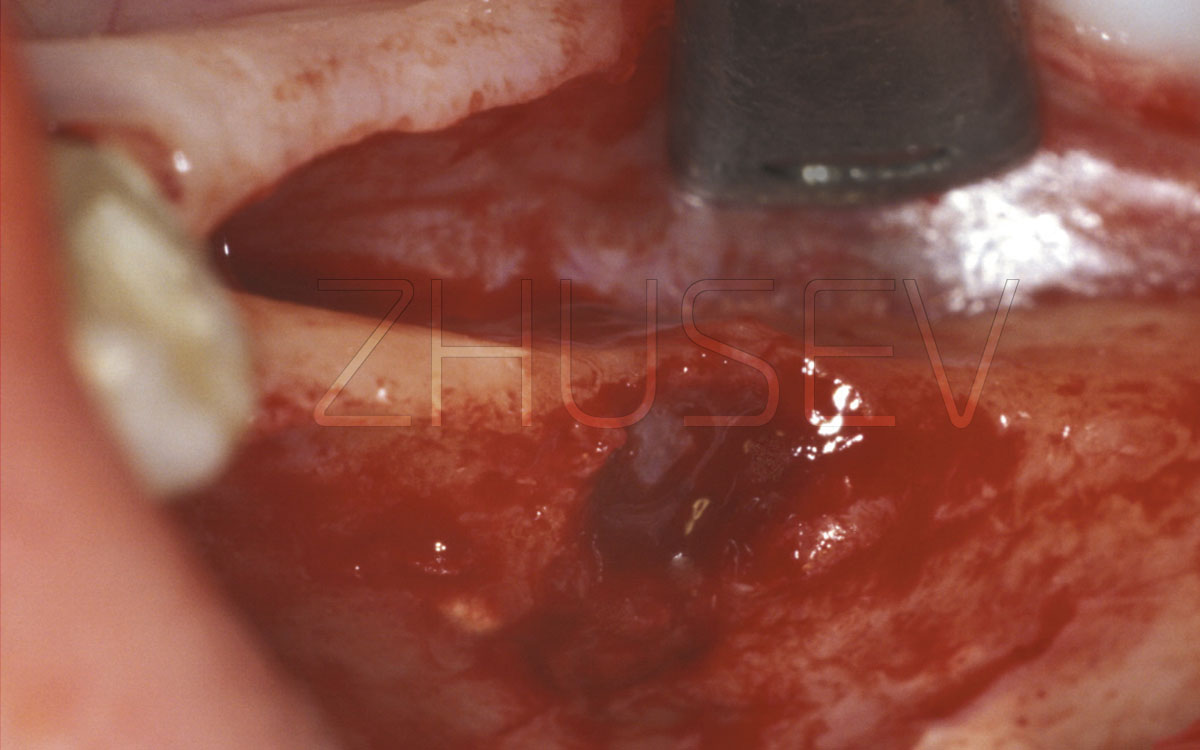
After taking an impression clean the implant and the soft tissues around it as carefully as you can from the impression paste residuals. Even an inconsiderable fragment that remained under the gingiva can cause a serious inflammation around the implant.
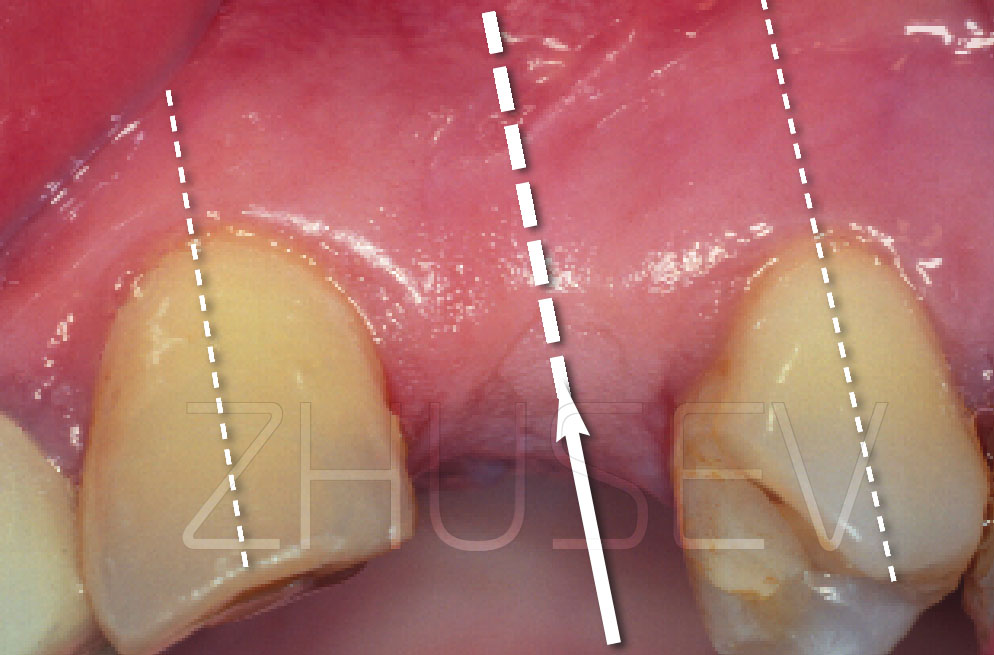
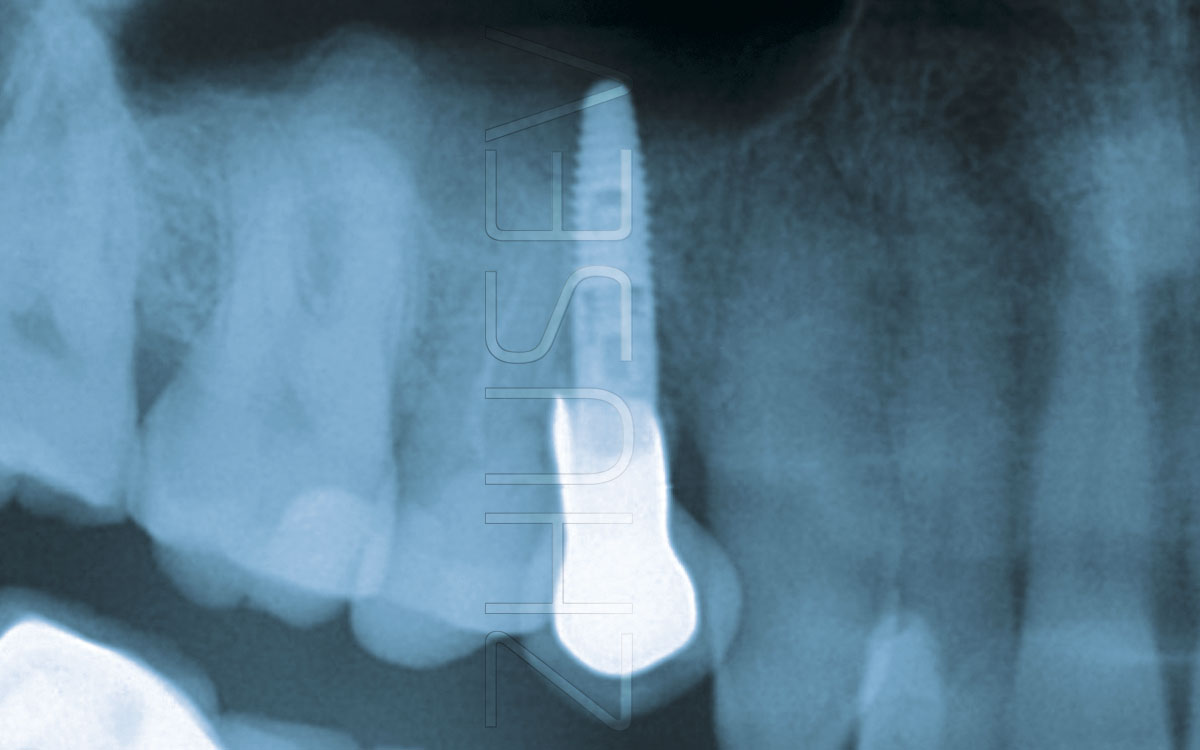
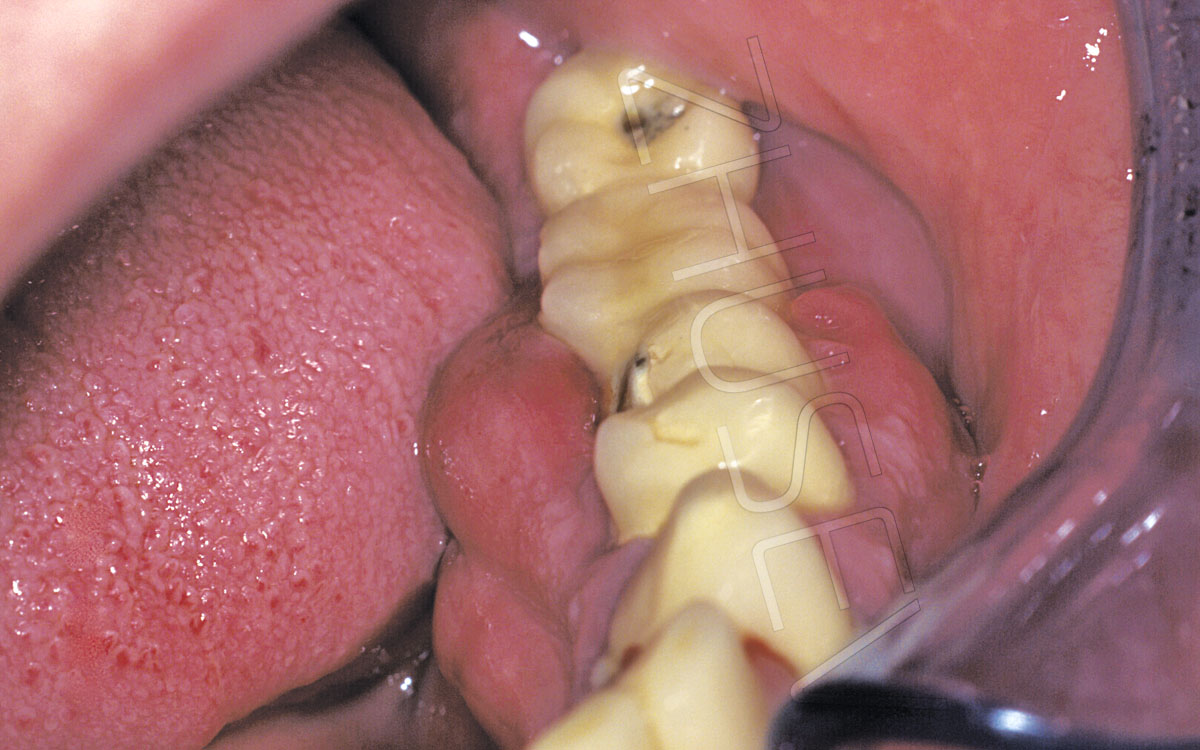
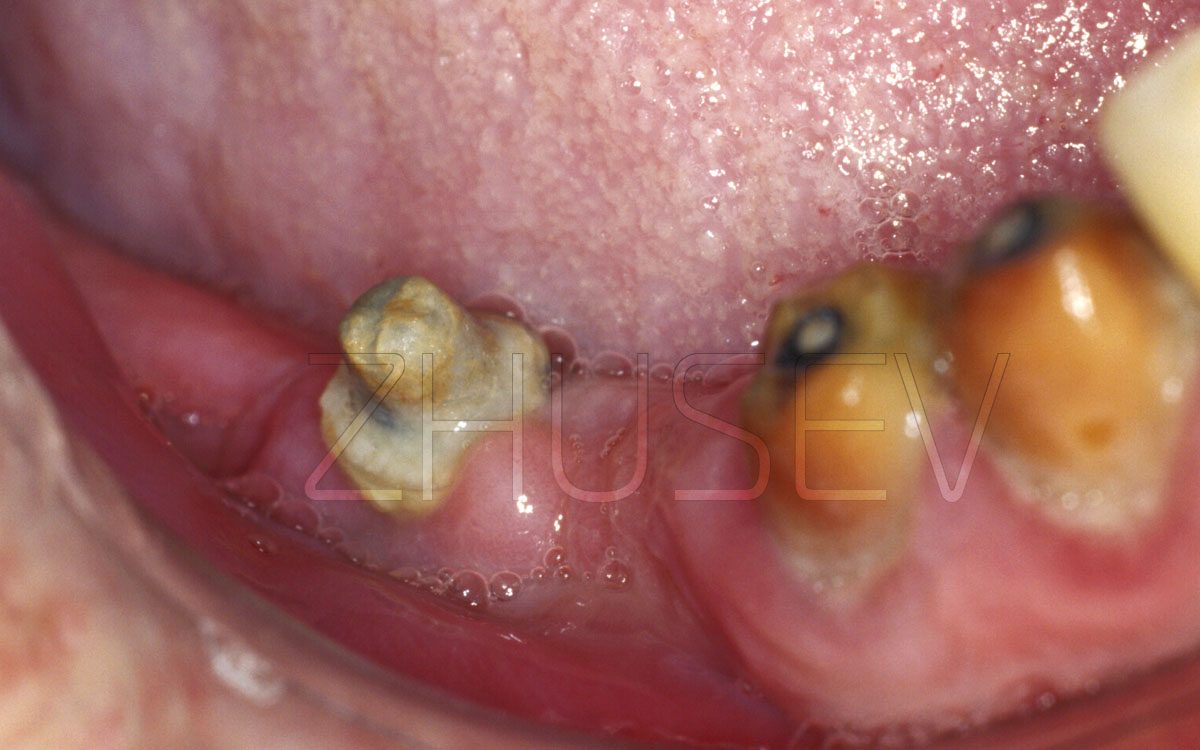
If a few days after the impression taking procedure the patient complains of the feeling of weight and discomfort, and sometimes pain in the gingiva around the implant, carefully check the implant-gingiva attaching for any fragments that may remain here 4.9-3.
I have heard some orthopedists ignore such complaints and delivered their work, and 3-6 weeks later there occurred around the implant a major inflammation, the implant evidently became unstable and had to be extracted. The same things can appear after fixation of provisional constructions on temporary cement.
There is no smoke without fire! If a patient complains of something, and these complaints continue for a couple of days, you should start searching for the reason. It is likely that a fragment remained under the gingiva.
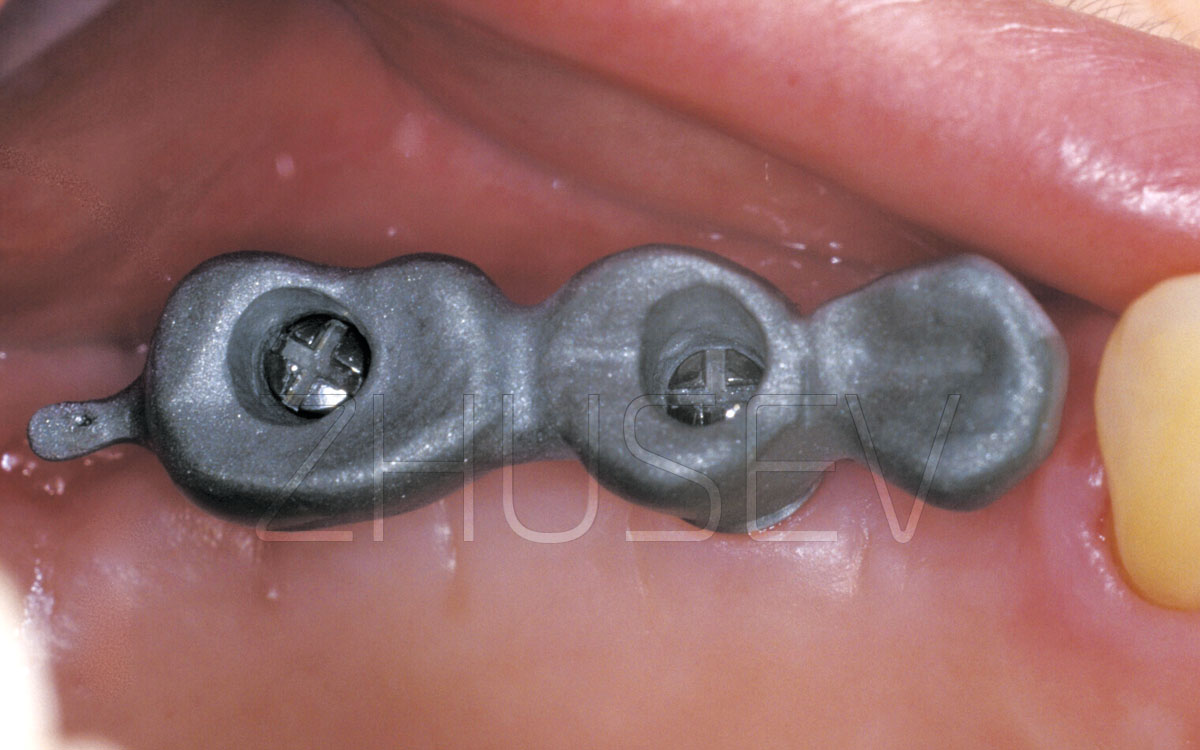
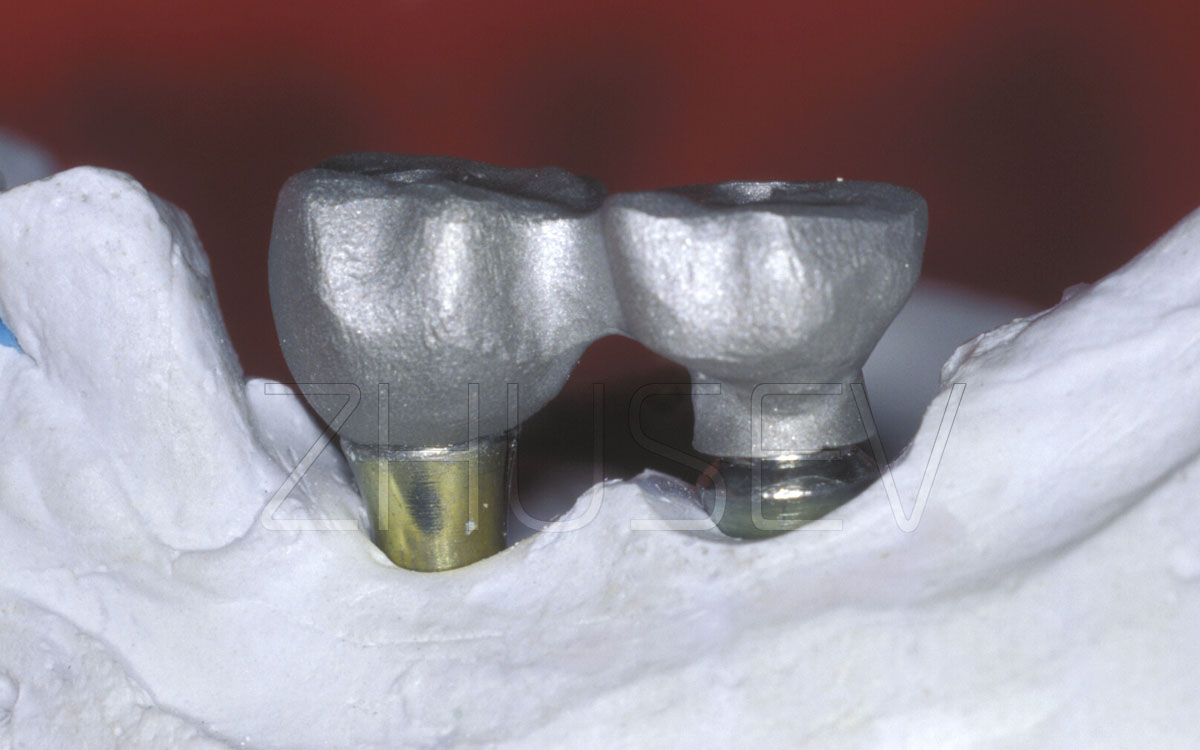
TRY-ON AND FITTING OF THE FRAMEWORK OF THE IMPLANT-SUPPORTED DENTURETry-on and fitting procedures of the framework of the future prosthetic construction do not make not a difficult stage, but always a very important one. The most common error at this stage is to try to fit the unsuccessfully fabricated denture’s framework by all means.
If the framework is moving very tightly, with evident effort, stop trying it on! Check the fit of the entire work on the gypsum master cast. If all this fits nicely, check positions of each replica with a fixed abutment in the corresponding caps, one by one. If this revision’s result was successful too, but in the mouth the framework sits on the implants very tight or doesn’t sit at all, you have only two options what to do:

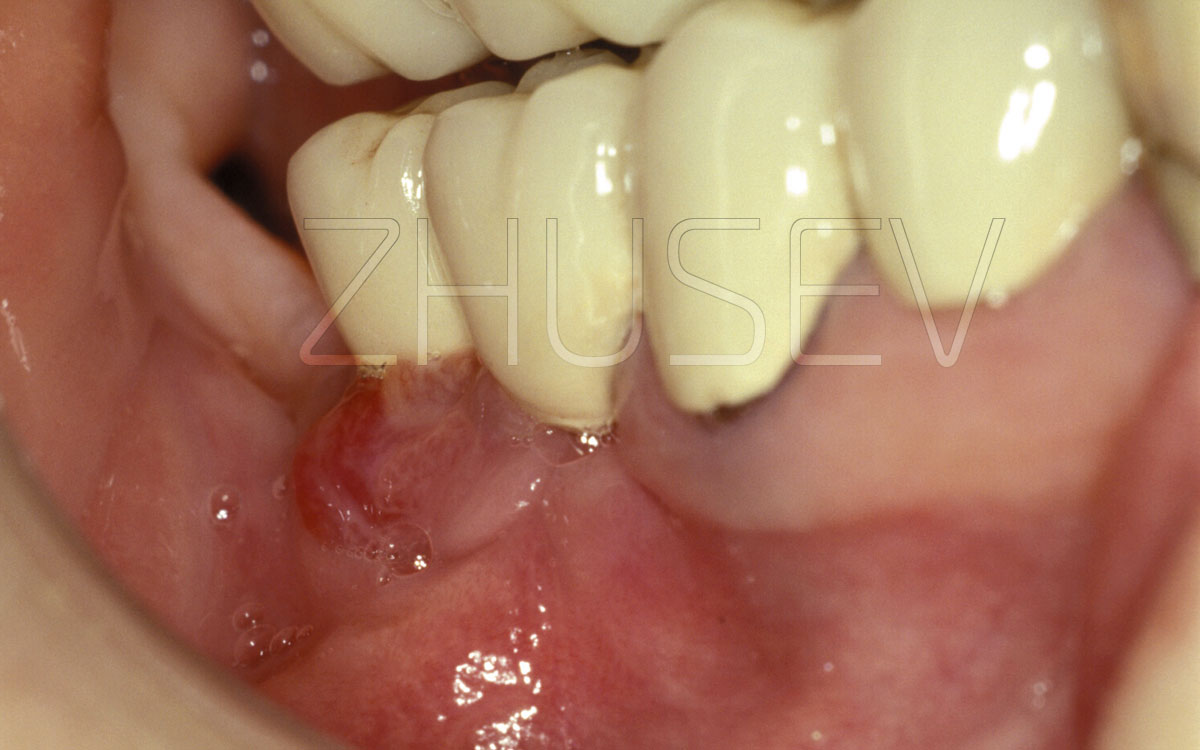
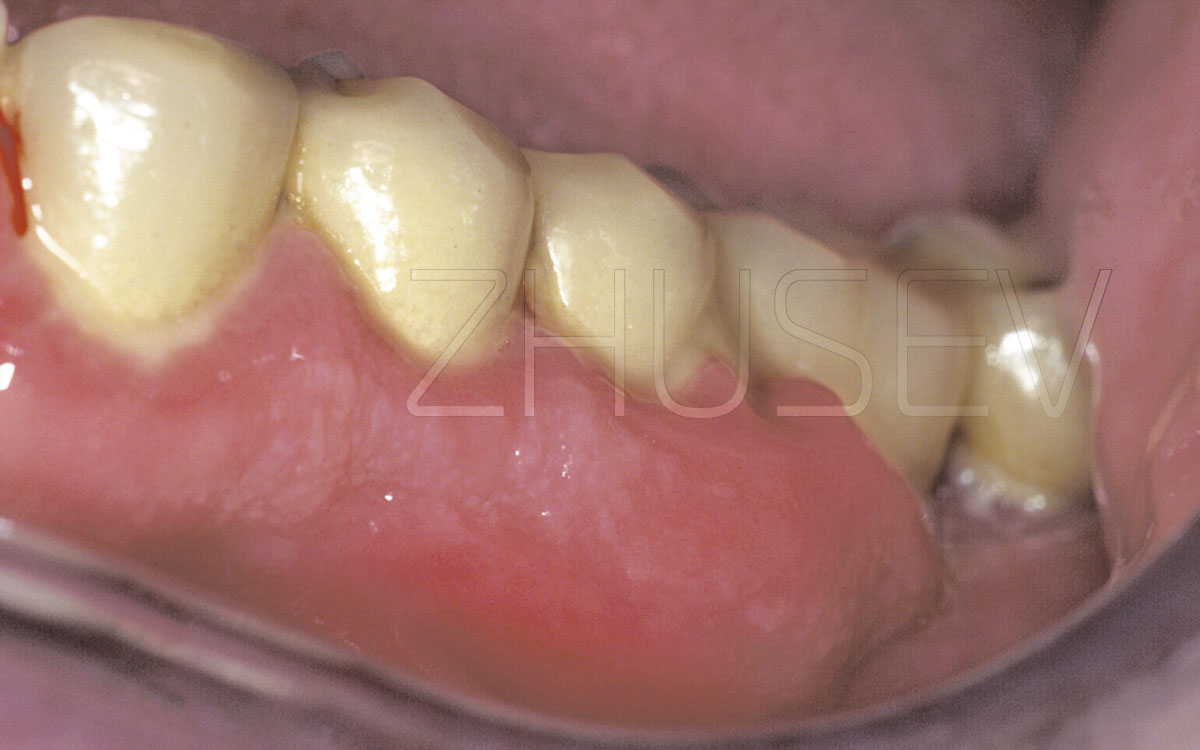
At this stage, it is also important to make sure that the denture framework edge doesn’t overhang the abutment or the implant’s shoulder. Even if these overhanging fragments cause neither pain or sense of discomfort during the try-on procedure, they can later cause a lot of trouble, especially if they are in the area of the mobile mucosa. This often can cause an effect of epithelium maceration, its uncontrolled growth and developing periimplantitis. Also, it is at the moment of the framework try-on that it is necessary to check the size and shape of the irrigation areas under the implant-supported bridge restoration.
There is a golden rule to this: the closer the mucobuccal fold is attached to the alveolar ridge, the larger the irrigation area should be. Some practitioners in search of «superesthetics» ignore this rule and install the crown too close to the gingiva. This should be avoided, especially if it is in the posterior mandible area.
If we explore options of the shapes of the bridge restoration irrigation part, the most preferable of them should be hanging or tangent. The saddle-like shape is the least successful!
Before cementing the prosthesis, carefully examine it to see whether it has rough edges or uneven surfaces. Be particularly careful when examining the interior surface of the denture. The interior surface will be never seen by the patient, but it is essential that it should be sanded, polished, and glazed. There should be no rough edges. The internal surfaces of all caps should be sanded and defatted.
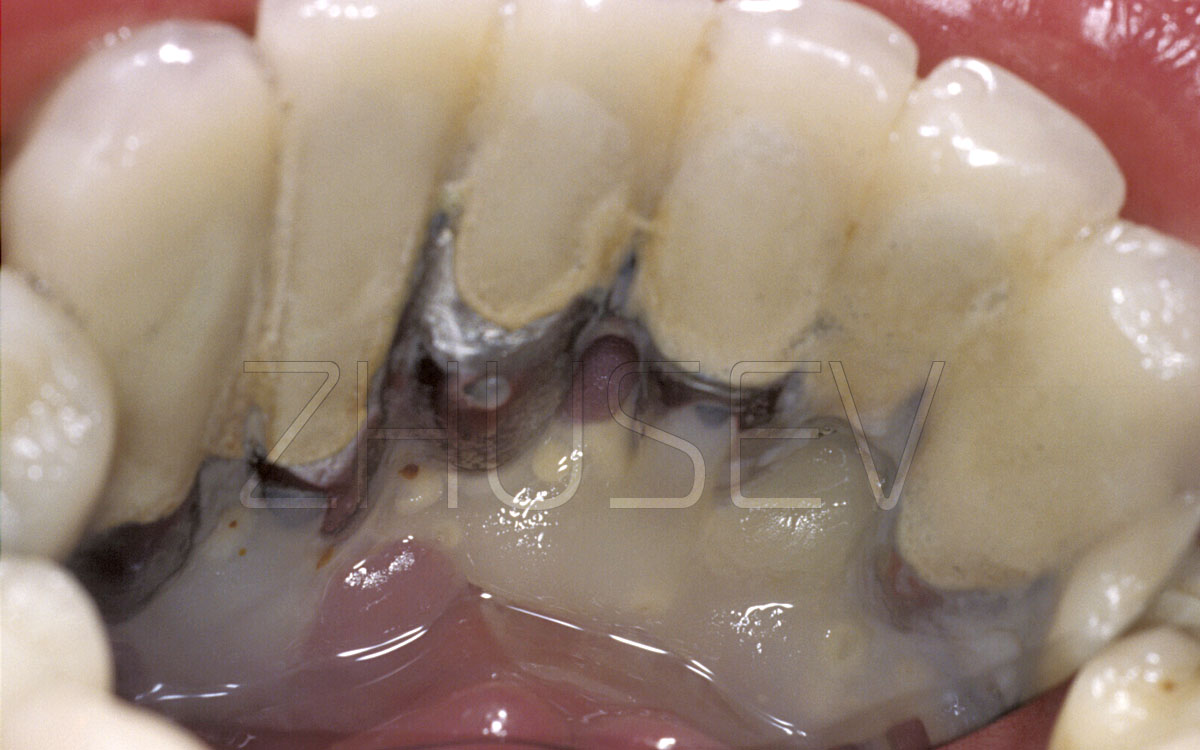
Before attaching the abutment, you must thoroughly rinse its internal surface, dry and defat it. Remember to use the torque-controlled wrench, which has already been discussed, and do not apply excessive force. When cementing a denture, be extra careful. Never let cement fill an entire cap, which is unfortunately often practiced. It is essential that cement should fill no more than one third of each cap. Apply a skim coat of cement to the entire internal surface of a cap.
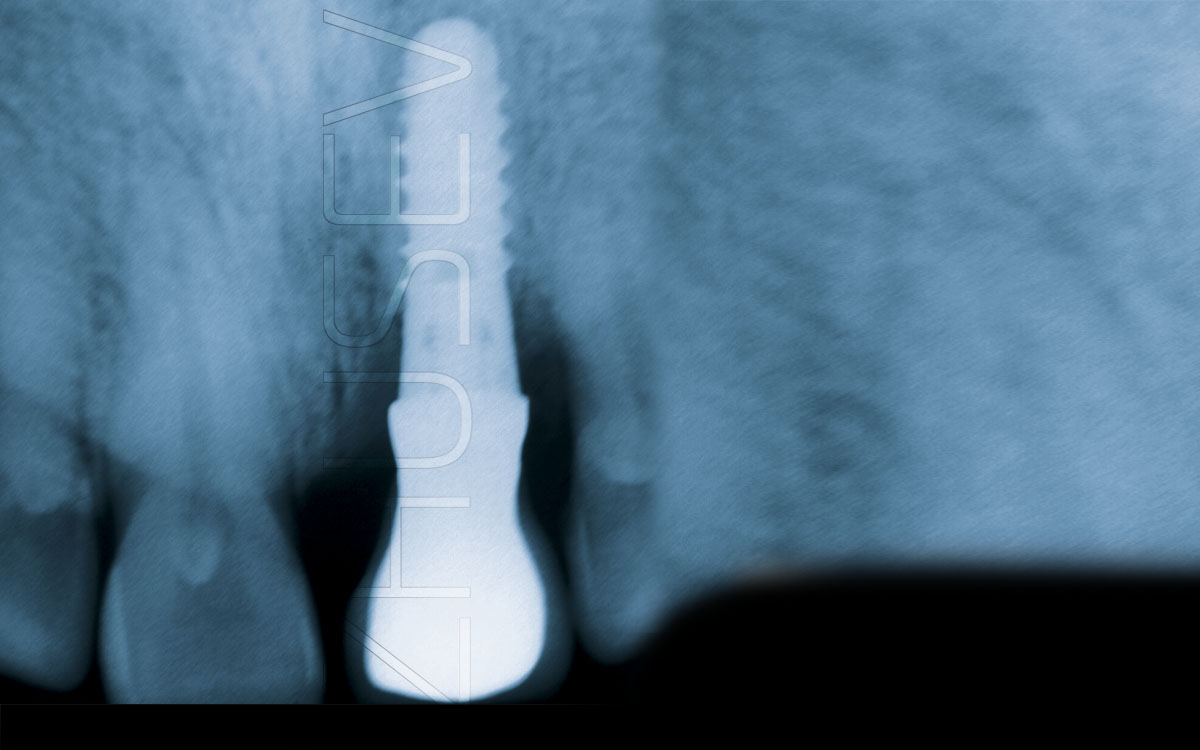
If the implant-to-crown connection is deep within the gum tissues, even a small amount of cement can provoke a severe inflammation.
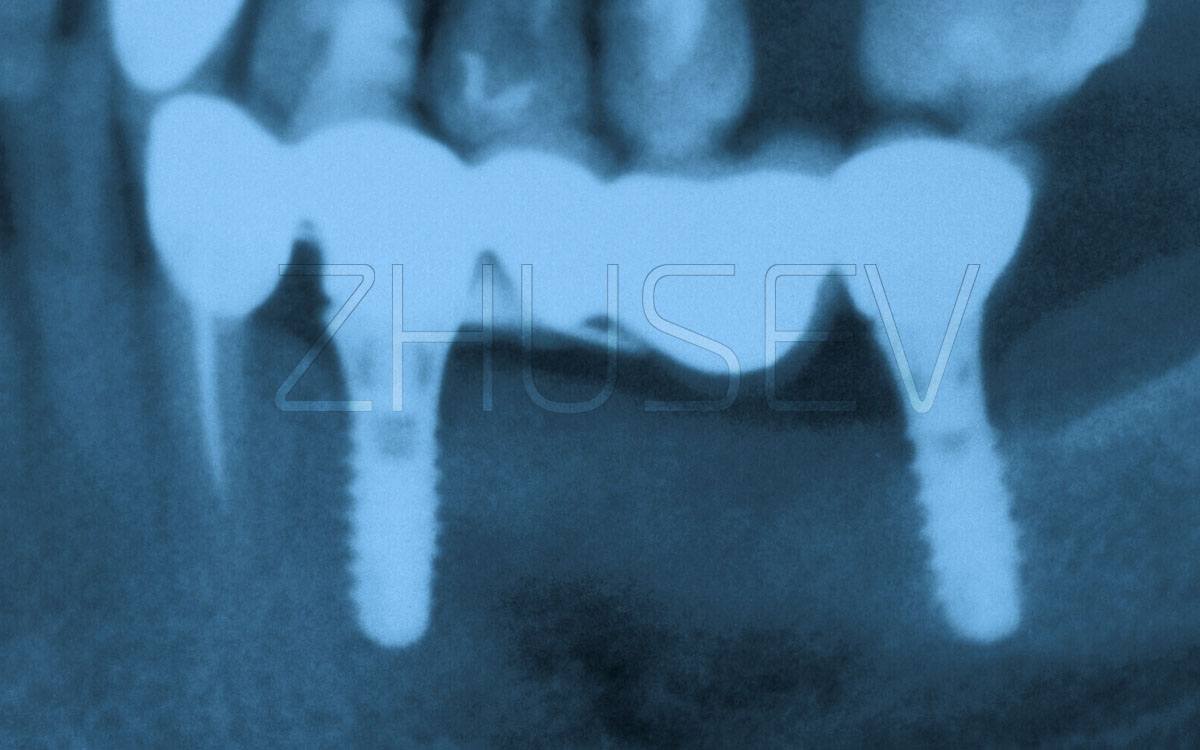
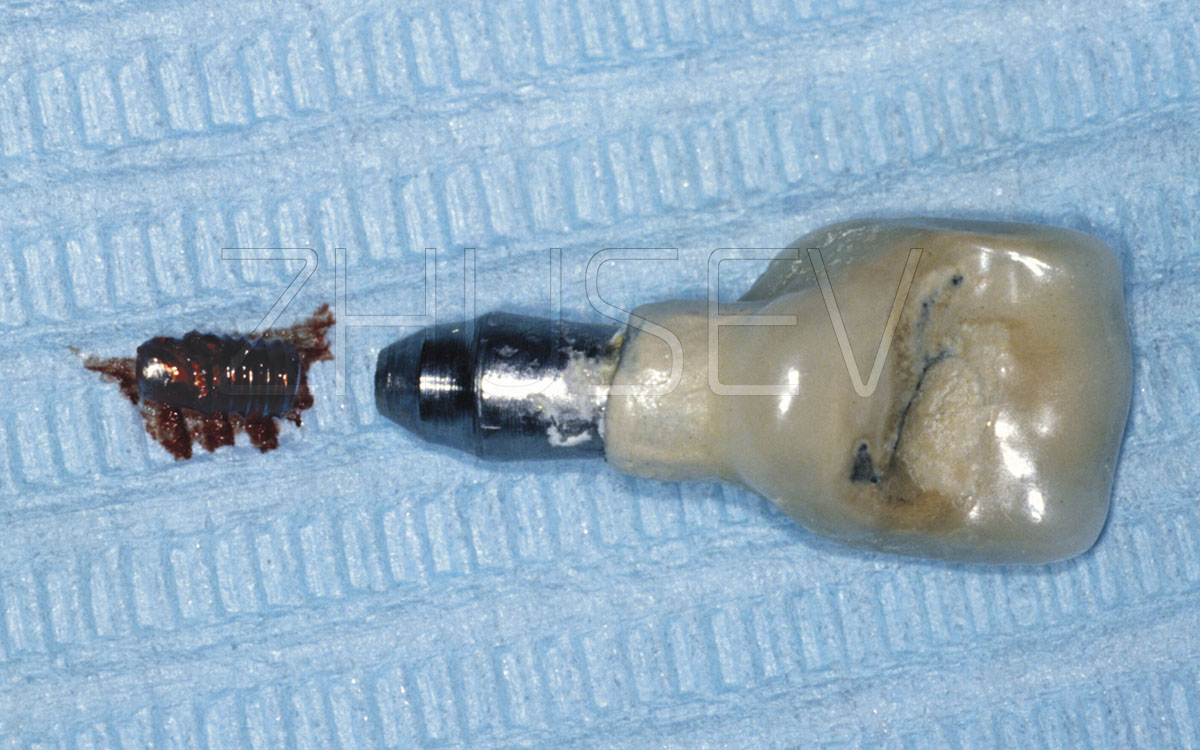
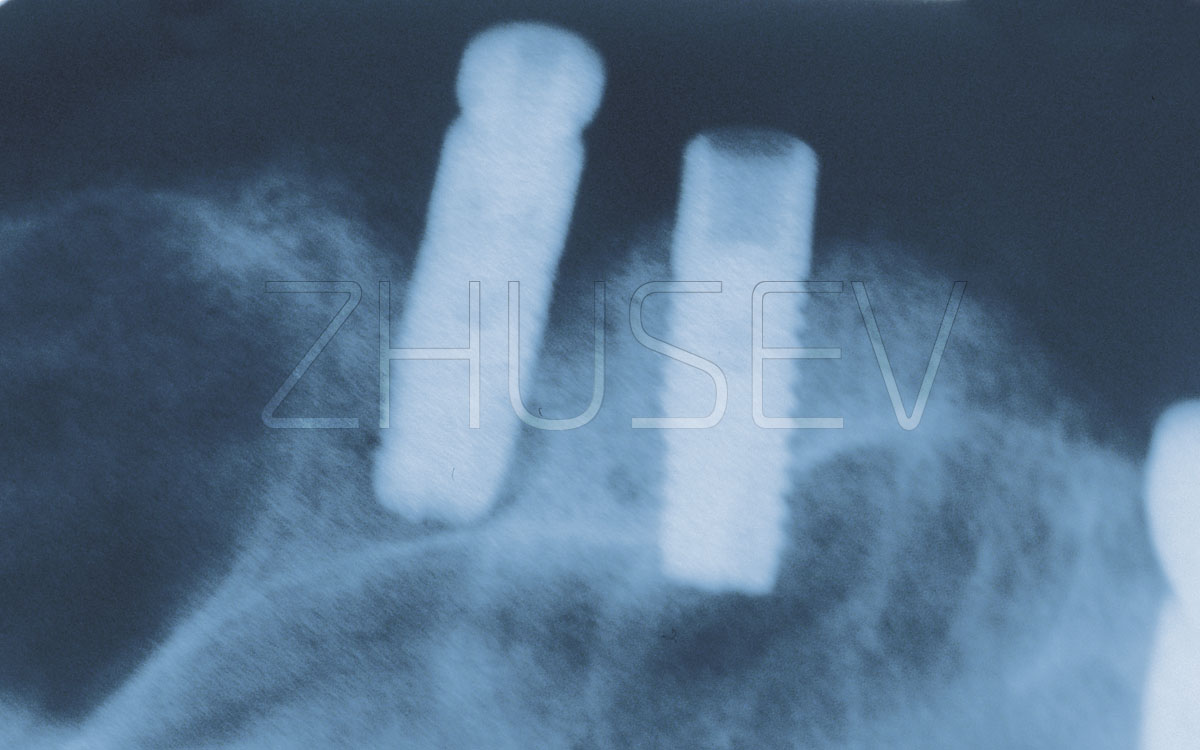
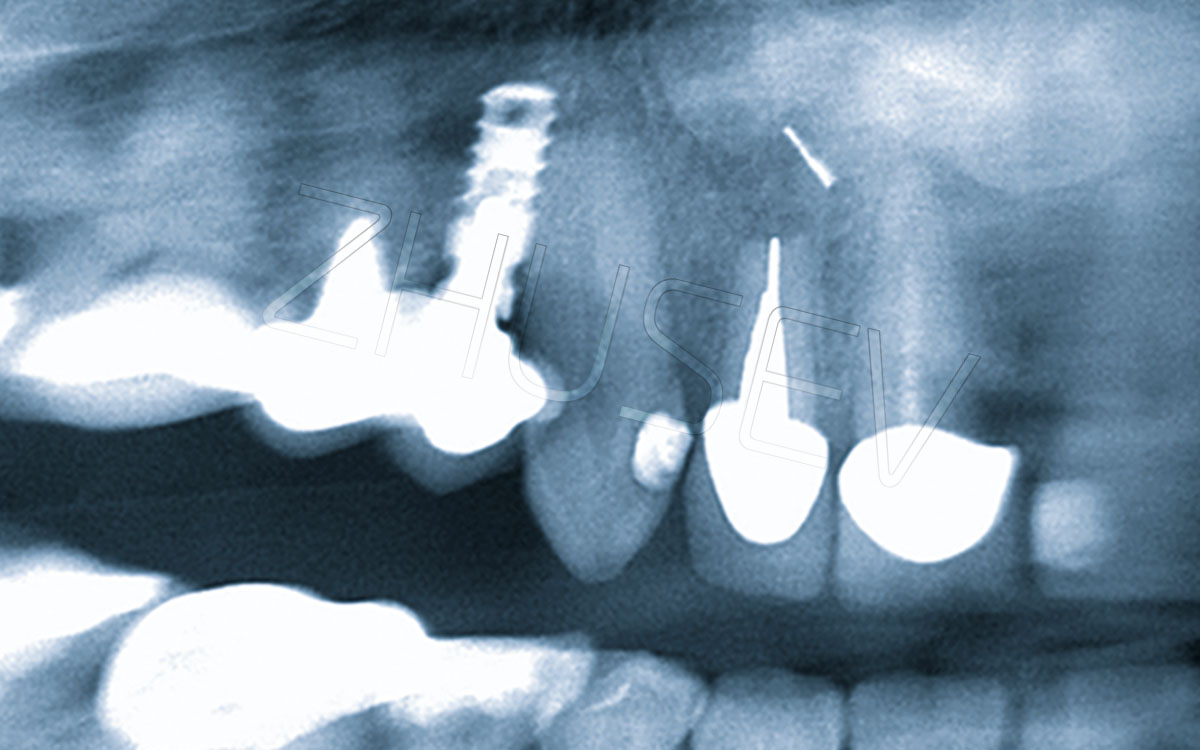
Even when a prosthetic denture is safely attached to the implants (the patient is happy with the result and experiences no discomfort), you should never forget about it. A dynamic examination and control must be performed at least once a year. The dentoalveolar complex is a dynamic system. Natural teeth deteriorate faster than PFM crowns attached to implants. As a result, an ideal occlusion in a few years may become directly or indirectly traumatic. Since implants are not innervated, the patient fails to notice implant overload. As a result, unless a timely diagnosis is received, the patient’s PFM crowns may suffer from chipping, but what is even worse is that the patient may suffer from fractured implants, damaged abutments and broken transocclusion screws.
It is naive to suppose that only “bad” implants fracture. I have witnessed implant breakage and I can truly say that almost all implants presented at the market can break. The problem is especially acute during the 7th – 9th years.


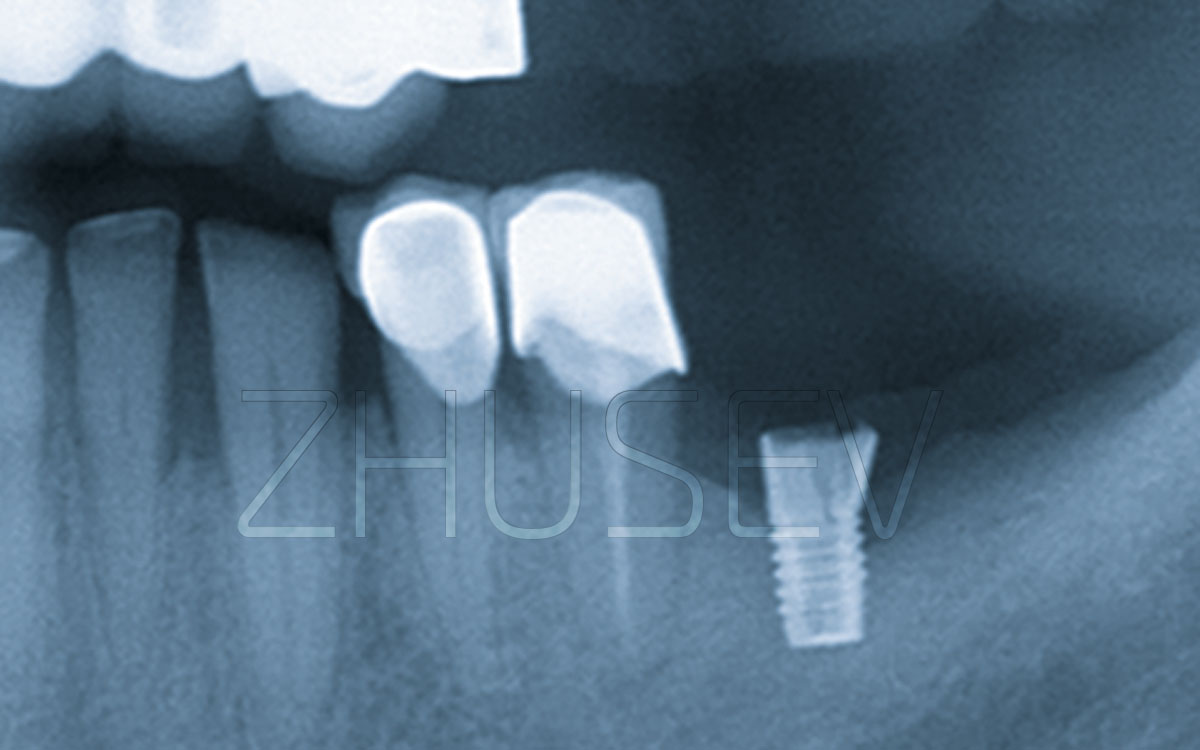

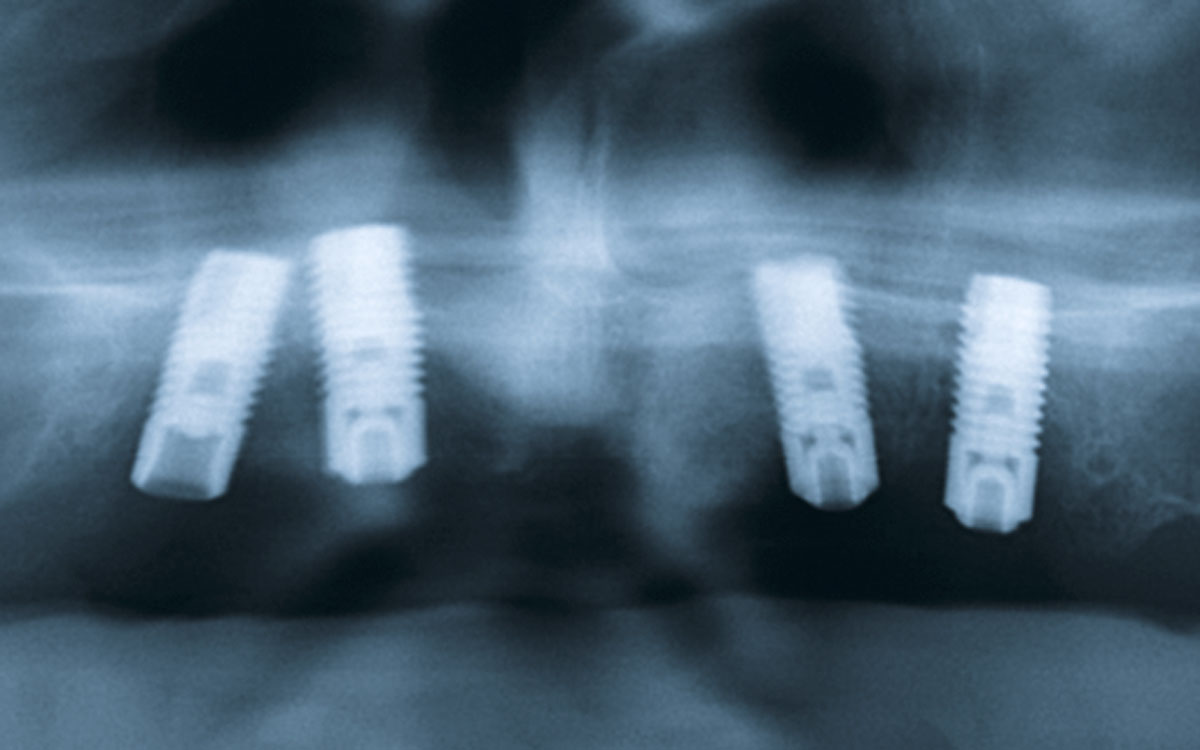
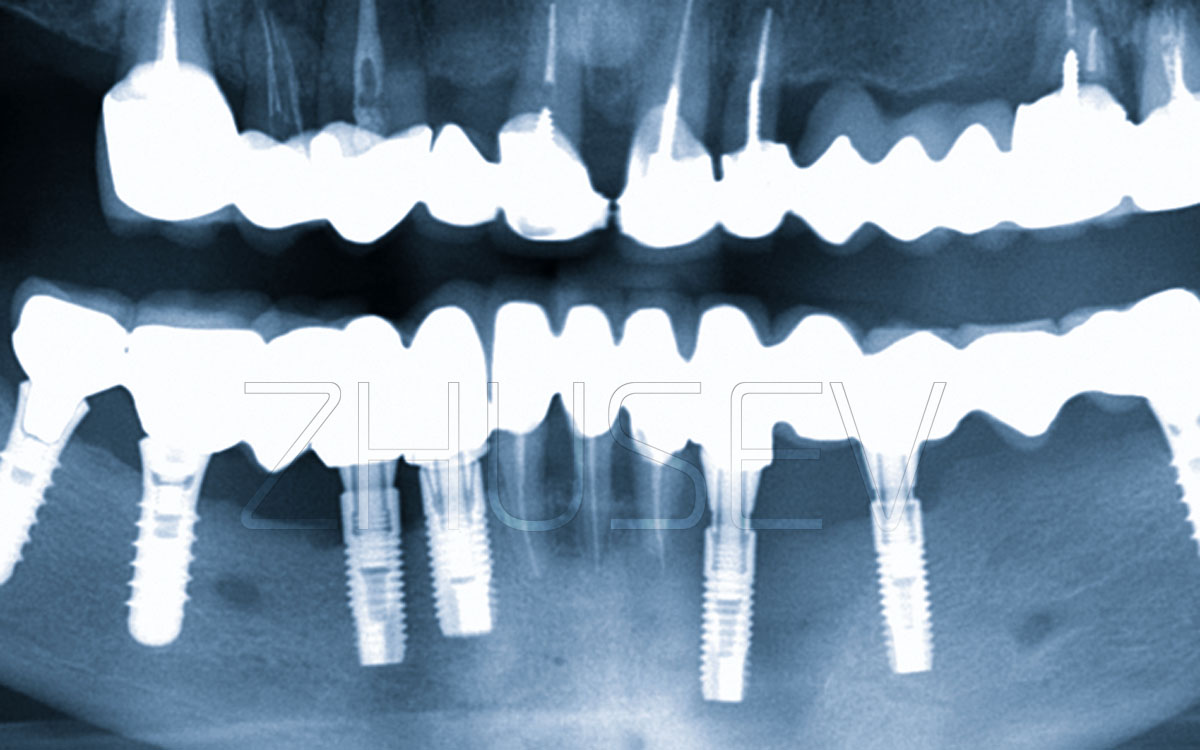

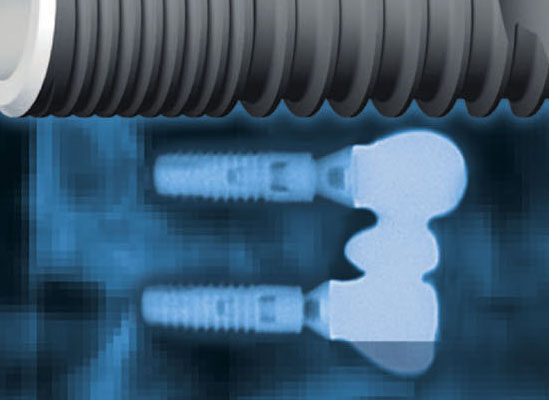
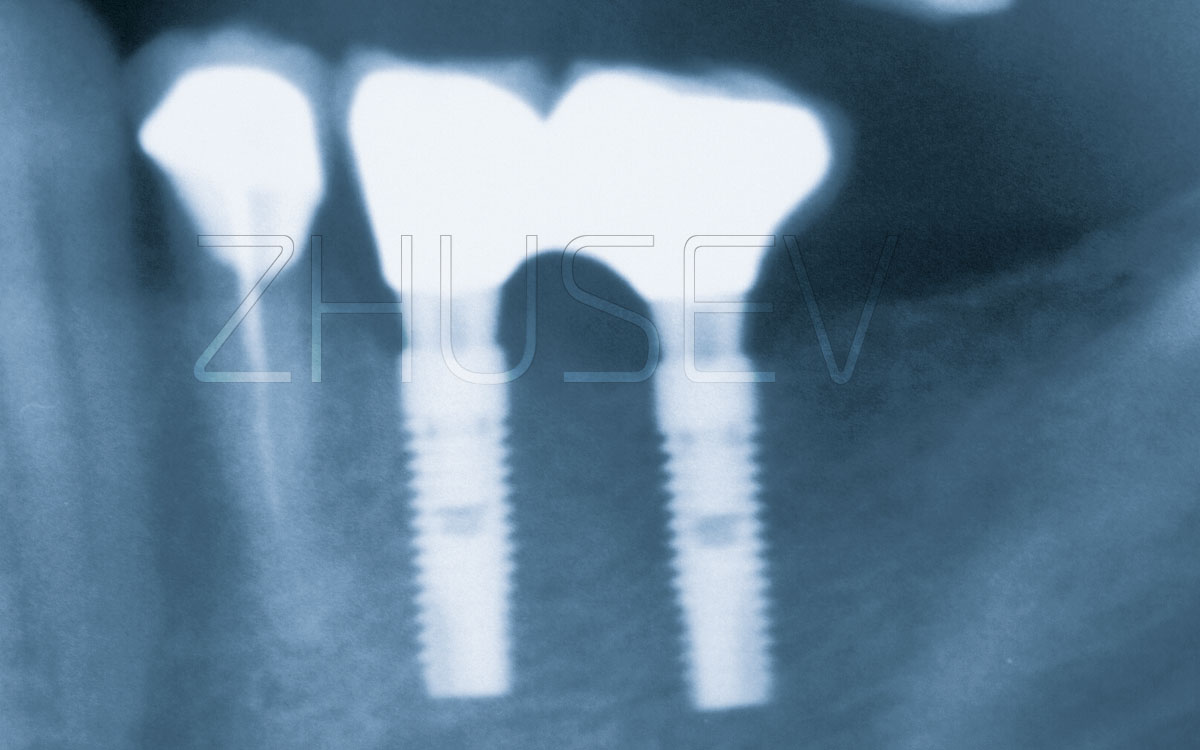
Implants connected to natural teeth are more prone to fractures (it is accounted for by different mobility of implants and natural teeth). Fractures often occur in multiple implant-supported dentures due to detachment of one or several restorations.
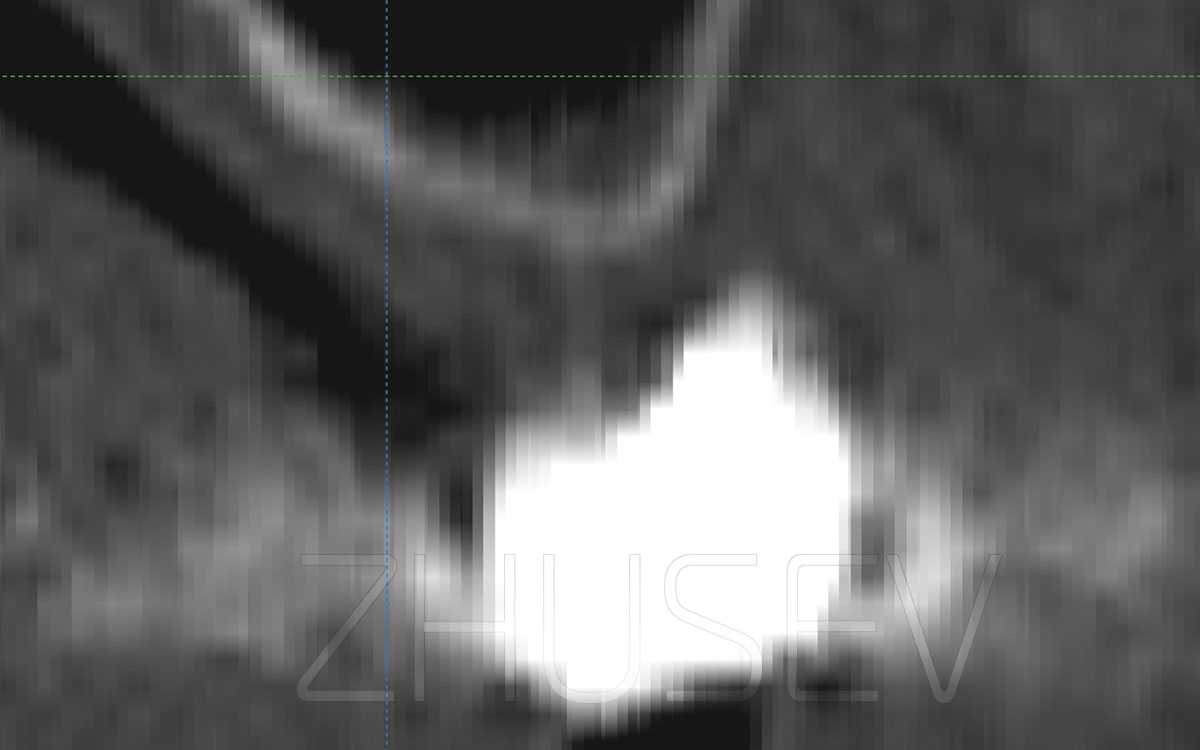
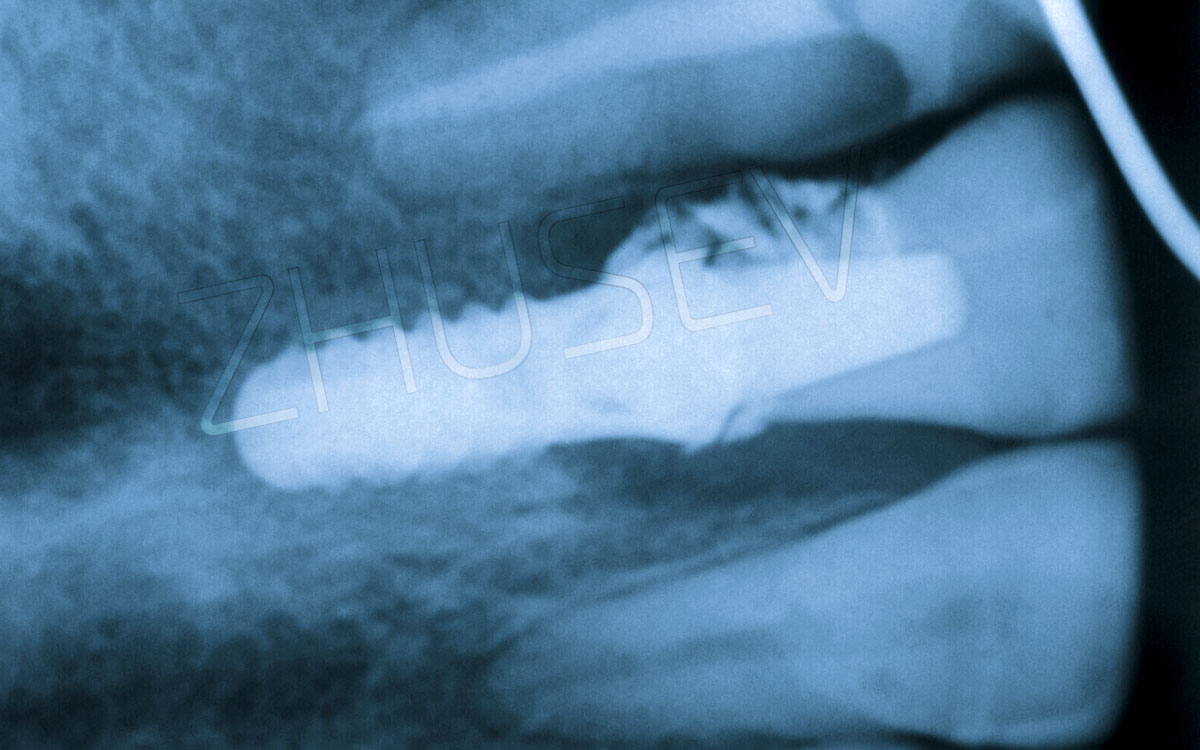
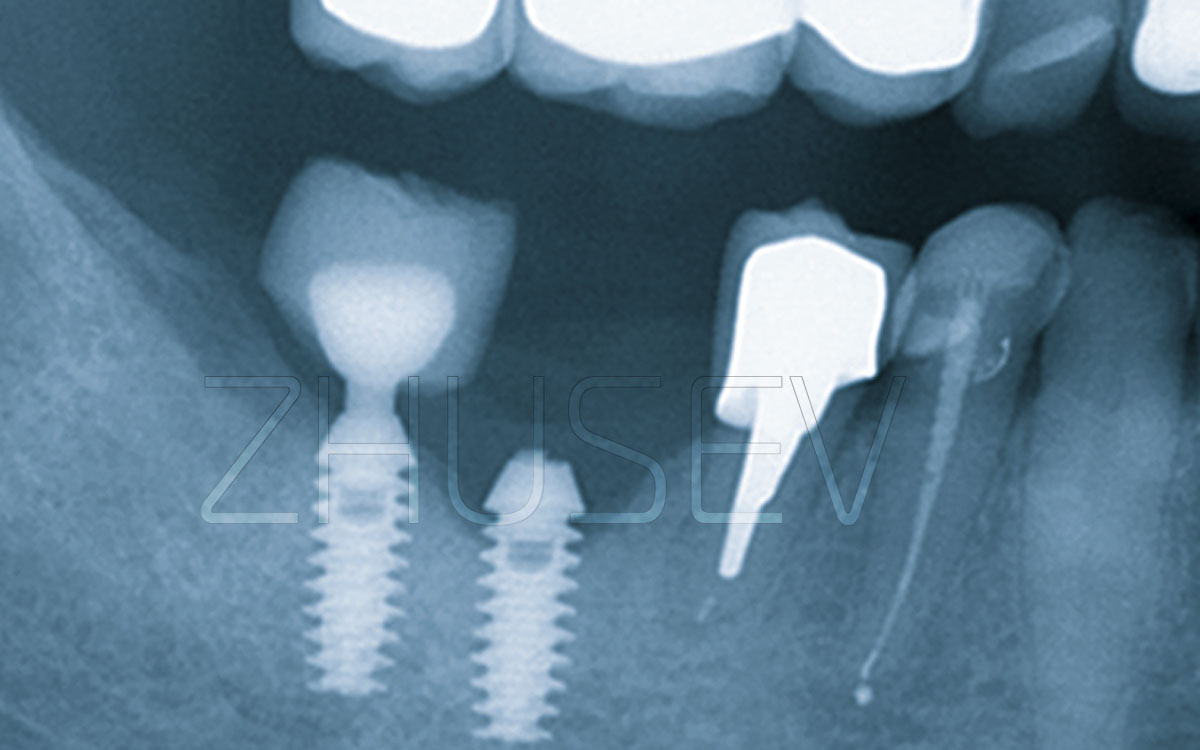
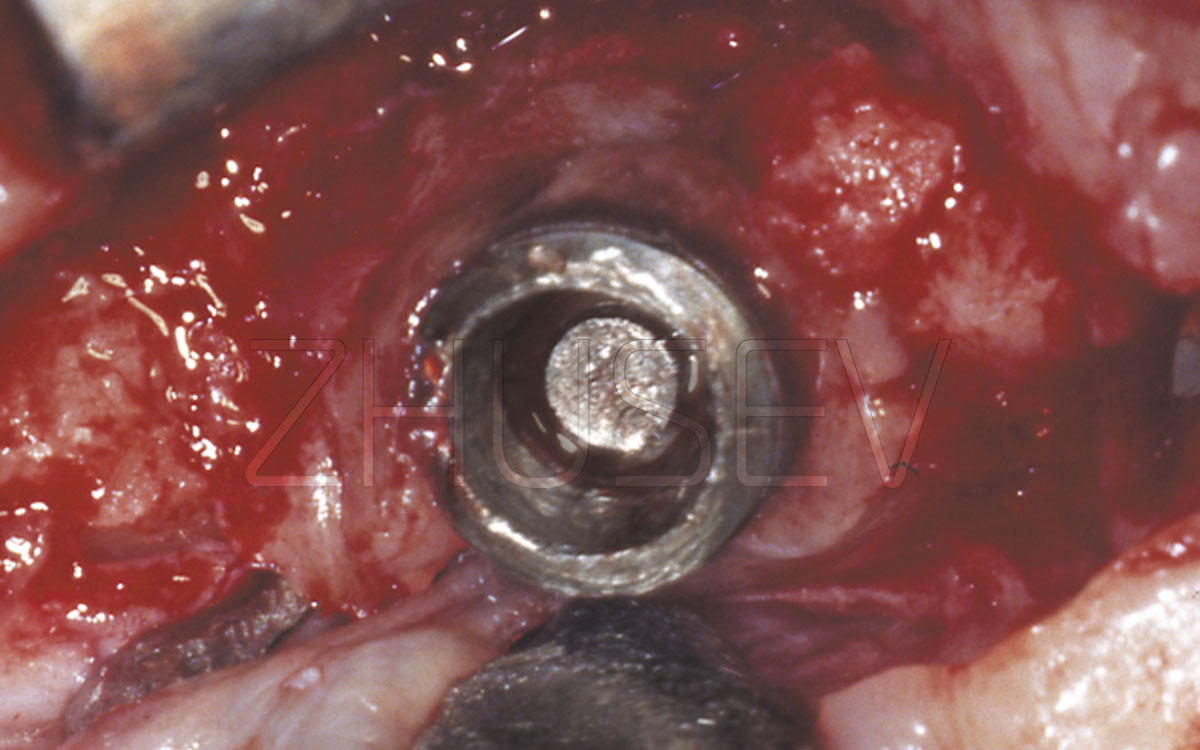
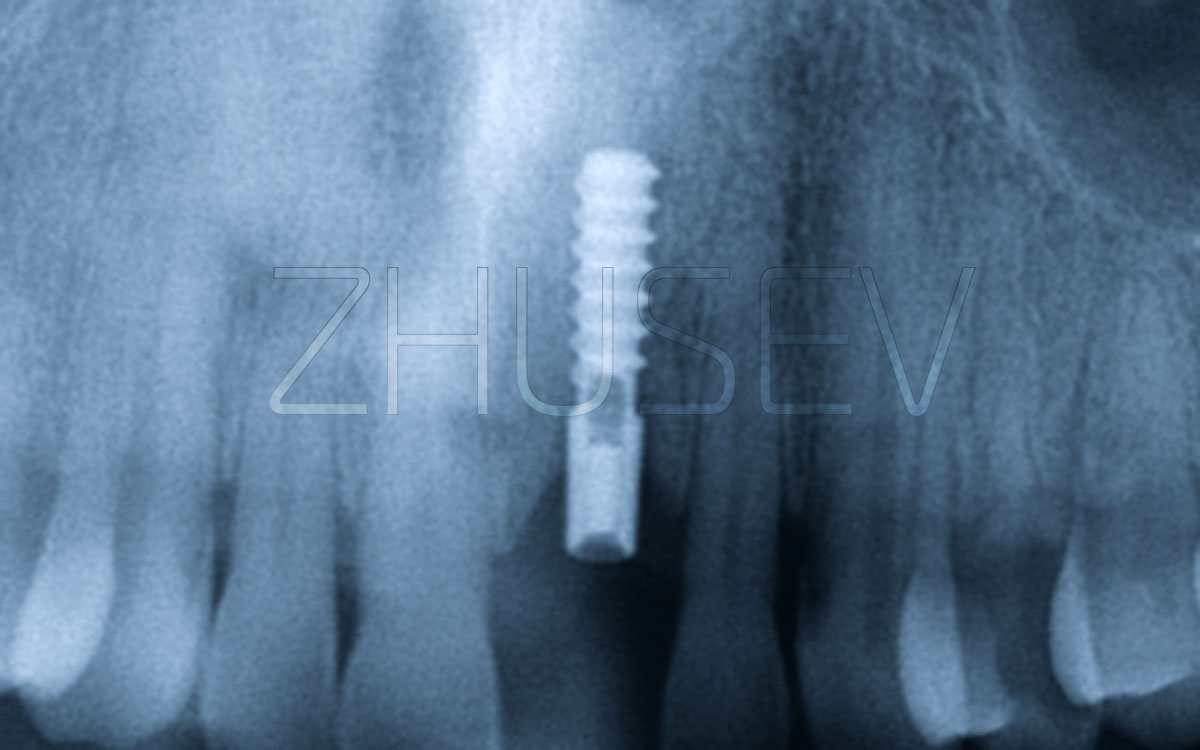
If implants are deeply inserted, it is difficult to control the correct implant-abutment connection. The thick layer of mucosal tissues hinders tactile examination.
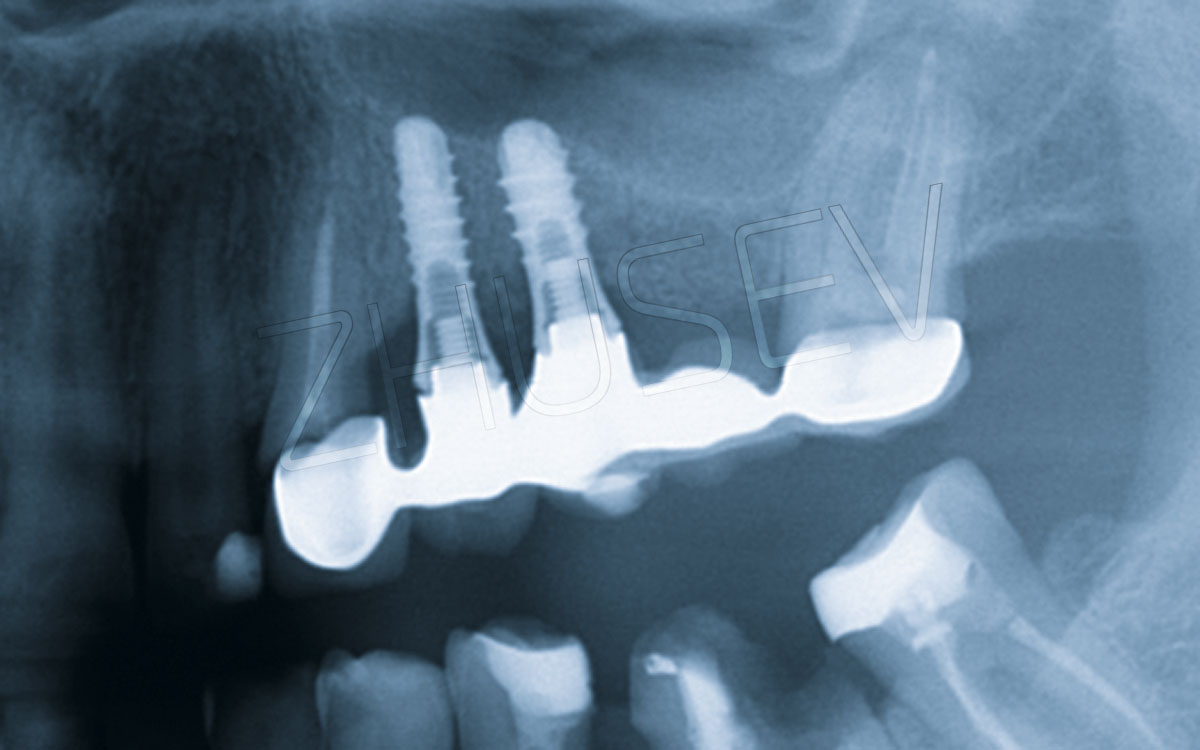
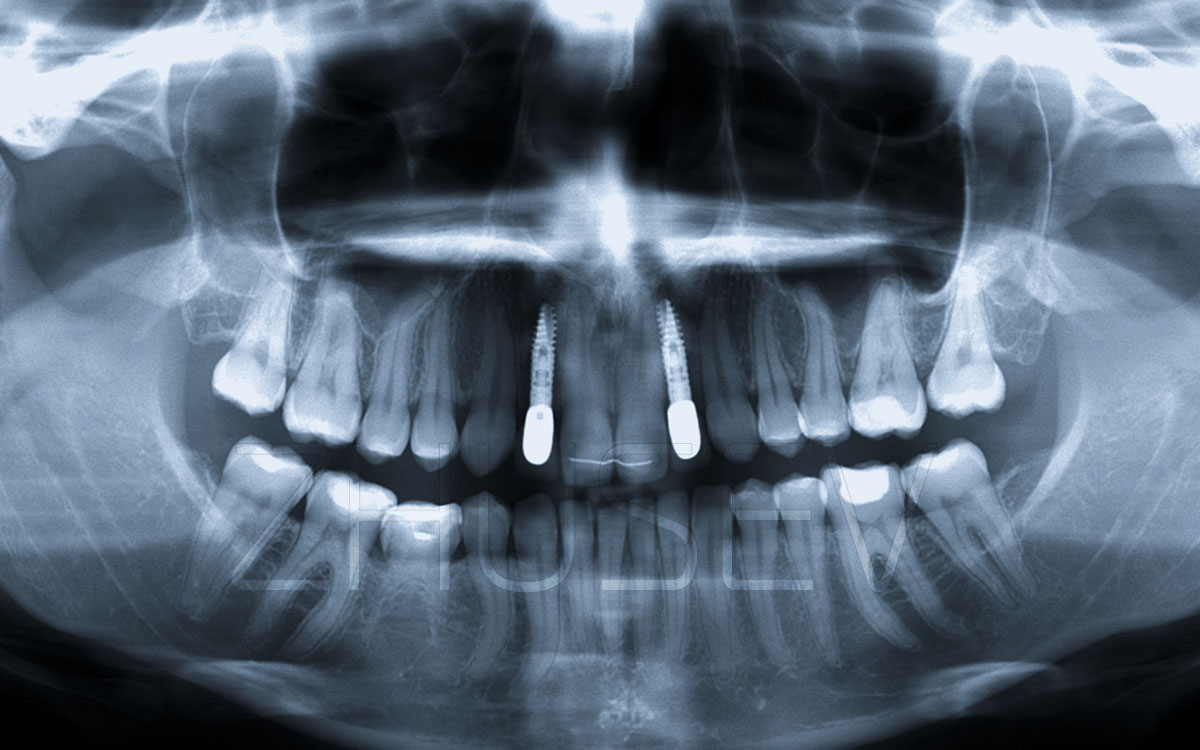
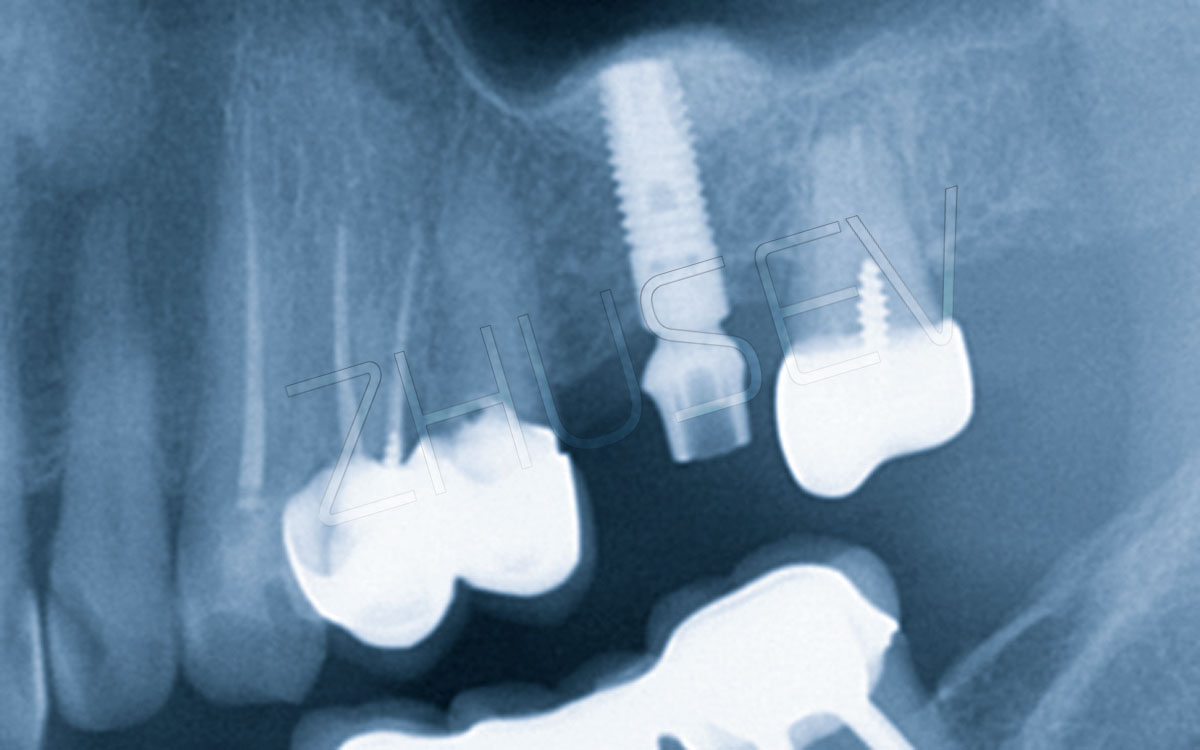
I recommend that you should make X-ray images before cementing the prosthesis. Be especially careful when fixing a multiple implant-supported prosthesis. All abutments and visible parts of implants must be thoroughly isolated from the saliva. The internal surfaces of a prosthesis must be dry and thoroughly defatted when you start applying a coat of cement. The patient’s saliva must be constantly aspirated while you are applying cement. When attaching a prosthesis, do not touch the patient’s mucosa or tongue. Preparing cement, be careful to preserve the required proportions.
During annual examinations, performing an occlusion check and grinding, if required, remember to ask your patient about their sensations. Even when detachment of a restoration is not visible, some patients may complain of light clicking. This is the first symptom of denture mobility. This is probably associated with crepitation, when a fixing screw and an implant move against each other or when cement is affected by air bubbles which leak with saliva through a gap. If examining the patient you register denture mobility, try to dismount the denture. If your attempts fail, but the patient complains of painful sensations and there is gingival bleeding, try dismounting the denture in a week or a fortnight (but not later). If next time you cannot dismount the denture even with the help of a crown extractor, you will have to saw it up and make a new one! There is a chance that the denture will eventually fall out in a few weeks. But this is seldom the case! If left unattended, the problem will inevitably result in implant fracture. Therefore, the sooner you treat the problem, the better.